Running Bitrise builds on-premise
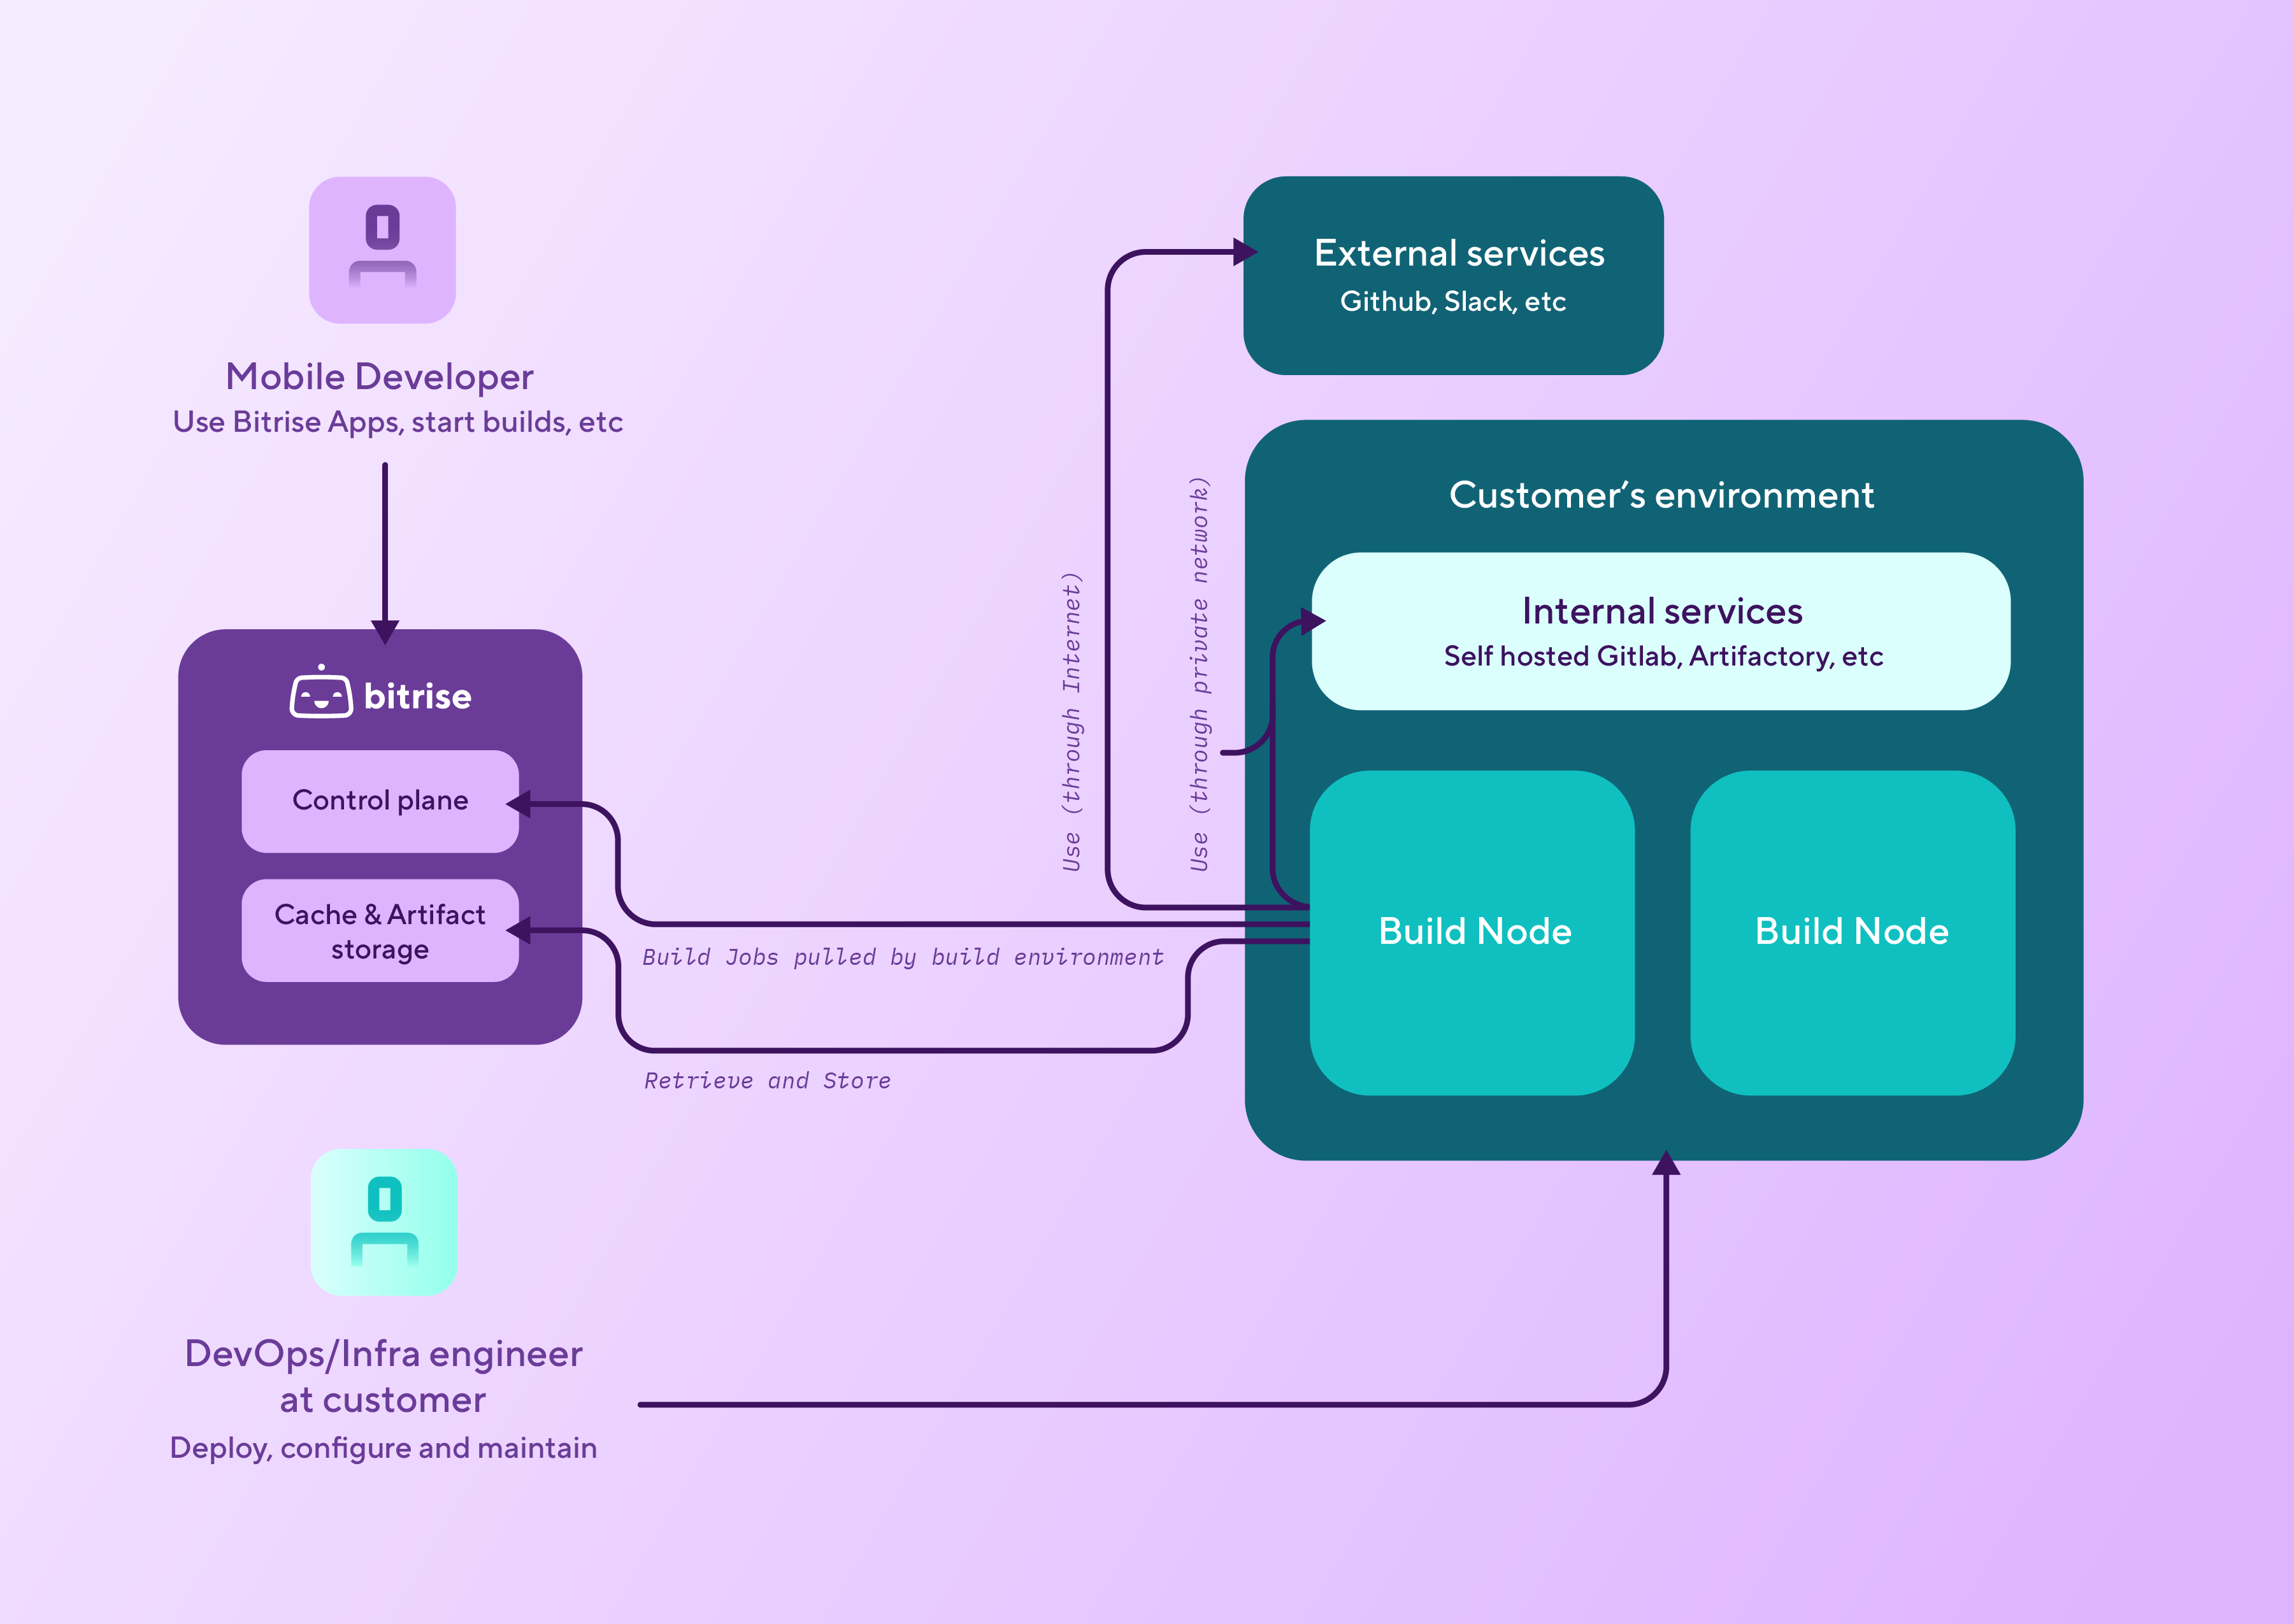
You can run Bitrise builds on self-hosted infrastructure - that is, that hardware or virtualized environments that you control - while taking advantage of every feature the Bitrise website offers. To do so, you just need to install the Bitrise agent on your own infrastructure and connect it to your Workspace. Once that is done, you can run builds from your Bitrise account, using the Bitrise UI as usual.
When to use the on-premise runnerClick to copy link
If you need to run Bitrise builds on infrastructure that you control, Bitrise offers two options: using Amazon EC2 Mac or Linux instances, or the on-premise runner option.
We only recommend using the on-premise runner if you have the necessary machines or use a cloud provider other than AWS for your infrastructure needs. The on-premise runner is NOT plug and play: you need to make sure all necessary tools and services are installed on your machines.
If you do have an AWS account for managing your infrastructure, we recommend checking our AWS offering.
Setting up Bitrise on-premiseClick to copy link
To be able to run Bitrise builds on your own infrastructure, you need to get the Bitrise runner from Homebrew and then configure your network to be able to access two Bitrise service endpoints.
Please note that when using the Bitrise runner this way, you have to make sure you have all the tools you need installed on the machine. For now, we don't provide preinstalled tools for this on-premise solution.
- macOS
- Linux
-
Configure Bitrise runner pools in your Workspace settings page on bitrise.io: Configuring runner pools.
Make sure to get the token from the process.
-
Fetch the
bitrise-den-agentformula from Homebrew.brew tap bitrise-io/den-agent -
Install the latest version.
brew install bitrise-den-agentInstalling a specific versionYou can also install a specific version by amending the version number to the command:
-
Install the Bitrise CLI. The CLI runs the builds based on YAML configurations.
brew install bitrise -
Configure your network to be able to access the following two services:
https://den.services.bitrise.iohttps://build-log.services.bitrise.io
The agent needs to be able to access both of these to run your builds and communicate with the Bitrise website.
-
Generate a service daemon template.
You need the runner pool token to finish the process.
sudo $(brew --prefix)/bin/create_bitrise_daemon.sh --bitrise-agent-intro-secret=YOUR_TOKEN --enable-agent-self-update -
Configure agent mode to clean up your build environment after a build: Cleaning up persistent build environments.
-
Configure Bitrise runner pools in your Workspace settings page on bitrise.io: Configuring runner pools.
Make sure to get the token from the process.
-
Add a GPG public key.
curl -fsSL https://bitrise-den-agent-deb.s3.amazonaws.com/DEB-GPG-KEY-bitrise.pub |sudo gpg --dearmor -o /usr/share/keyrings/DEB-GPG-KEY-bitrise.gpg -
Add the Bitrise DEN agent deb package repository.
echo 'deb [arch=amd64 signed-by=/usr/share/keyrings/DEB-GPG-KEY-bitrise.gpg] https://bitrise-den-agent-deb.s3.amazonaws.com stable main' |sudo tee /etc/apt/sources.list.d/den-agent-deb.list -
Install the runner and connect it on your machine to your Bitrise workspace.
You need the runner pool token to finish the process.
sudo apt updatesudo apt install bitrise-den-agent/opt/bitrise/releases/bitrise-den-agent-configure.sh $TOKEN --enable-agent-self-update -
Configure agent mode to clean up your build environment after a build: Cleaning up persistent build environments.