Creating a Workflow
This guide is about creating a Workflow in the Workflow Editor. For YAML configuration syntax, check out Workflow level properties.
It’s very simple to create your own Workflow with the Workflow Editor. You can create new Workflows based on any of the existing ones, or you can simply create an empty Workflow and add the Steps yourself.
The offline Workflow Editor runs on your own computer: you can edit your project's configuration YAML file without logging in to bitrise.io, and your configuration never leaves your network. It offers most features of the Workflow Editor.
If, for example, you create a Workflow based on your primary one, it means that it will be created with the exact same Steps and input values as the primary Workflow.
-
Log in to Bitrise and select Bitrise CI on the left, then select your project.
-
Click the Workflows button on the main page.
-
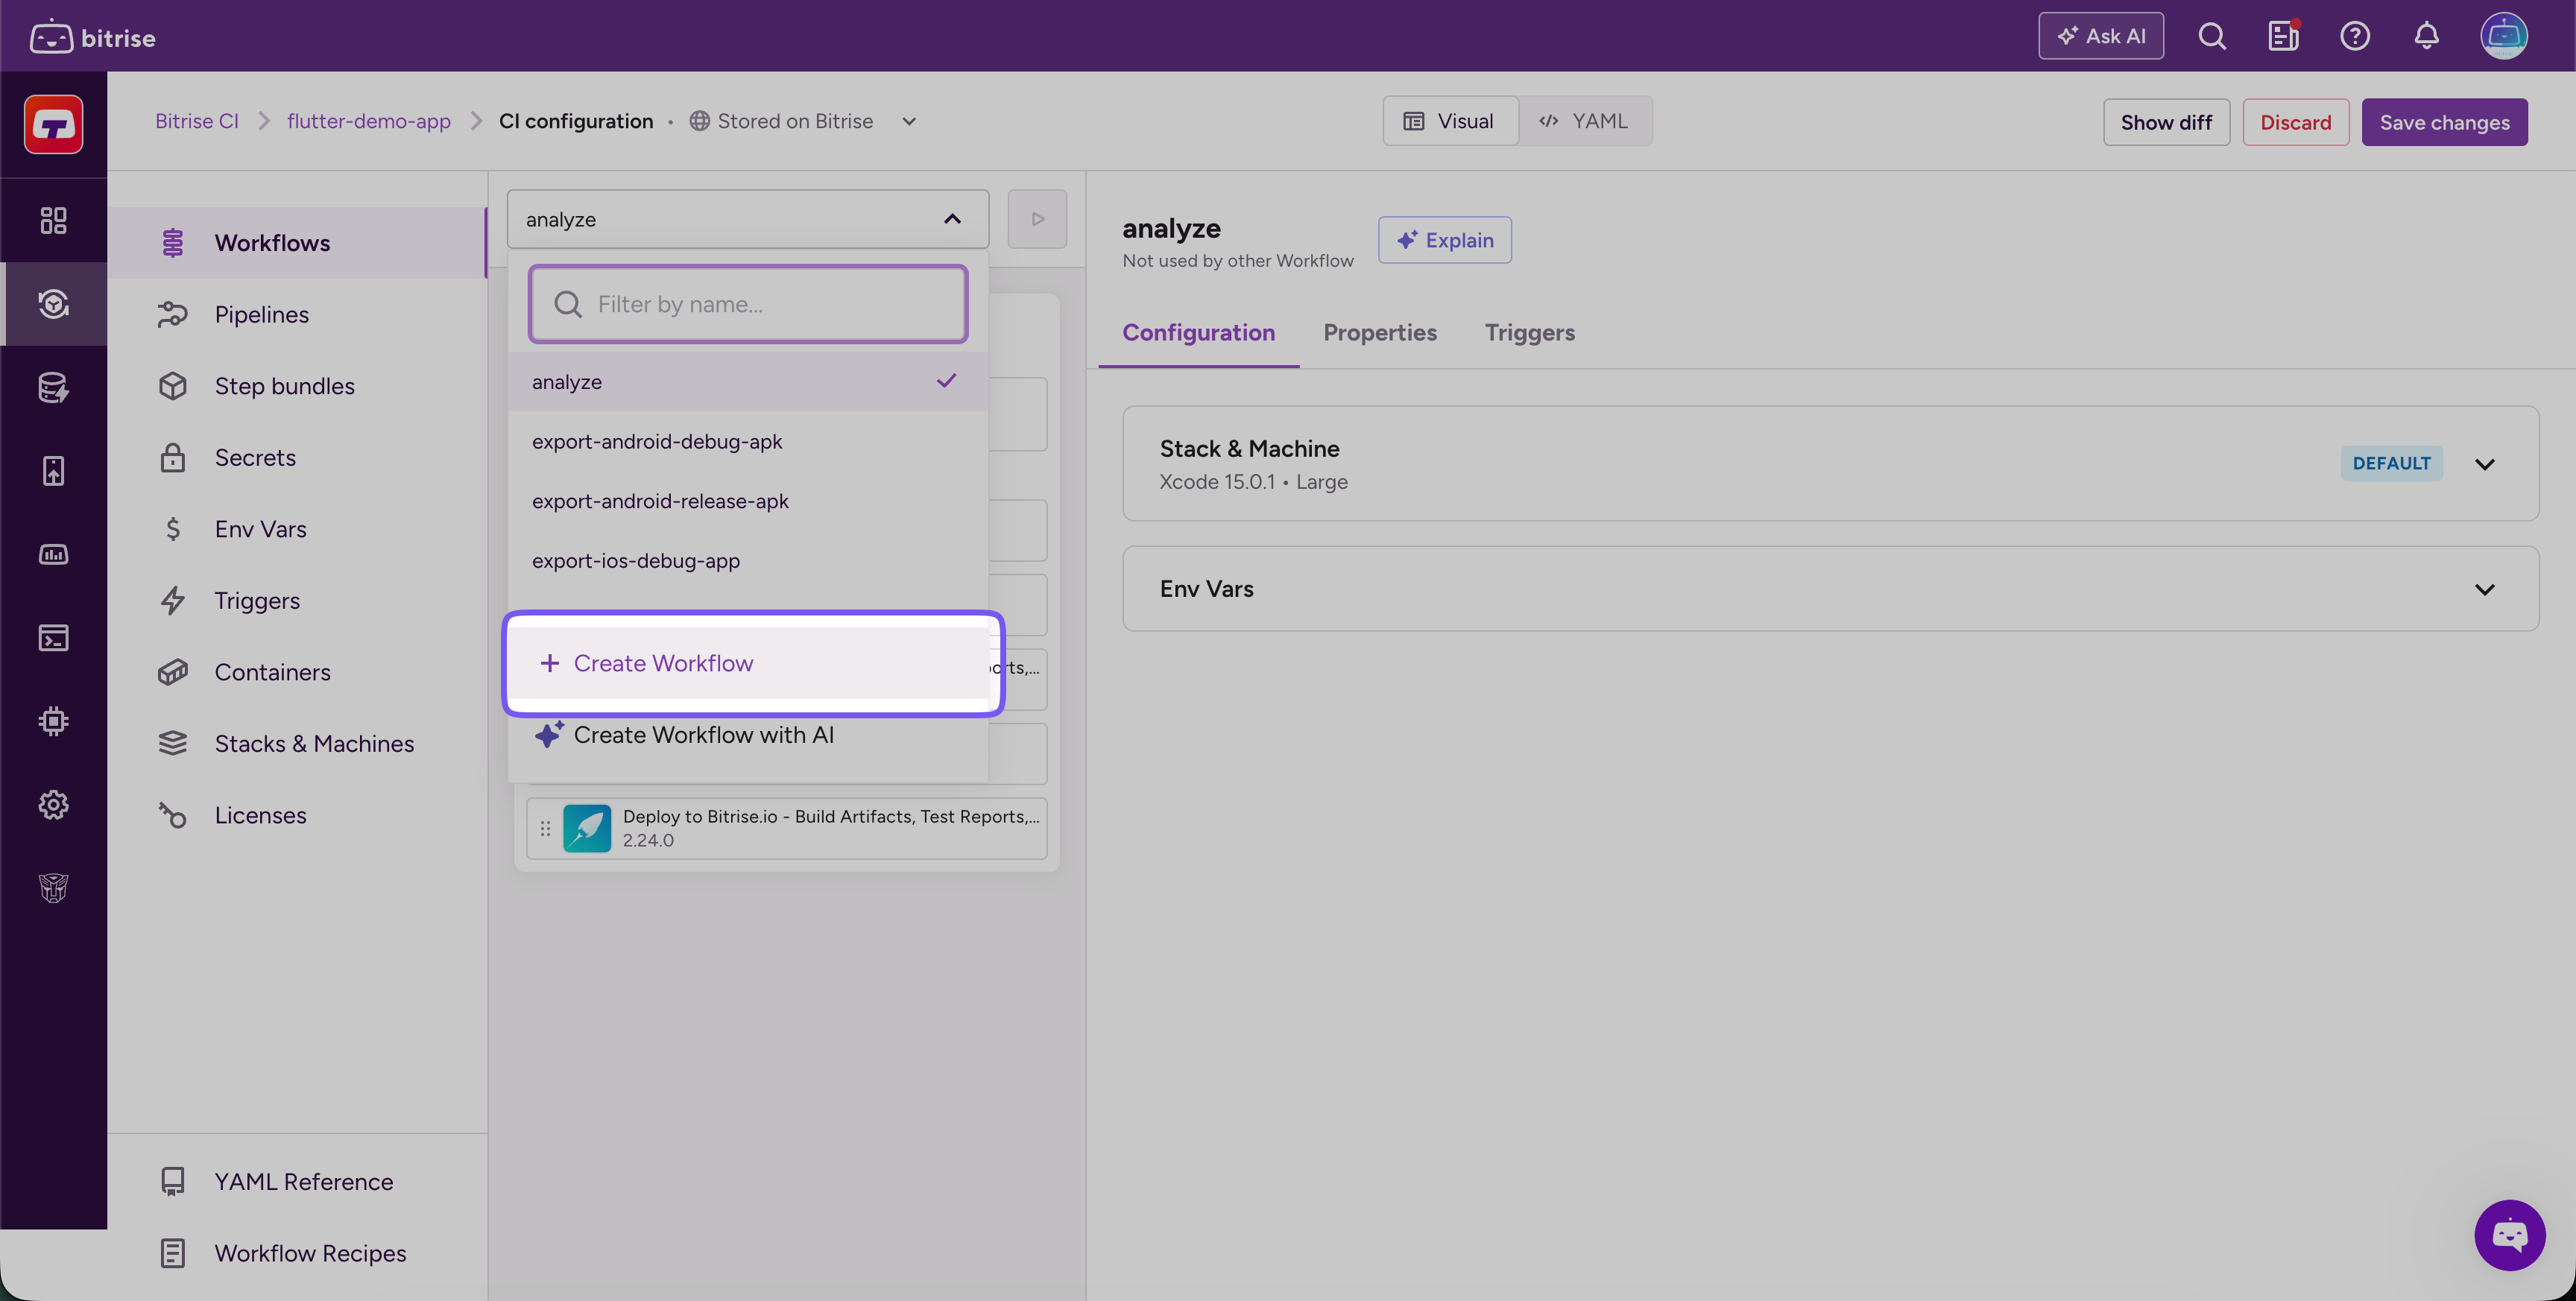
Open the Workflow selector dropdown and click Create Workflow.
-
In the dialog, give your Workflow an ID.
The ID can only contain the following characters:
A-Za-z0-9-_.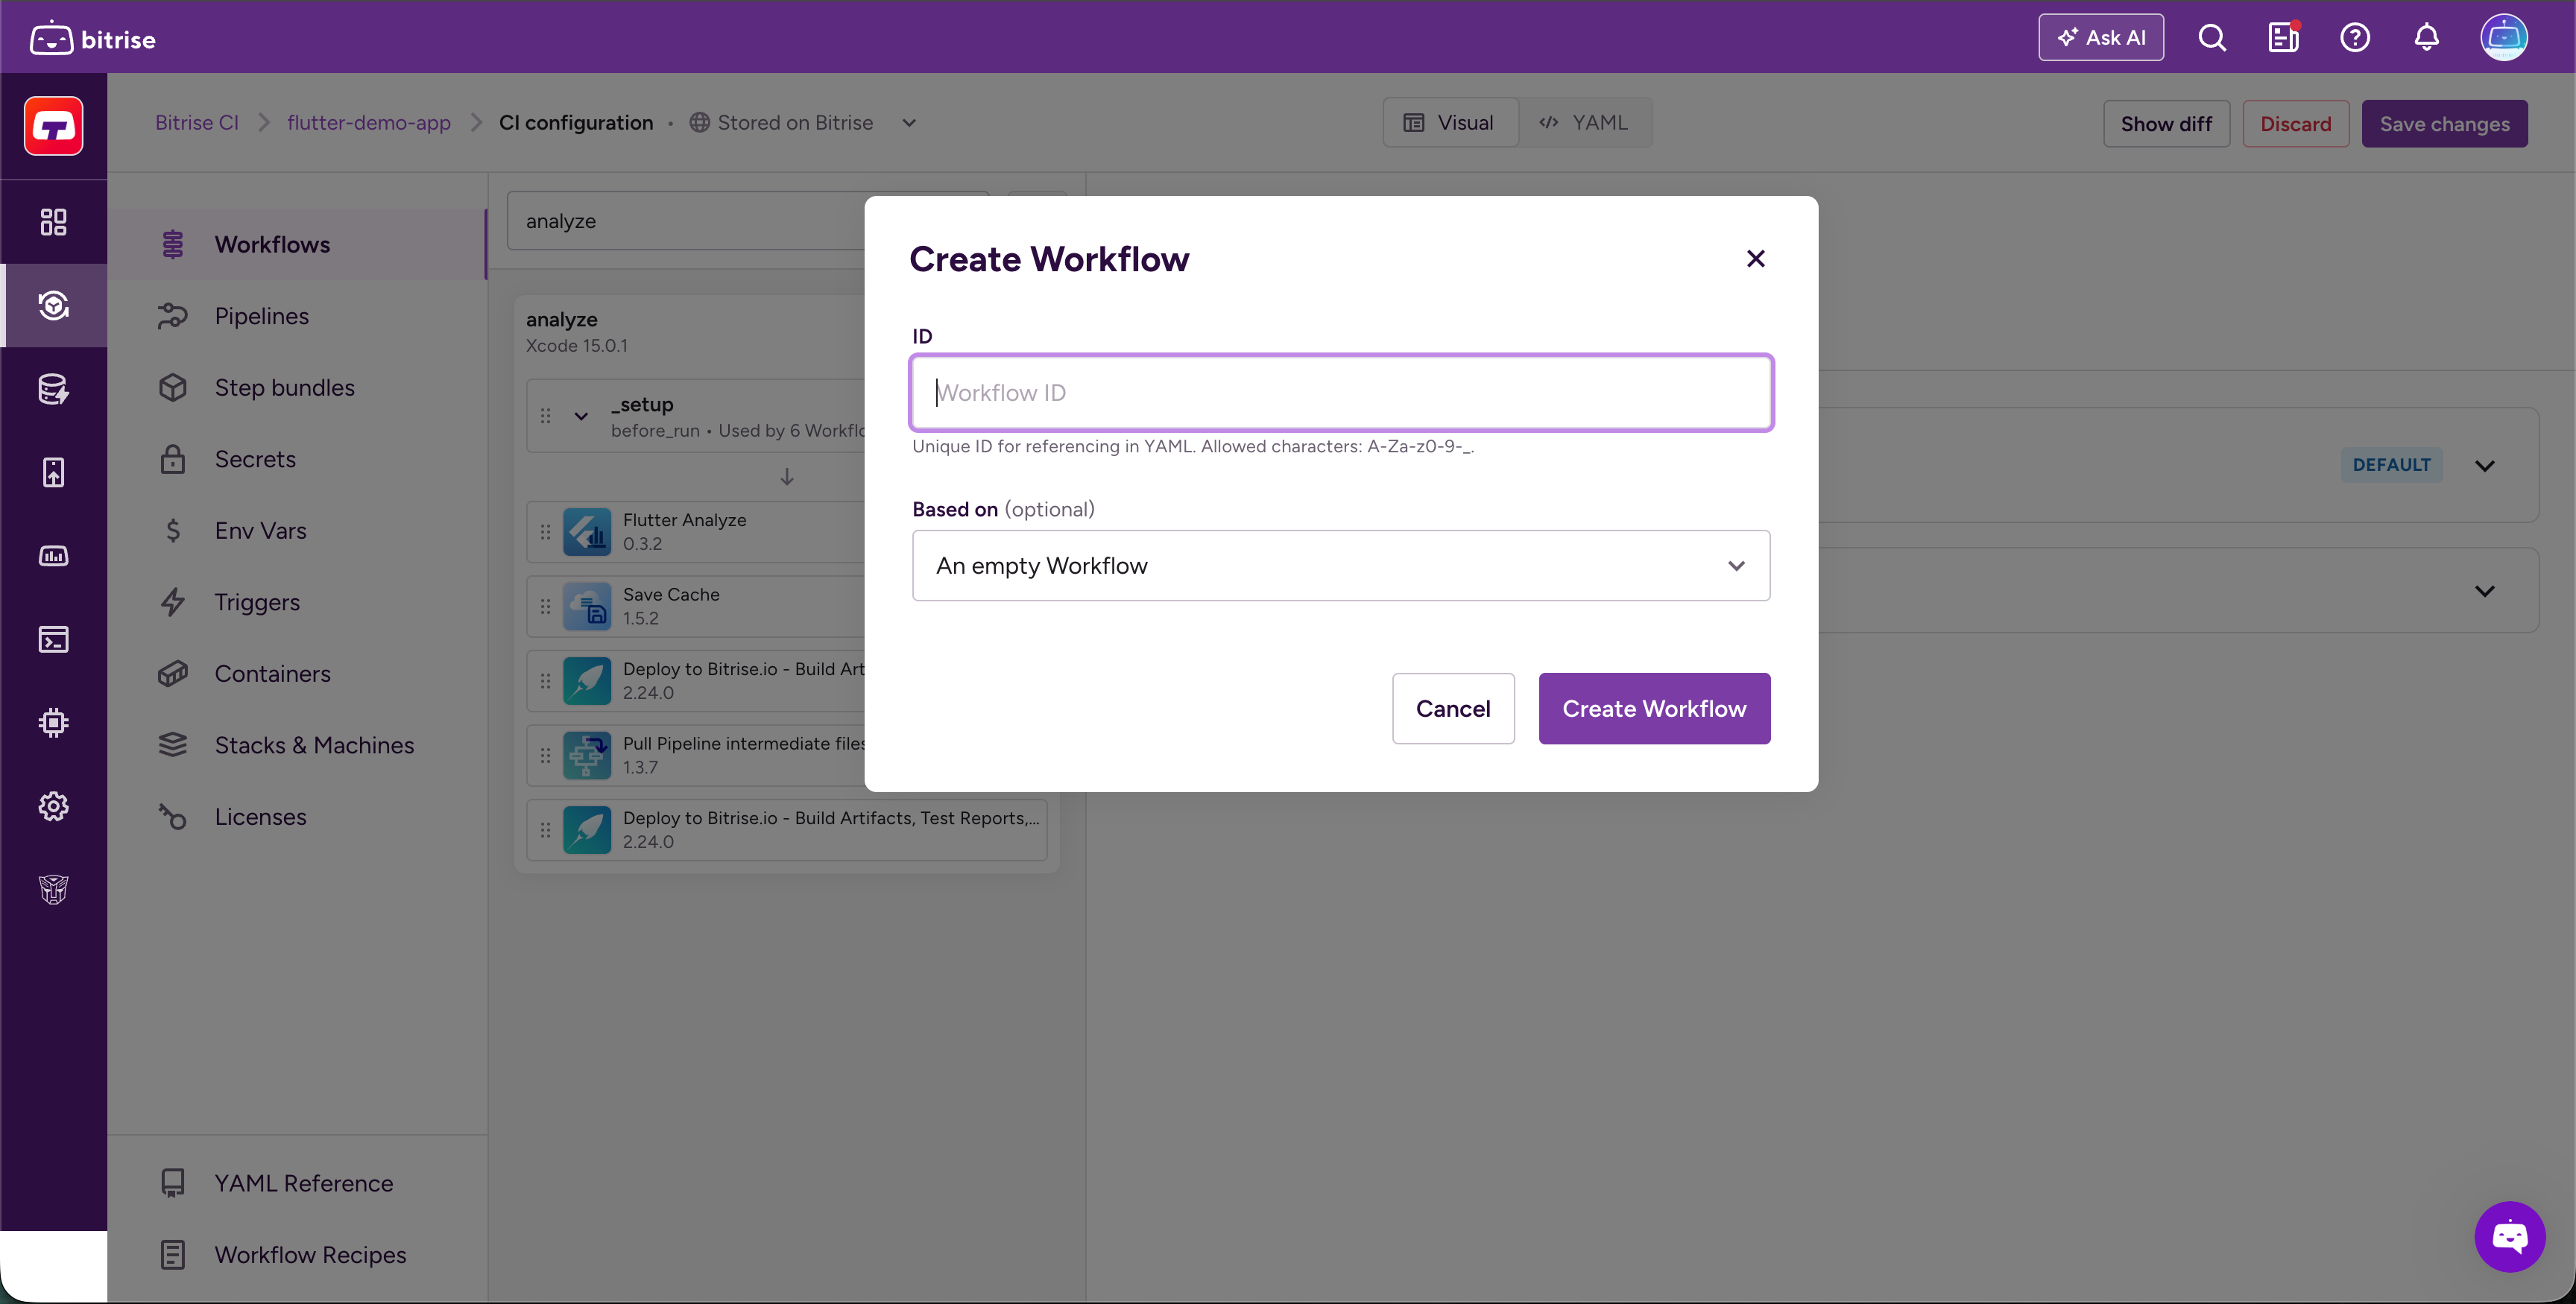
-
From the dropdown menu labeled Based on, select the Workflow you want to use as the basis for the new one.
Alternatively, choose the An empty workflow option to create an empty Workflow.
-
Add the Steps you need to your Workflow.
Click the + (Add Step or Step bundle) symbol between two Steps to insert a Step at that position. Remove Steps you do not need by clicking on the Step, opening the three-dot menu, and selecting Delete item.
-
Click Save changes in the top right corner.