Connecting self-hosted GitLab instances
For Workspaces, Bitrise supports connecting to self-hosted GitLab instances. Connecting is simple, and once it’s done, you can add projects to Bitrise from privately hosted repositories. All functions that you got used to with publicly hosted repositories will be available!
Bitrise needs to be authorized as an application for the entire GitLab instance and then the Application Id and the Secret value belonging to the Bitrise OAuth application must be added to the Workspace on bitrise.io.
Configuring the GitLab connectionClick to copy link
To access privately hosted GitLab repositories on Bitrise, you need to create a new OAuth application on your GitLab account, and assign the appropriate credentials to access your server.
When you create a new Bitrise project, you must pick the dedicated GitLab Self-hosted option in the provider picker. If you paste your repository URL into the Other field instead, Bitrise will save the project as a generic Custom-provider repository, and the following features will be silently unavailable:
- The Service Credential User UI in App Settings.
- The Store bitrise.yml in repository option.
- Build status reporting back to GitLab merge requests.
This cannot be fixed by editing the repository URL afterwards. If you have already created the project this way, contact support to have the provider type corrected.
Your self-hosted instance must have a publicly resolvable IP address, otherwise Bitrise won’t be able to connect to it.
The connection requires two URLs: a Bitrise OAuth callback URL and a GitLab instance URL:
| URL | Where it goes | Example |
|---|---|---|
| Bitrise's OAuth callback URL | In GitLab, in the OAuth application's Callback URL field | https://app.bitrise.io/users/auth/gitlab/callback |
| Your GitLab instance URL | In Bitrise, in the Workspace Integrations Self-hosted URL field | https://gitlab.example.com |
-
Allowlist the Bitrise backend workers for your GitLab instance: Configuring your network to access our build machines.
Be aware that the Bitrise backend workers that power, among other things, app.bitrise.io and the Bitrise build machines have a different IP address range. Allowlisting the build machines is not sufficient for this feature.
If allowlisting the backend workers is not an option for you, reach out to Bitrise so we can discuss other options.
-
Log in to your GitLab instance with root privileges. If you connect to Bitrise without root privileges, your Workspace’s other team members will not have access to the repository on the GitLab instance.
-
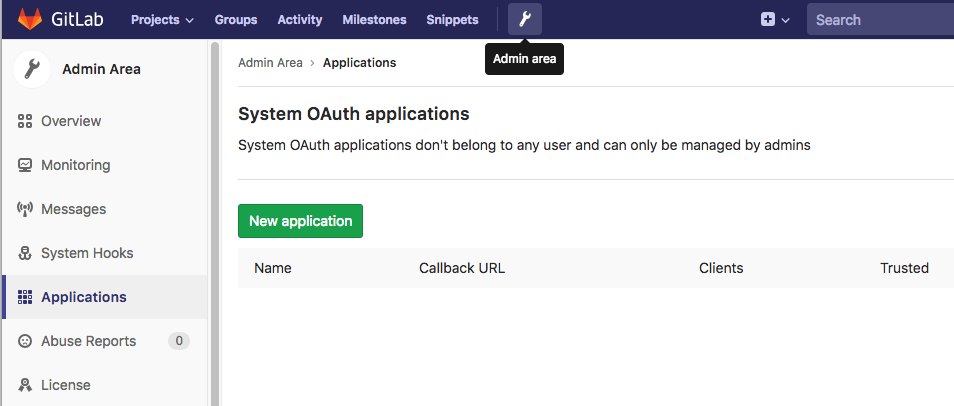
Go to the admin area by clicking the little wrench icon on the top menu bar.
-
On the left menu bar, select Applications, then click New Application.
-
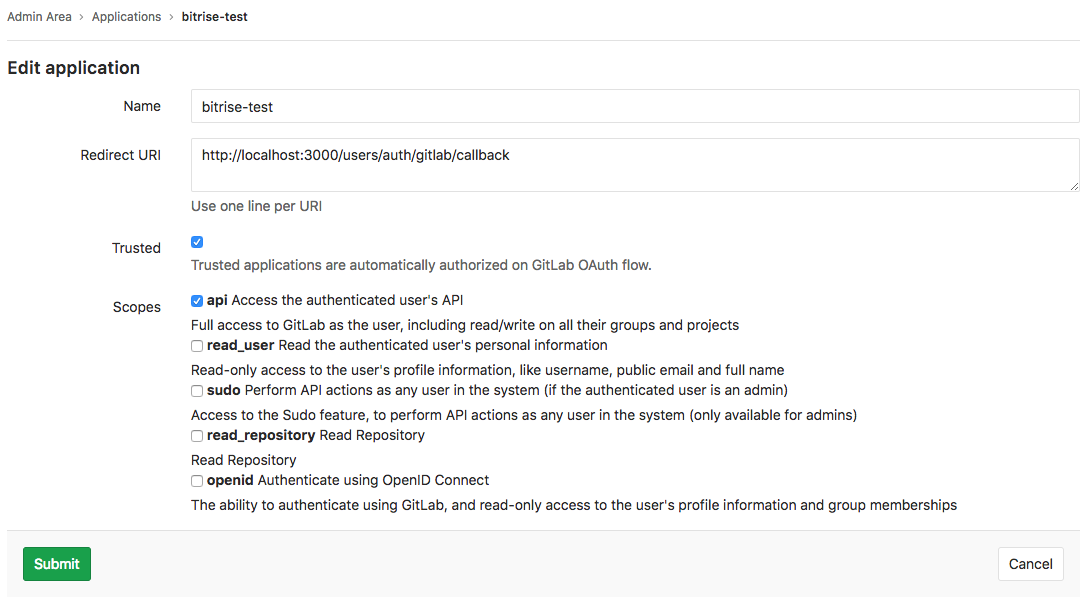
In the Name field, enter a name that clearly identifies the application. For the sake of simplicity, we recommend
Bitrise. -
In the Callback URL field, enter
https://app.bitrise.io/users/auth/gitlab/callback.This is Bitrise's URL. GitLab will redirect users here after they authenticate.
-
In the Scopes menu, check api.
-
Set the Confidential option to No.
If the newly created app is configured to be confidential, Bitrise won't be able to access it!
-
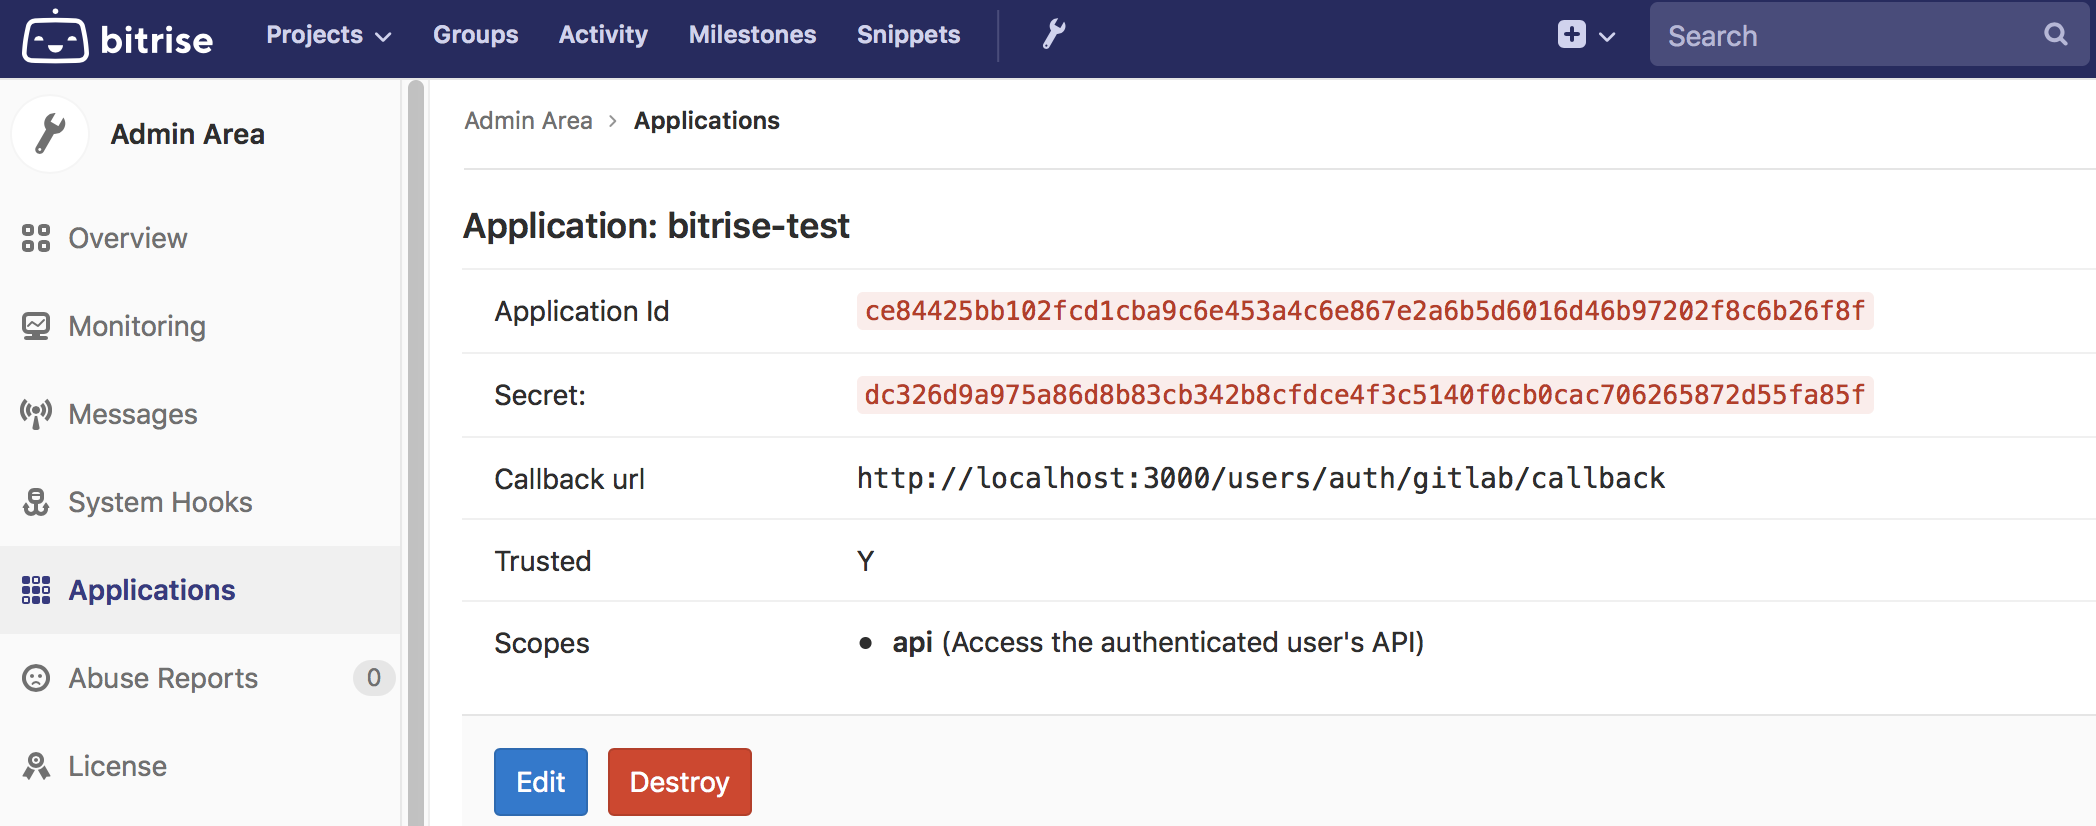
Click Submit. On the next page, you should find the Application Id and a Secret. You’ll need both to connect to your GitLab instance on bitrise.io.
-
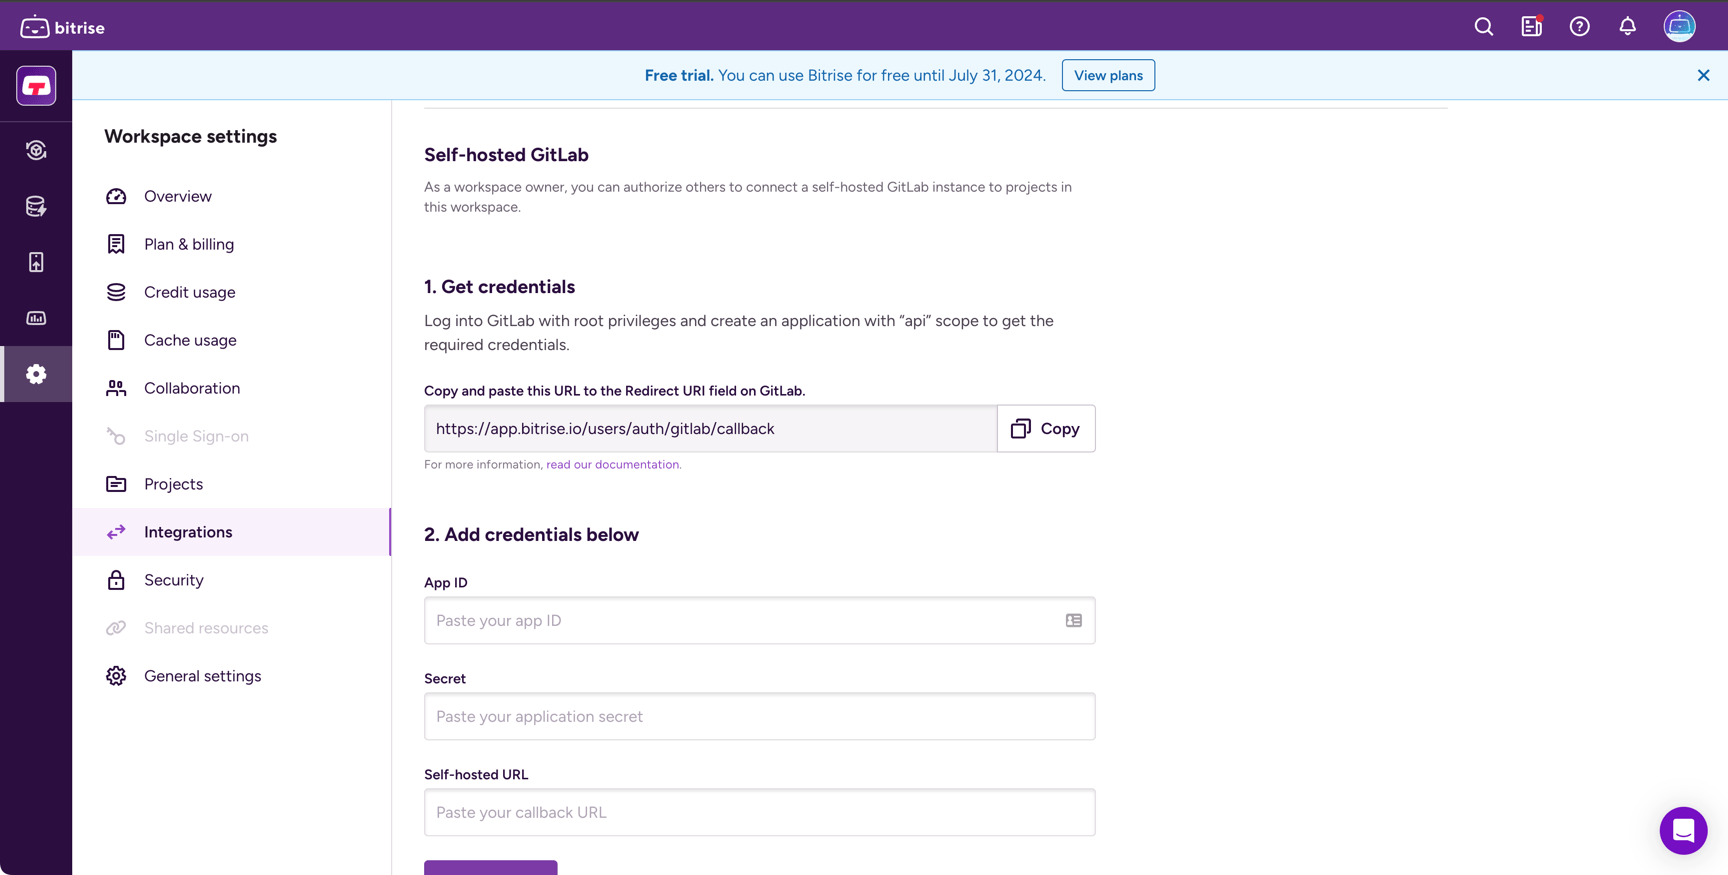
Log in to Bitrise and select your workspace.
-
On the left, select Integrations.
-
Find the Self-hosted GitLab self-managed section.
-
Click Add credentials and add your self-hosted GitLab credentials:
-
App ID
-
Secret
-
Self-hosted URL
The Self-hosted URL is your GitLab instance's URL (for example, https://gitlab.example.com). It is not the same as the Bitrise callback URL that you pasted in the GitLab instance configuration!
noteOptionally, you can add custom HTTP headers: Connecting through a proxy.
-
You are done! Now you are able to access your privately hosted repositories with Bitrise.
Service credential user roleClick to copy link
Bitrise uses a Service Credential User (SCU) on your GitLab instance to register webhooks, post commit statuses on merge requests, and read repository contents. On self-hosted GitLab, the SCU needs Maintainer role on the repository at minimum:
| GitLab operation | Required role |
|---|---|
Read bitrise.yml, list branches | Reporter |
| Register webhook | Maintainer |
| Post commit / merge request status | Maintainer |
Reporter or Developer is not sufficient. Status reporting will silently fail. See The service credential user for the full SCU configuration flow.
Connecting through a proxyClick to copy link
You can add custom HTTP headers to your self-hosted GitLab instance to be able to connect through a proxy. The header values are stored encrypted.
To add a custom HTTP header, go to the Workspace settings page and select Integrations. Find the GitLab self-managed card and you can edit your credentials there.
For example, Cloudflare Access customers can set their client ID and client secret: CF-Access-Client-Id and CF-Access-Client-Secret.
Adding a new project from a self-hosted GitLab repositoryClick to copy link
- Start the process of adding a new project.
- When prompted to select your Git provider, select the Self-hosted GitLab option.
- Click Connect.
Once connected, proceed as usual: Adding your first project.