Deploying test results
View your test results in one place after a Bitrise CI build. All tests will be available on the build page, even if you have multiple testing Steps in your Workflows. Our goal is to make sure you have accessible and actionable test results on Bitrise, leading to faster time to recover from test failures and a better overall developer experience.
Deploy your test results on the build page with minimal configuration. The requirements depend on your setup:
- Using the official Bitrise testing Steps to run tests
- Using other Steps to run tests
Once deployed, failed and flaky tests can also be posted as a comment on your pull request: Reporting build problems in PR comments.
Deploying results from the official Bitrise testing StepsClick to copy link
The supported testing Steps are the following:
- Android Unit Test: Android unit tests.
- Android Instrumented Test: Running instrumented tests for Android apps.
- Xcode Test for iOS: Running unit and UI tests for iOS apps.
- iOS Device Testing: Device testing for iOS.
- Virtual Device Testing for Android: Device testing for Android.
- Flutter Test: Testing Flutter apps.
- Maestro Test: Running Maestro tests on Bitrise.
If you use any of these Steps, make sure you have the Deploy to Bitrise.io Step in your Workflow. Bitrise will automatically deploy your test results to the build page.
If your tests generate attachments or you want Bitrise to show flaky tests, the Deploy to Bitrise.io Step must be of version 2.19.1 or newer. To link attachments to test cases by filename, it must be version 2.26.0 or newer: Naming attachments after their test case.
Deploying results from other StepsClick to copy link
If you run your tests using other Steps (for example, you can use Script Steps for a fully custom testing solution), you need some additional configuration.
-
Add the Step running your tests to your Workflow.
-
Add the Export test results to the Test Reports Step to your Workflow.
-
Configure the Step: Using the Export test results to the Test Reports Step.
-
Make sure you have the Deploy to Bitrise.io Step in your Workflow.
Attachments and flaky testsIf your tests generate attachments or you want Bitrise to show flaky tests, the Deploy to Bitrise.io Step must be of version 2.19.1 or newer. To link attachments to test cases by filename, it must be version 2.26.0 or newer: Naming attachments after their test case.
Using the Export test results to Test Reports StepClick to copy link
You can use the Export test results to Test Reports Step to make sure your test results appear on the Tests tab, even if you use Steps that don’t automatically export their results.
With the correct configuration, the Step finds the test results in your project’s repository and puts them in the export directory.
-
Log in to Bitrise and select Bitrise CI on the left, then select your project.
-
Click the Workflows button on the main page.
-
Add the Export test results to Test Reports Step to your Workflow after the Step that runs your tests.
-
In the The name of the test input, set the name of the test run.
-
In the Test result base path input, set the path where your test results can be found.
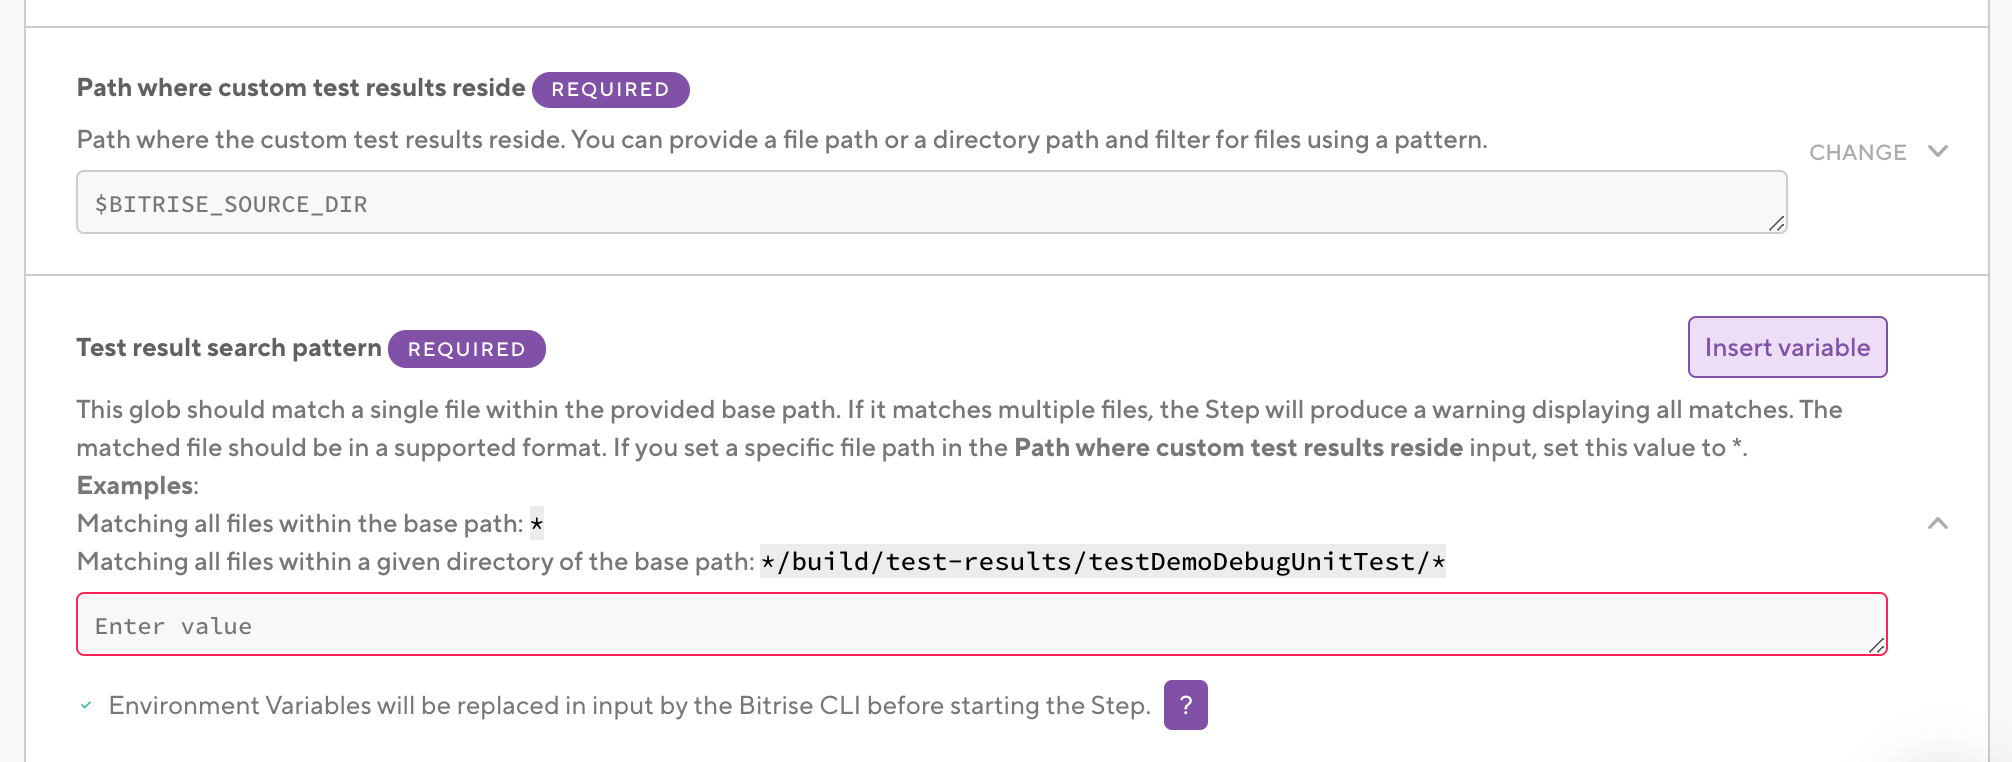
We recommend setting a folder here, though you can also set a specific filepath. The default value is the source directory of your project. Example patterns:
- If your project’s root directory is
app:app/build/test-results/testDemoDebugUnitTest/ - If your test results are within a project folder but
appis not the root directory: ./app/build/test-results/testDemoDebugUnitTest/
To export attachments named after their test case, set a folder that contains both your test results and your attachments, for example
app/build/. - If your project’s root directory is
-
In the Test result search pattern input, set a pattern that matches your test result file.
This search pattern is used to search every file and folder of the path that was set in the Path where custom test results reside input.
If there is more than one match, the Step will export the first match with a warning in the logs. If you set a specific filepath in the previous input, just set * here.
Example patterns:
- Matching all files within the base path:
* - Matching all files within a given directory of the base path:
*/build/test-results/testDemoDebugUnitTest/* - Matching a single JUnit XML when the base path is a wider folder, such as
app/build/:*/test-results/testDemoDebugUnitTest/TEST-com.example.ScreenshotTest.xml
- Matching all files within the base path:
-
In the Step’s test result directory input, make sure the path is correct.
Do NOT modify this input’s value: this is the folder where the Deploy to Bitrise.io Step will look for the test results to export them. It should be set to the
$BITRISE_TEST_RESULT_DIREnv Var. -
Make sure you have a Deploy to Bitrise.io Step in your Workflow.
If your tests generate attachments, make sure the Step is of version 2.19.x or newer.