Setting the stack for your builds
The build stack indicates the virtual machine version that we will use to run your build. You can set the stack for all your builds, or you can set Workflow-specific stacks.
You can also change build machine types for all apps owned by a single user or Workspace using the API: Changing machine types in all apps at the same time.
Setting the stack in the Workflow EditorClick to copy link
The simplest way to configure the build stack is in the Workflow Editor. You can set both the default stack and Workflow-specific stacks.
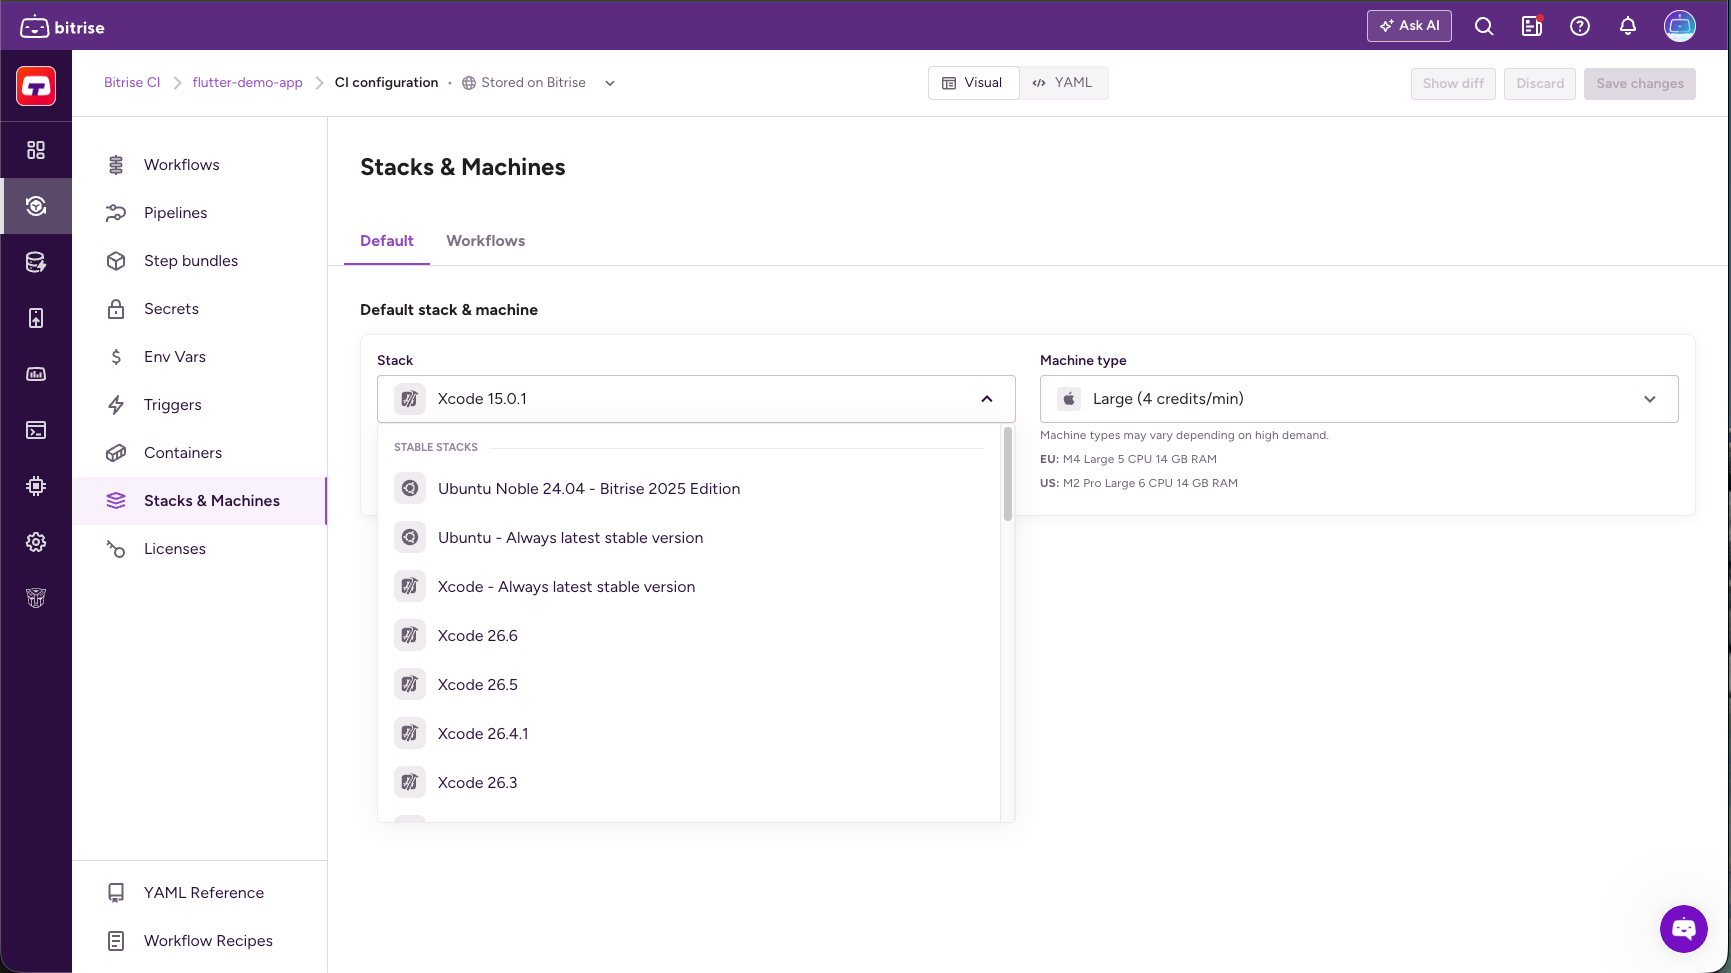
Setting the default stackClick to copy link
The default stack of your project is the stack that is used if you haven't set a specific stack for a Workflow.
Note that if you change the project type on the app's Settings tab to a type that isn't compatible with your selected default stack, we'll automatically change the stack to a compatible one.
-
Log in to Bitrise and select Bitrise CI on the left, then select your project.
-
Click the Workflows button on the main page.
-
On the left, select Stacks & Machines.
-
In the Default stack & machine section, open the dropdown menu and select the stack you need.
-
Click Save changes in the top right corner.
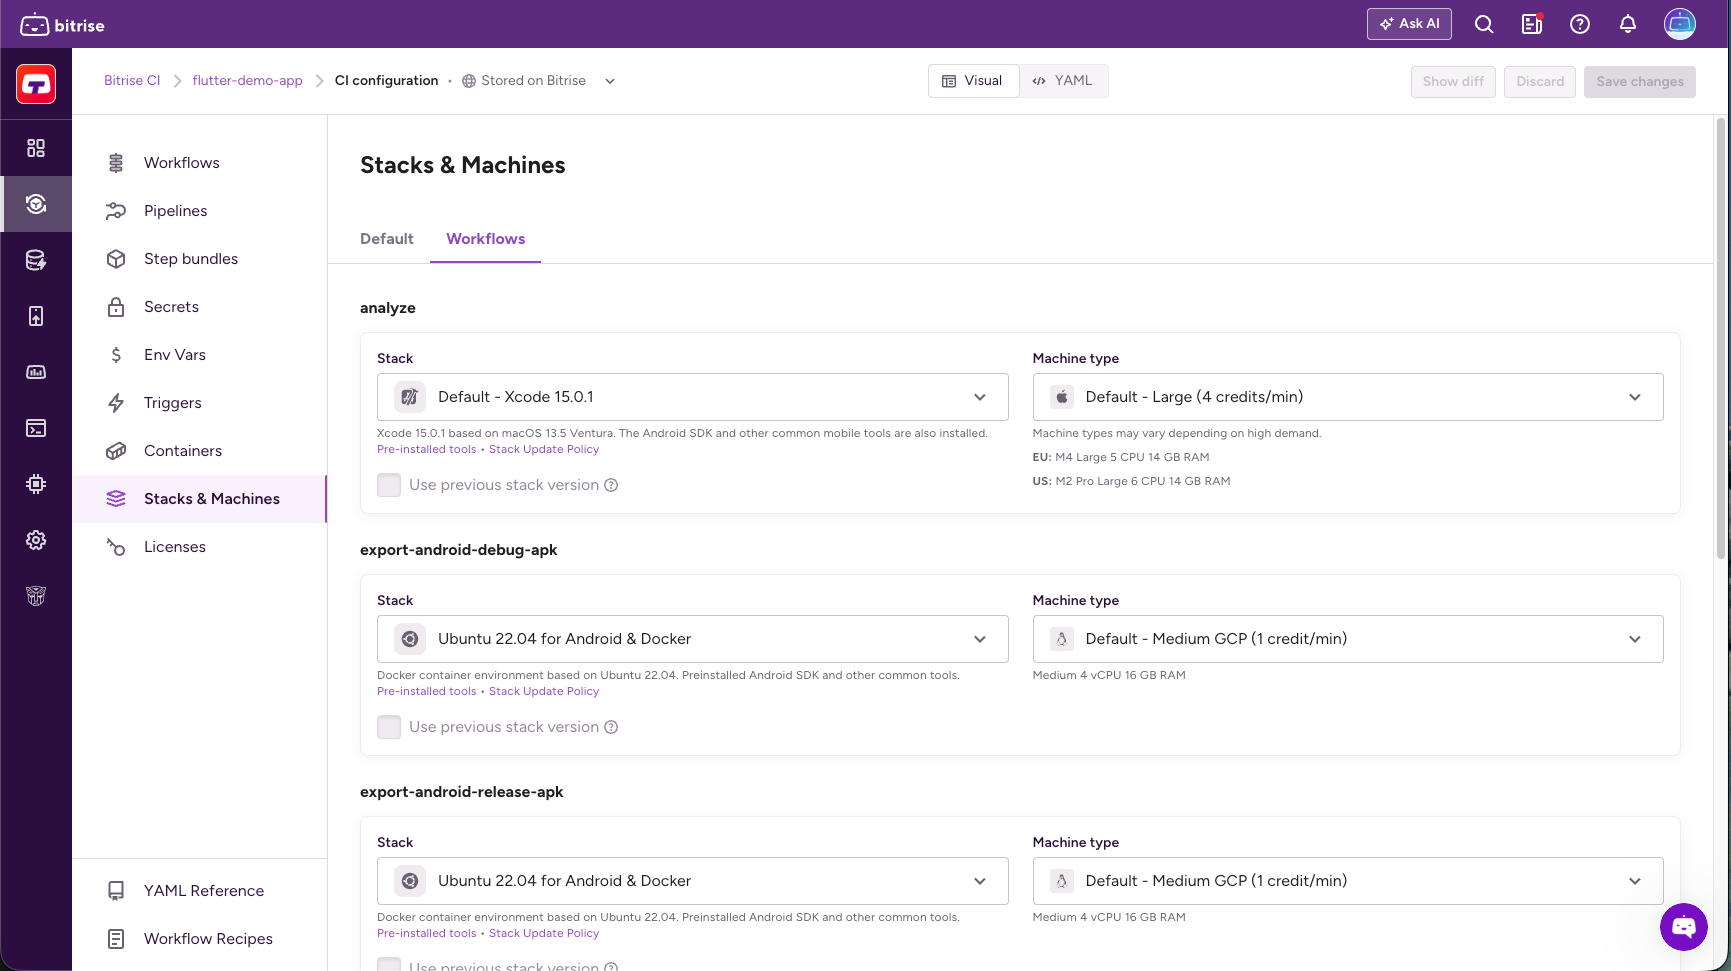
Setting a Workflow-specific stackClick to copy link
When you set a stack for a Workflow, that Workflow will always run on that stack, regardless of the default stack.
-
Log in to Bitrise and select Bitrise CI on the left, then select your project.
-
Click the Workflows button on the main page.
-
On the left, select Stacks & Machines.
-
Select the Workflows tab.
-
Find the Workflow you need and select a stack.
-
Click Save changes in the top right corner.
Setting the machine type in the Workflow EditorClick to copy link
You can define the machine type you want to use for your build in the Workflow Editor. The available machine types depend on the type of stack you use: Build machine types.
To set the machine type:
-
Log in to Bitrise and select Bitrise CI on the left, then select your project.
-
Click the Workflows button on the main page.
-
On the left, select Stacks & Machines.
-
In the Default stack & machine section, choose a machine type from the machine type selector.
-
Optionally, choose a Workflow-specific machine type for any Workflow that has a Workflow-specific stack set.
Setting the stack in the Configuration YAMLClick to copy link
You can set both the default stack and Workflow-specific tasks in your project's Configuration YAML. Use the meta field with the appropriate stack ID:
meta:
  bitrise.io:
    stack: <stack-id>
This is particularly useful if you keep your bitrise.yml file stored in your app's repository.
You can find the stack IDs on the top of each stack report: Bitrise stack reports. Alternatively, you can set a stack in the Workflow Editor and then check out the ID on the bitrise.yml tab, by finding the meta field.
The stack reports also show every pre-installed tool that is available on the stack.
Setting the default stack in the Configuration YAMLClick to copy link
The default stack of your project is the stack that is used if you haven't set a specific stack for a Workflow.
-
Open your project's Configuration YAML.
-
Add a
metaentry outside theworkflowsproperty or at the end of your Configuration YAML:meta:bitrise.io:stack:Make sure you use double indentation.
-
Add the stack ID.
You can find the stack IDs on the stack reports page: the filenames without the
.logextension are the stack IDs.meta:bitrise.io:stack: <stack-id>
Setting Workflow-specific stacks in the Configuration YAMLClick to copy link
When you set a stack for a Workflow, that Workflow will always run on that stack, regardless of the default stack.
-
Open your project's Configuration YAML.
-
Find the
workflowsproperty and find the name of the Workflow you need within. -
Add a
metaentry under the Workflow itself:workflows:deploy:meta:bitrise.io:stack: -
Add the stack ID.
You can find the stack IDs on the top of each stack report page.
workflows:deploy:meta:bitrise.io:stack: <stack-id>
Setting the machine type in the Configuration YAMLClick to copy link
You can also define the machine type you want to use for your build in your project's Configuration YAML. Machine type refers to the hardware resources used in your build; for example, an Elite machine has more CPU cores and available RAM than a Standard machine.
To set the machine type in Configuration YAML file, you need to use the machine_type_id attribute in a meta entry:
You can find the available machine type IDs here: Build machine types.
-
Open your project's Configuration YAML file.
-
Find the
workflowsproperty and find the name of the Workflow you need within. -
Add a
metaentry:# setting an 8-core Gen2 machine for an Xcode stack as the default machine type of the app:meta:bitrise.io:machine_type_id: g2.8core# setting a 12-core Gen2 machine as a Workflow-specific machine typeworkflows:deploy:meta:bitrise.io:machine_type_id: <machine-id>
Build machine typesClick to copy link
Bitrise offers multiple build machines with different specifications You can choose between them based on your needs.
You can track how much time you spent building your apps on each machine type with Insights: Bitrise CI metrics.
Not all machines are available on all subscription plans. Visit the pricing page to find out which machines are available on your plan!
Machine types are divided into resource classes. The same resource class offers multiple machine types with broadly similar performances. Bitrise automatically assigns machine types from a resource class, which means that on the same day, your builds might run on different machine types.
Use the machine type ID to set the machine type in your configuration YAML.
| OS and resource class | Hardware type | Specs | Machine type ID |
|---|---|---|---|
| macOS Medium | M2 Pro Medium | • 4 CPU @3.49GHz • 6 GB RAM | g2.mac.medium |
| macOS Medium | M4 Medium | • 5 CPU @4.4 GHz • 6 GB RAM | g2.mac.medium |
| macOS Large | M2 Pro Large | • 6 CPU @3.49GHz • 14 GB RAM | g2.mac.large |
| macOS Large | M4 Large | • 5 CPU @4.4 GHz • 14 GB RAM | g2.mac.large |
| macOS X Large | M2 Pro X Large | • 12 CPU @3.49GHz • 28 GB RAM | g2.mac.x-large |
| macOS X Large | M4 X Large | • 10 CPU @4.4 GHz • 28 GB RAM | g2.mac.x-large |
| macOS 4Large | M4 Pro Large | • 7 CPU @4.52GHz • 27 GB RAM | g2.mac.4large |
| macOS 4X Large | M4 Pro X Large | • 14 CPU @4.52GHz • 54 GB RAM | g2.mac.4x-large |
| Linux Medium | • 4 vCPU @3.1 GHz • 16 GB RAM | standard | |
| Linux Large | • 8 vCPU @3.1 GHz • 32 GB RAM | elite | |
| Linux X Large | • 16 vCPU @3.1 GHz • 64 GB RAM | elite-xl | |
| Linux M | AMD EPYC Zen 4/5 | • 4 vCPU @3.7 GHz • 16 GB RAM | g2.linux.medium |
| Linux 2M | AMD EPYC Zen 4/5 | • 6 vCPU @3.7 GHz • 24 GB RAM | g2.linux.2medium |
| Linux L | AMD EPYC Zen 4/5 | • 8 vCPU @3.7 GHz • 32 GB RAM | g2.linux.large |
| Linux 4L | AMD EPYC Zen 4/5 | • 14 vCPU @3.7 GHz • 56 GB RAM | g2.linux.4large |
| Linux XL | AMD EPYC Zen 4/5 | • 16 vCPU @3.7 GHz • 64 GB RAM | g2.linux.x-large |
| Linux 3XL | AMD EPYC Zen 4/5 | • 24 vCPU @3.7 GHz • 96 GB RAM | g2.linux.3x-large |
| Linux 5XL | AMD EPYC Zen 4/5 | • 32 vCPU @3.7 GHz • 128 GB RAM | g2.linux.5x-large |
| Linux 7XL | AMD EPYC Zen 4/5 | • 48 vCPU @3.7 GHz • 192 GB RAM | g2.linux.7x-large |
Some macOS resource classes list two hardware types with the same machine type ID. Both generations use the same ID — Bitrise automatically selects the available hardware for each build.