Getting started with MacOS projects
In this guide, we’ll walk you through how to add a macOS project to Bitrise, how to run Xcode tests, manage your code signing files and deploy the finished app to bitrise.io and to the App Store.
Adding a macOS project to BitriseClick to copy link
Add your project the same way as any other: see Adding a new project for the full walkthrough of the wizard. This section covers what's specific to macOS.
How the scanner detects a macOS projectClick to copy link
The project scanner looks for .xcodeproj files and .xcworkspace directories, the same way it does for iOS. To tell the two apart, it checks each build configuration's SDKROOT: a macosx value (or a SUPPORTED_PLATFORMS list that includes it) registers the project as macOS, while iphoneos registers it as iOS.
As with iOS, a Package.swift file without an Xcode project or workspace is treated as a Swift package, and matched to macOS if its declared platforms include macos.
What you can configureClick to copy link
During the CI configuration stage, the wizard shows:
- Project or workspace path: the
.xcodeproj,.xcworkspace, orPackage.swiftfile to build. - Scheme name: any shared scheme found in your project or workspace.
- Export method: how Bitrise exports your app, for example App Store, Developer ID, Development, or none, which exports a copy of the
.appfile without re-signing it. This option isn't shown for Swift packages.
Testing your macOS appClick to copy link
If you have test targets defined, a default Workflow of a macOS project includes the two Steps you need to run your Xcode tests, and view their results on bitrise.io:
- Xcode Test for Mac
- Deploy to Bitrise.io
Running Xcode tests and deploying their results to Bitrise do not require any code signing files. So don’t worry about them just yet!
The Xcode Test for Mac Step runs the pre-defined Xcode tests. It has a default configuration that does not need to be modified: if the tests are written correctly, they will work. You can find the same configuration options in Xcode, too.
The Deploy to Bitrise.io will deploy the following:
- your Xcode test results.
- your raw
xcodebuildoutputlog.
You can view the results in one place: Deploying and viewing test results.
Code signing and exporting a macOS appClick to copy link
To install and test the app on other physical devices, you will need to create and export an .app or .pkg file. This requires setting up code signing. In the example, we’ll be exporting an app with the development export method: you cannot upload such an app to Testflight but you can test it, for example, on the devices of your internal testers.
The example procedure described here uses manual provisioning, with the Certificate and profile installer Step. However, Bitrise also supports automatic provisioning but it is not in the scope of this guide.
You will need:
- the automatically created
deployworkflow. - a Development certificate (a .p12 certificate file).
- a Development type Provisioning Profile. For a macOS project, the file extension of the provisioning profile is
.provisionprofile.
-
Set the code signing type of your project in Xcode to either manual or automatic (Xcode managed), and generate the package file locally.
-
Collect and upload the code signing files.
The tool can also upload your code signing files to Bitrise - we recommend doing so! Otherwise, upload them manually: enter the Workflow Editor and select the Code signing tab, then upload the files in their respective fields.
-
Go to your app’s Workflow Editor, and select the deploy workflow in the WORKFLOW dropdown menu in the top left corner.
-
Check that you have the Certificate and profile installer Step in your Workflow. It must be before the Xcode Archive for Mac Step (you can have other Steps between the two, like Xcode Test for Mac).
-
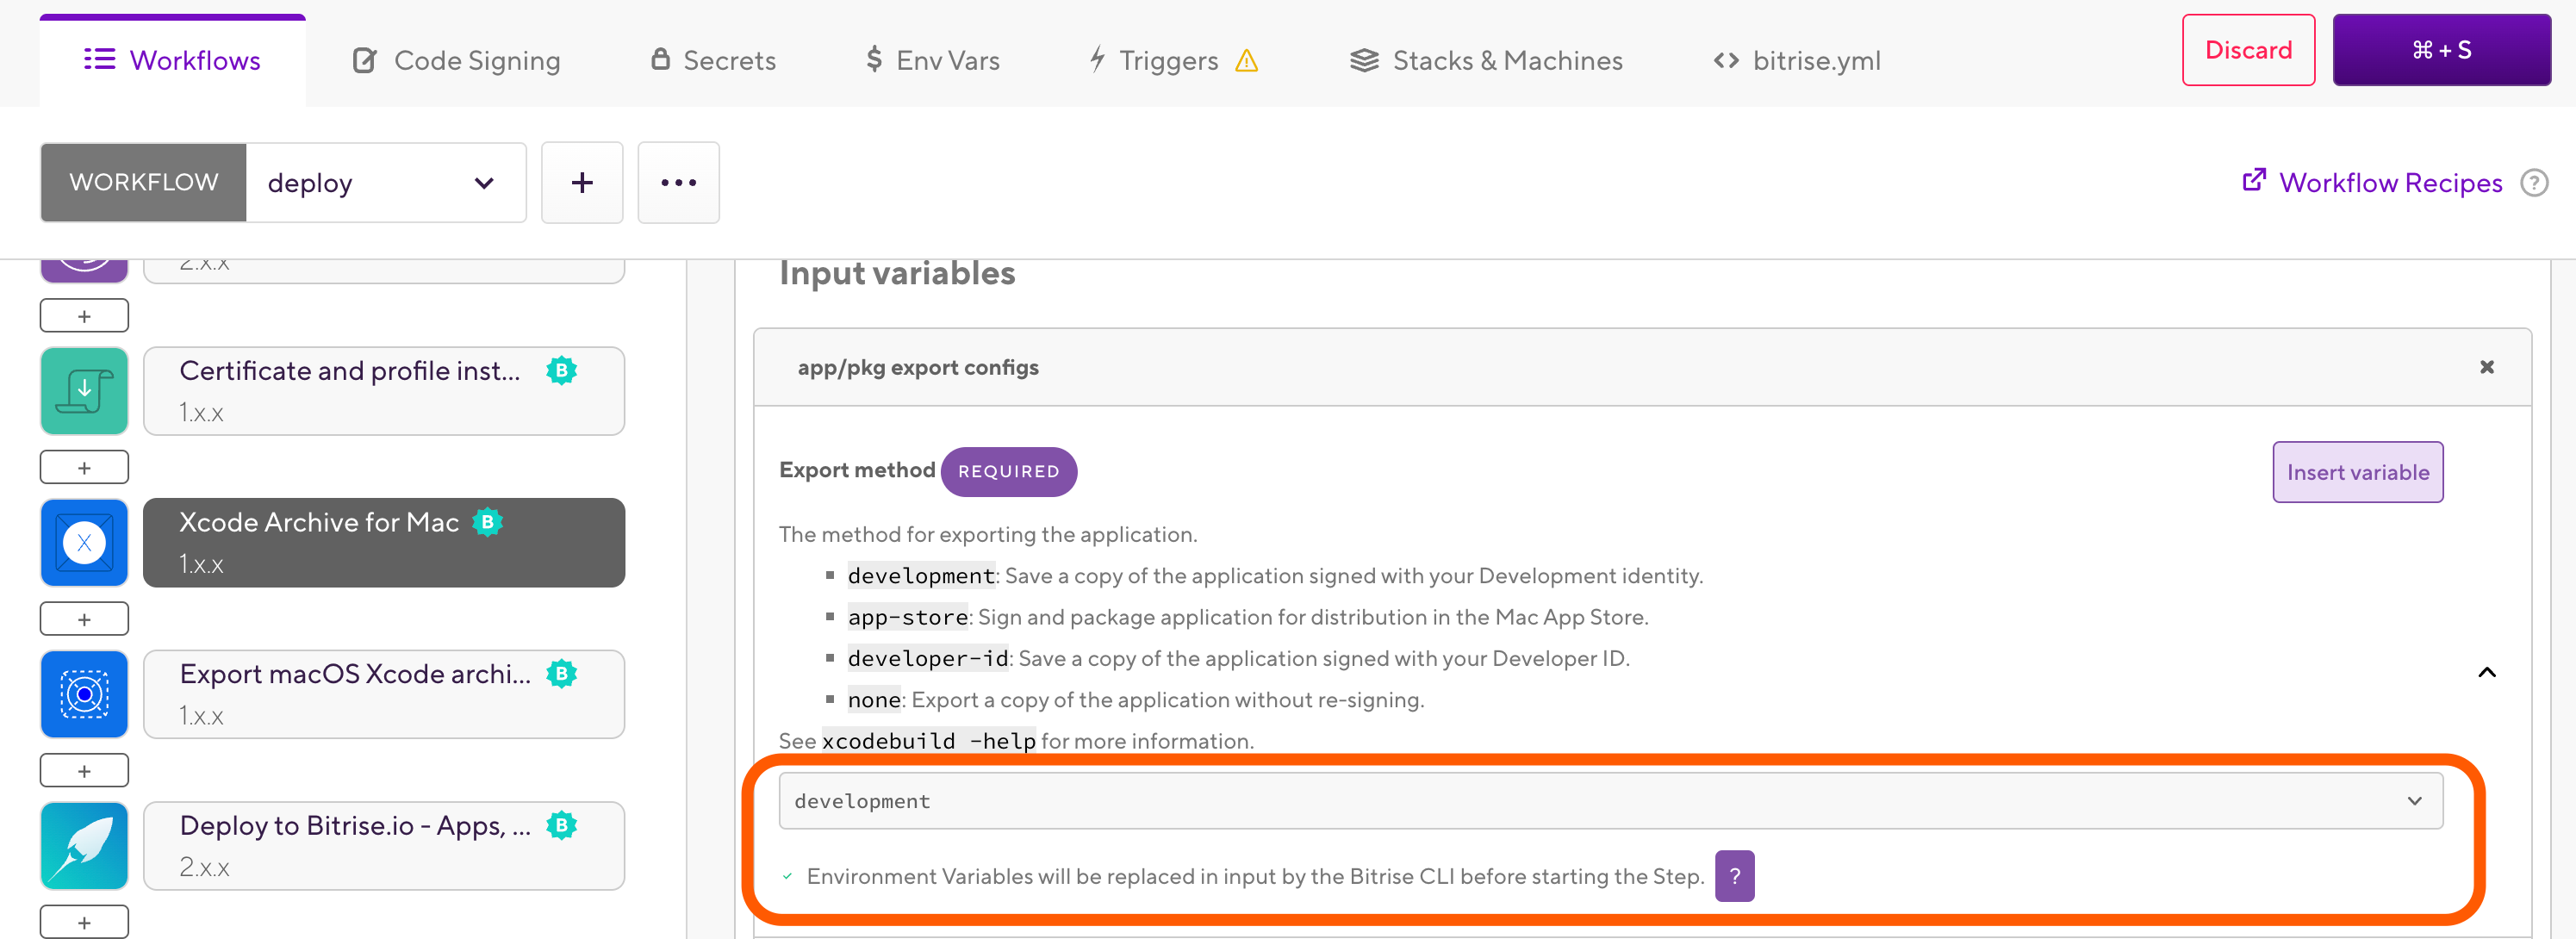
Check the Export method input under the app/pkg export configs input group of the Xcode Archive for Mac Step.
If you selected development when you added the app to Bitrise, you don’t need to change the input. Otherwise, manually set it to development.
The available options are:
- development: Signs the app with your Development identity for internal testing.
- app-store: Signs and packages the app for distribution in the Mac App Store.
- developer-id: Signs the app with your Developer ID for distribution outside the App Store.
- none: Exports the app without re-signing.
-
Start a build.
If you uploaded the correct code signing files, the Certificate and profile installer Step should install your code signing files and the Xcode Archive for Mac Step should export an .app or .pkg file with the development export method. If you have the Deploy to Bitrise.io Step in your workflow, you can find the binary package file on the Artifacts tab of the build page.
Deploying the app to the App Store ConnectClick to copy link
If you set up your code signing files and created an .app or .pkg file for your internal testers, it is time to involve external testers and then to publish your macOS app to the App Store. Let’s see how!
If you want to distribute your app outside the App Store, you can sign it with a Developer ID. This method is not in the scope of this guide but on Bitrise, it works the same way: you just need to upload the appropriate code signing files.
To deploy to the App Store, you will need these code signing files:
- a Mac App Distribution certificate.
- a Mac Installer Distribution certificate.
-
On your local machine, set up App Store code signing for your project in Xcode, and export an .app or .pkg file. If this fails locally, it will definitely fail on Bitrise, too!
-
Collect and upload the code signing files.
-
Go to the app’s Workflow Editor and create a new Workflow: click the + button next to the Workflow dropdown menu, enter the name of your new Workflow and in the BASED ON dropdown menu, select deploy. This way the new Workflow will be a copy of the basic deploy Workflow.
-
Click on the the app/pkg export methods , and set the Export Method input of the Xcode Archive for Mac Step to app-store.
You can export multiple binaries with different export methods: use the Export macOS Xcode archive Step in your Workflow, to do so.
-
Add the Deploy to App Store Connect - Application Loader (formerly iTunes Connect) Step to your workflow, after the Xcode Archive for Mac Step but preferably before the Deploy to Bitrise.io Step.
-
Provide your Apple credentials in the Deploy to App Store Connect - Application Loader (formerly iTunes Connect) Step.
The Step will need your:
- Apple ID.
- password or, if you use two-factor authentication on iTunes Connect, your application password.
Don’t worry, the password will not be visible in the logs or exposed - that’s why it is marked SENSITIVE.
And that’s it! Start a build - if everything went well, you should see your app on Testflight. From there, you can distribute it to external testers or release it to the App Store.