Getting started with React Native projects
If you use Expo in a React Native project, we have a dedicated guide: Getting started with Expo projects.
You can easily set up and configure your React Native project on Bitrise. A React Native repo can consist of an Android and an iOS project so configurations should be done as you would normally do with Android and iOS apps. When running a React Native project on Bitrise, you will see that first an Android, then an iOS build gets built.
Make sure you have signed up to bitrise.io and can access your Bitrise account. There are multiple ways of registering an account:
Adding a React Native project to BitriseClick to copy link
Add your project the same way as any other: see Adding a new project for the full walkthrough of the wizard. This section covers what's specific to React Native.
How the scanner detects a React Native projectClick to copy link
The project scanner looks for a package.json file that lists react-native as a dependency, skipping anything under node_modules. It then checks for an ios/ and an android/ directory next to it, and only registers the project as React Native if at least one of them exists.
The scanner also checks whether your project uses Expo: if package.json lists expo as a dependency and there's an app.json, app.config.js, or app.config.ts file alongside it, Bitrise treats the project as Expo-based instead, and skips the native ios//android/ check. See Getting started with Expo projects for that flow.
What you can configureClick to copy link
During the CI configuration stage, the wizard shows:
- React Native project directory: the directory containing your
package.jsonfile. - For the Android part of your project: Project root directory, Module (defaults to
app), and Variant (defaults toDebug). - For the iOS part of your project: Project or workspace path, Scheme name, and Distribution method.
Installing JavaScript dependenciesClick to copy link
If the Bitrise project scanner has successfully scanned your project, Run npm command or Run yarn command Steps will be included in your default Workflows. These Steps can install the missing JavaScript dependencies for your app.
For native Android dependencies, you can use the Install missing Android SDK components Step.
For native iOS dependencies, you can use, among others, the Brew install Step or the Run CocoaPods install Step.
To install JavaScript dependencies with npm:
In this guide, we're using npm to install JavaScript dependencies. However, you can use the Run yarn command Step: it can install missing JS dependencies without any additional configuration required.
-
Log in to Bitrise and select Bitrise CI on the left, then select your project.
-
Click the Workflows button on the main page.
-
Make sure your Workflow includes the Run npm command Step.
-
In The 'npm' command with arguments to run input variable, type
install. Using the
npm cicommand instead ofnpm installIf you already have an up to date
package-lock.jsonfile in your project, we recommend using thecicommand in The 'npm' command with arguments to run input. Usingnpm cican not only result in much faster build times compared tonpm installbut more reliable builds as well.
Code signing for React Native projectsClick to copy link
A React Native project can consist of an Android and an iOS project. Both have different signing procedures. Follow our platform-specific instructions to code sign your mobile app for both iOS and Android.
Signing your Android projectClick to copy link
All Android apps must be digitally signed with a certificate before they can be installed on Android devices. On Bitrise, you can use our dedicated Step for this purpose but first you'll need a keystore file.
-
Open your project on Bitrise with a user that has the Admin role on the project, or a custom role with the Edit workflows permission.
-
On the main page of the project, click on the Project settings button.
-
On the left, select Code signing from the menu.
-
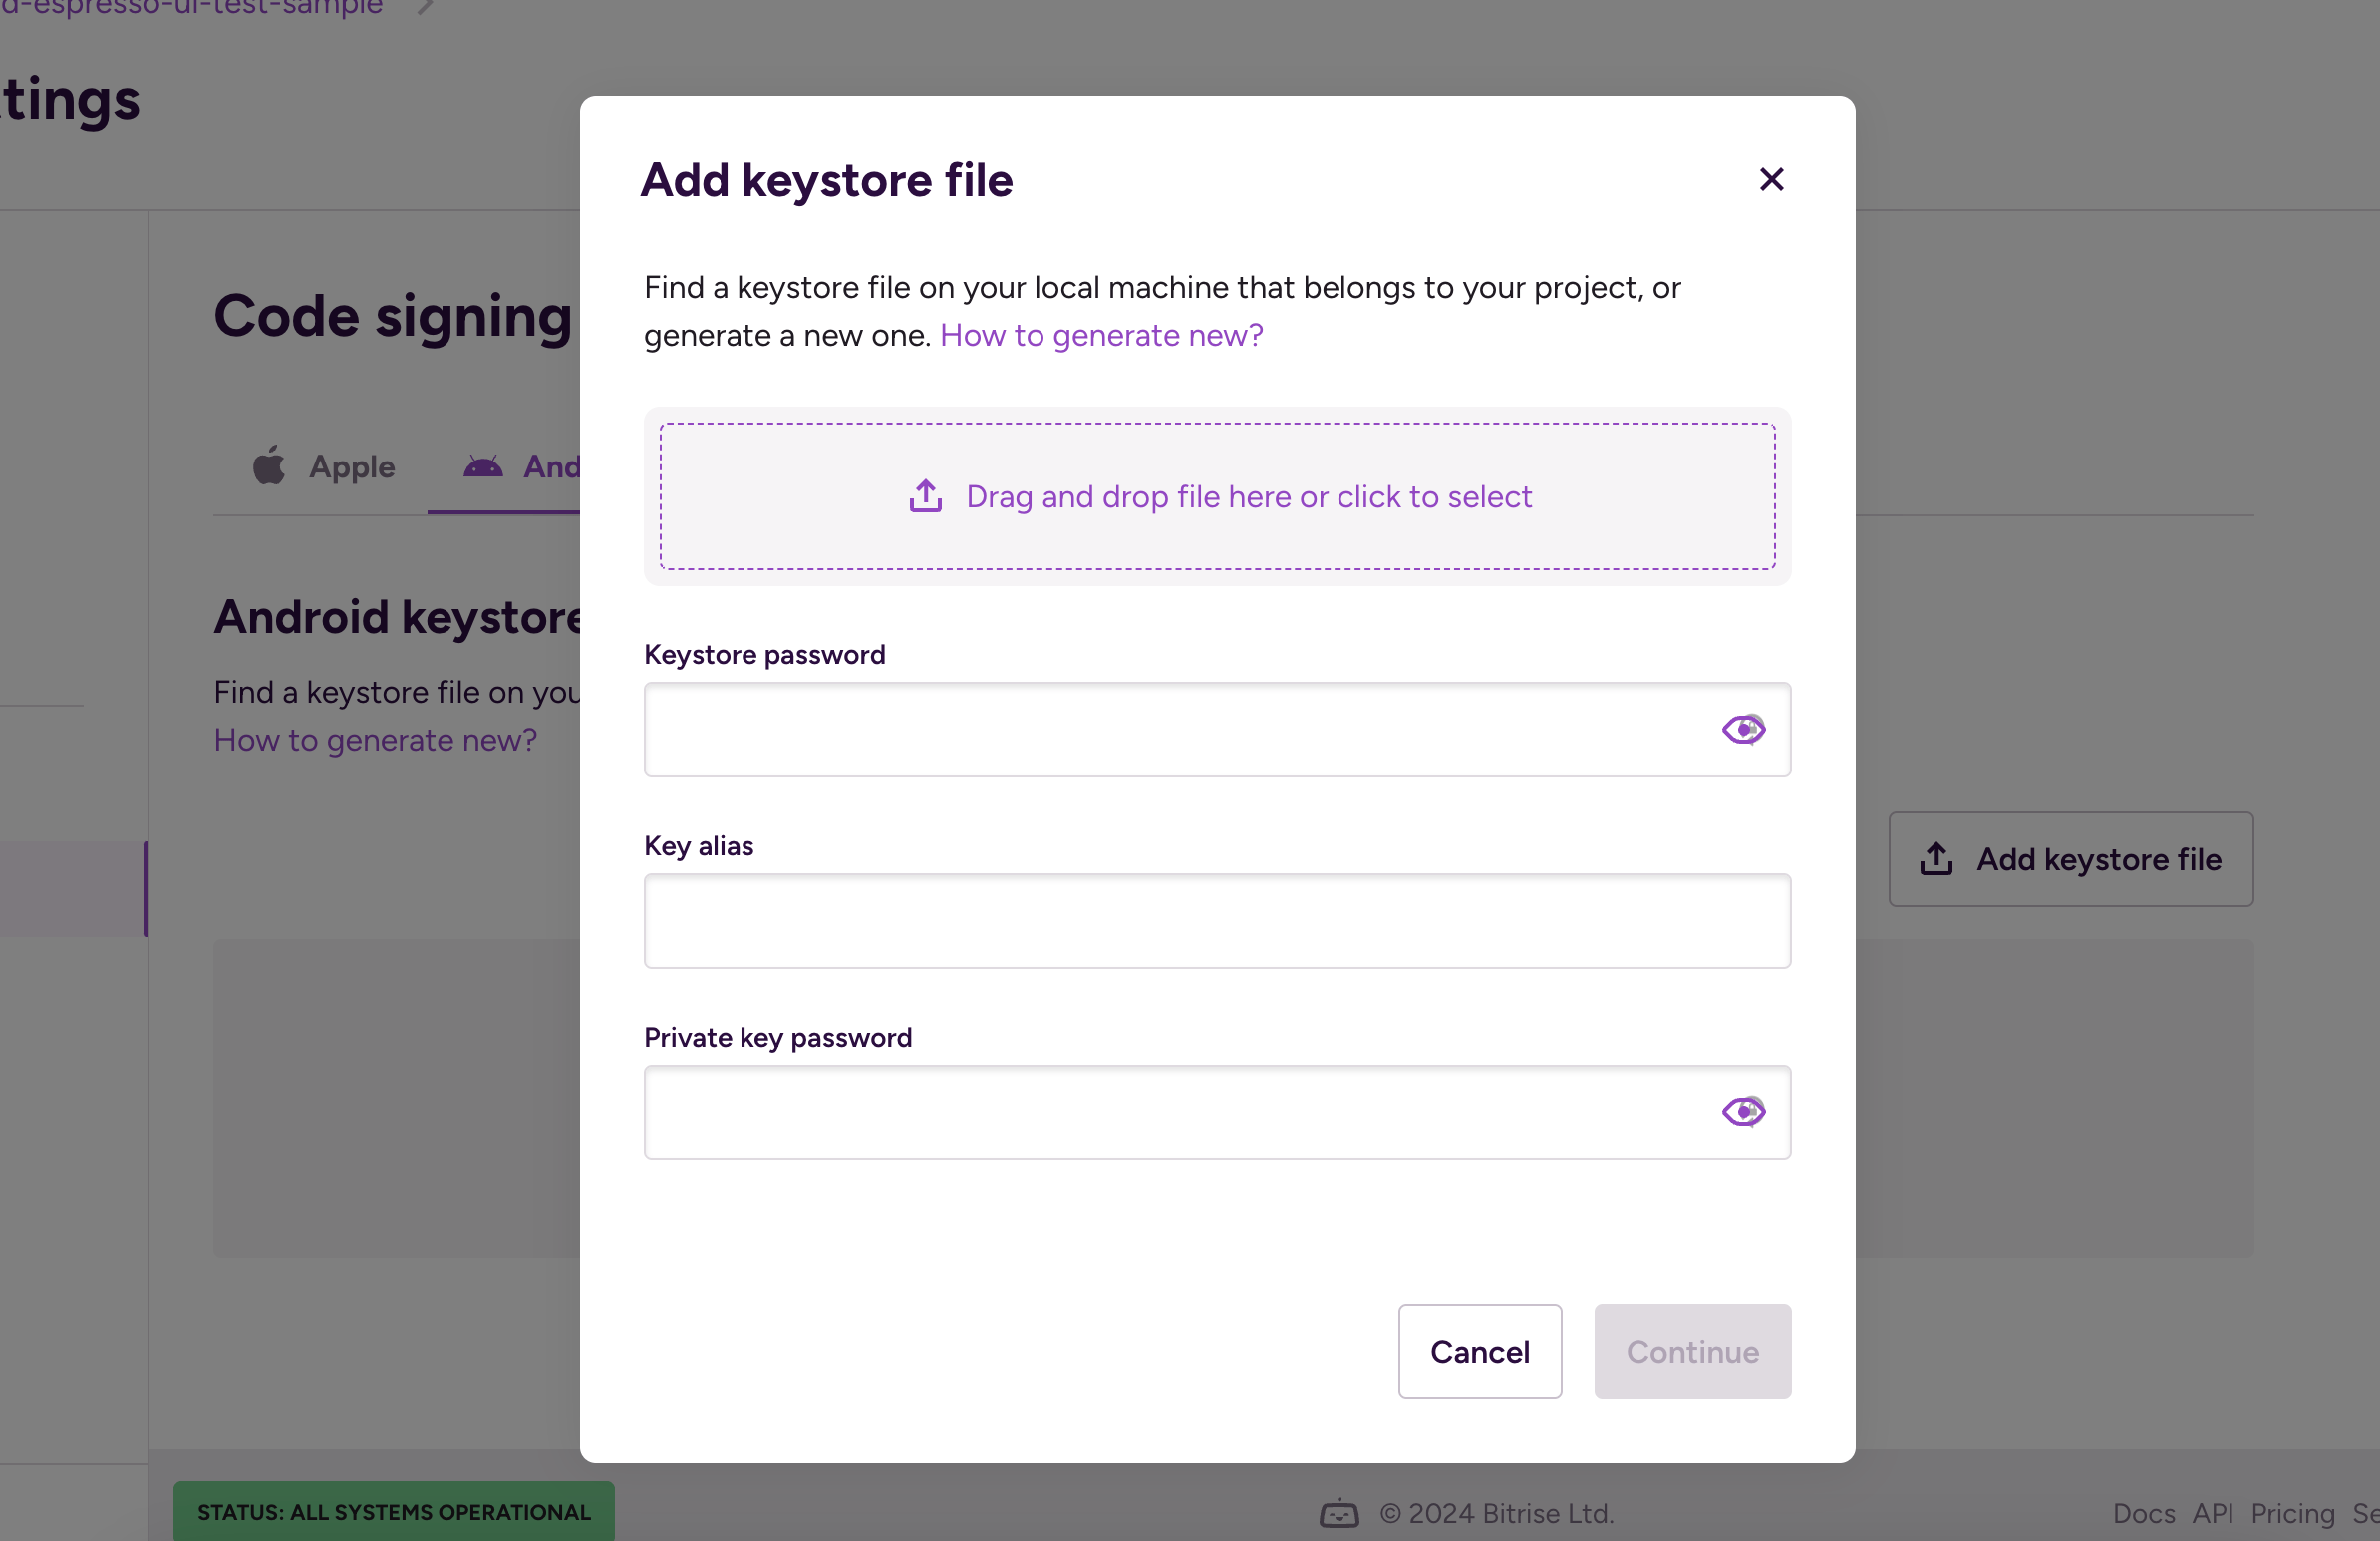
On the Android tab, click Add keystore file.
-
In the dialog, drag-and-drop the file and fill out the required fields then click Continue
-
Open the Workflow Editor.
-
Add the Android Sign Step to your Workflow.
If you uploaded your keystore file and filled out the metadata, the required inputs of the Step are already filled and require no more configuration from you.
Prerequisite of the Android Sign StepMake sure to add the Android Sign Step after a build Step (Android Build Step or Gradle Runner Step) in your Workflow.
Creating a signed IPA for Xcode projectsClick to copy link
For a comprehensive overview on what Steps are available for code signing asset management, visit the iOS code signing page.
You can easily create a signed IPA file for your Xcode project with Bitrise.
- You have set up Apple service connection on Bitrise.
- Your code signing files are managed correctly.
- You set the relevant inputs of our Xcode Archive & Export for iOS Step.
We strongly recommend uploading BOTH the development and distribution signing certificates for your project. If you don't have an uploaded development signing certificate, Steps with automatic provisioning options will generate one on the fly every time you start a build. This can eventually lead to reaching the maximum number of certificates, blocking you from starting new builds.
If you’re all set, proceed to setting up IPA export in your Workflow.
- Workflow Editor
- Configuration YAML
-
Make sure the necessary code signing files have been collected and uploaded.
-
Make sure you have the Xcode Archive & Export for iOS Step in your Workflow.
-
Set the Distribution method input of the Step.
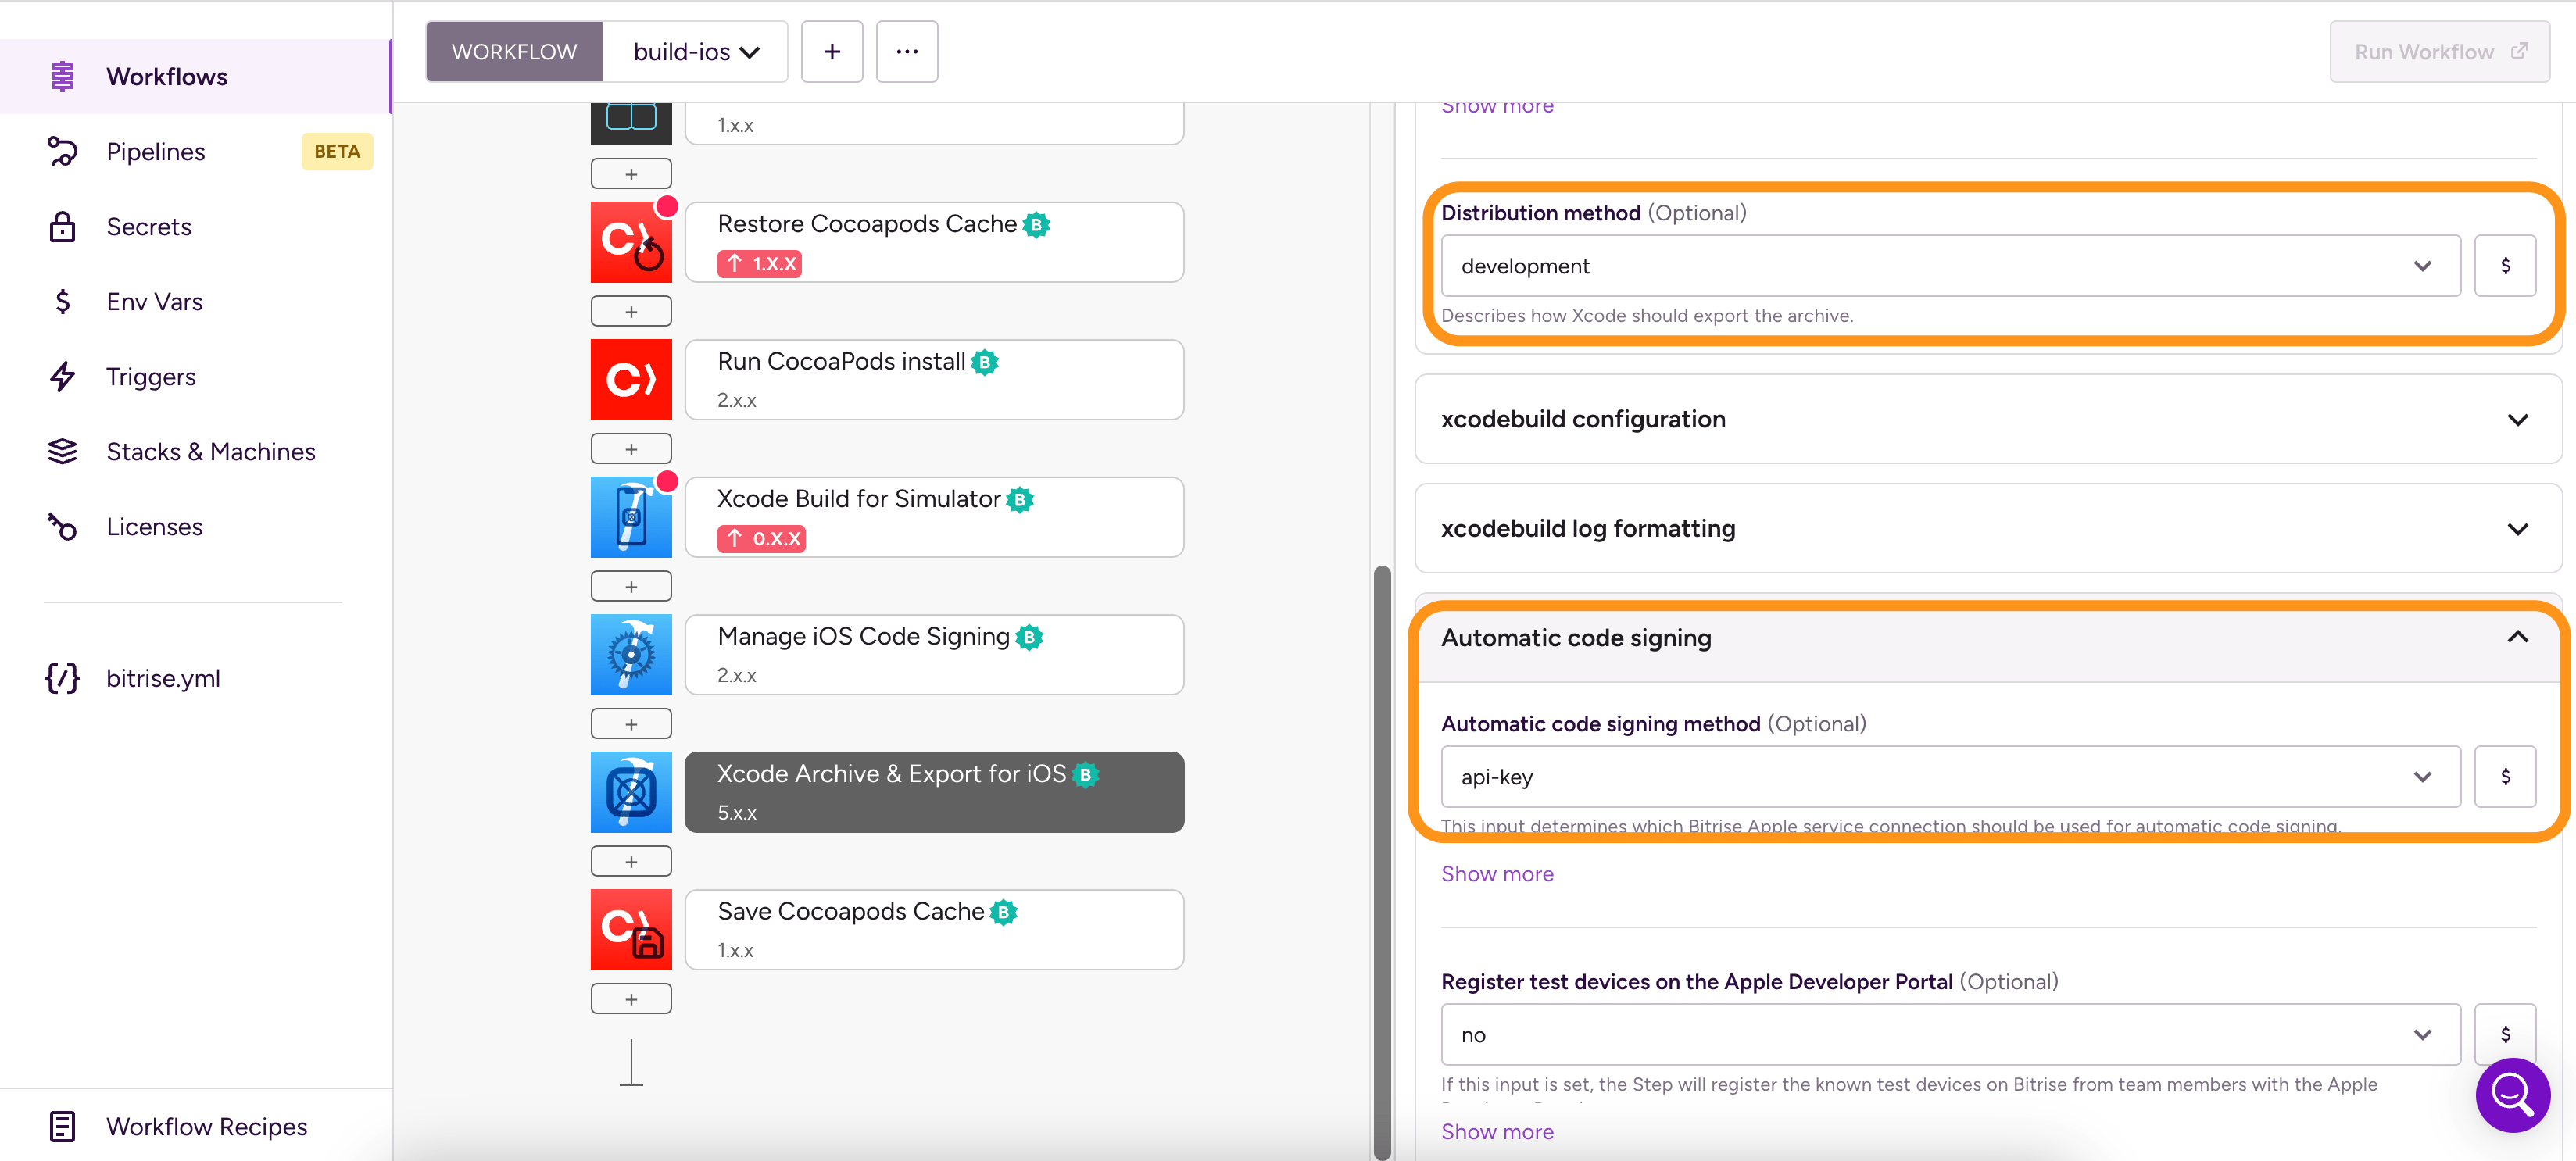
The options are:
app-store: Choose this if you want to deploy the app to the App Store. Requires a Distribution certificate and an App Store provisioning profile.ad-hoc: Choose this if you want to deploy the app to ad-hoc testers. Requires a Distribution certificate and an Ad Hoc provisioning profile.enterprise: Choose this if you have an Apple Enterprise account and want to use that to distribute your app.development: Choose this for internal testing. Requires a Developer certificate and a Development provisioning profile.
-
Set the Automatic code signing input to the Apple service connection you want to use for code signing. The available options are:
offif you don’t use automatic code signing.api-keyif you use API key authorization.apple-idif you use Apple ID authorization.
-
Save the Workflow, and start a new build.
-
Make sure all the necessary code signing files are available for your build.
-
Open the
bitrise.ymlfile of your app. -
Make sure you have the
xcode-archiveStep in your Workflow.my-workflow:steps:- xcode-archive:inputs: -
Set the
distribution_methodinput to the correct value. The available options are:app-store: Choose this if you want to deploy the app to the App Store. Requires a Distribution certificate and an App Store provisioning profile.ad-hoc: Choose this if you want to deploy the app to ad-hoc testers. Requires a Distribution certificate and an Ad Hoc provisioning profile.enterprise: Choose this if you have an Apple Enterprise account and want to use that to distribute your app.development: Choose this for internal testing. Requires a Developer certificate and a Development provisioning profile.
my-workflow:steps:- xcode-archive:inputs:- distribution_method: development -
Set the
automatic_code_signinginput to the Apple service connection you want to use for code signing. The available options are:offif you don’t do automatic code signing.api-keyif you use API key authorization.apple-idif you use Apple ID authorization.
my-workflow:steps:- xcode-archive:inputs:- automatic_code_signing: api-key- distribution_method: development
That’s all. Xcode will automatically select the right signing files based on your project’s Bundle ID and Team ID settings, and the export method you set.
Signing an IPA file with a different team’s code signing fileClick to copy link
You might want to sign the IPA file with a different team’s code signing files. For example:
- If you use your company’s code signing files for internal builds, but your client’s code signing files are used for App Store distribution.
- If you use Apple ID for automatic code signing and the Apple ID belongs to multiple teams, use The Developer Portal team to use for this export input to specify which team should be used for automatic code signing asset management.
To do so:
- Make sure the right code signing files of the new development team are uploaded to Bitrise.
- Set the The Developer Portal team to use for this export option as well (in addition to the Distribution method).
- Set the Distribution method.
Testing your React Native appClick to copy link
You can use React Native’s built in testing method, called jest to perform unit tests.
-
Log in to Bitrise and select Bitrise CI on the left, then select your project.
-
Click the Workflows button on the main page.
-
Add the run npm command Step to your Workflow.
-
In the npm command with arguments to run input field, type
test.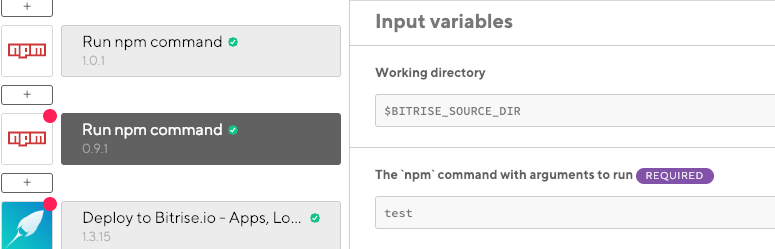
For more detailed guides on React Native testing, check out Testing React Native apps.
Viewing React Native test resultsClick to copy link
Bitrise allows you to view and analyze your test results in one convenient place: Deploying and viewing test results.
By default, tests run with the Run npm command Step won't show up in test reports. However, you can export the results. . The basic process is as follows:
-
Generate a
junit.xmlfile during the build.For example, you can use jest-junit to prepare a report.
-
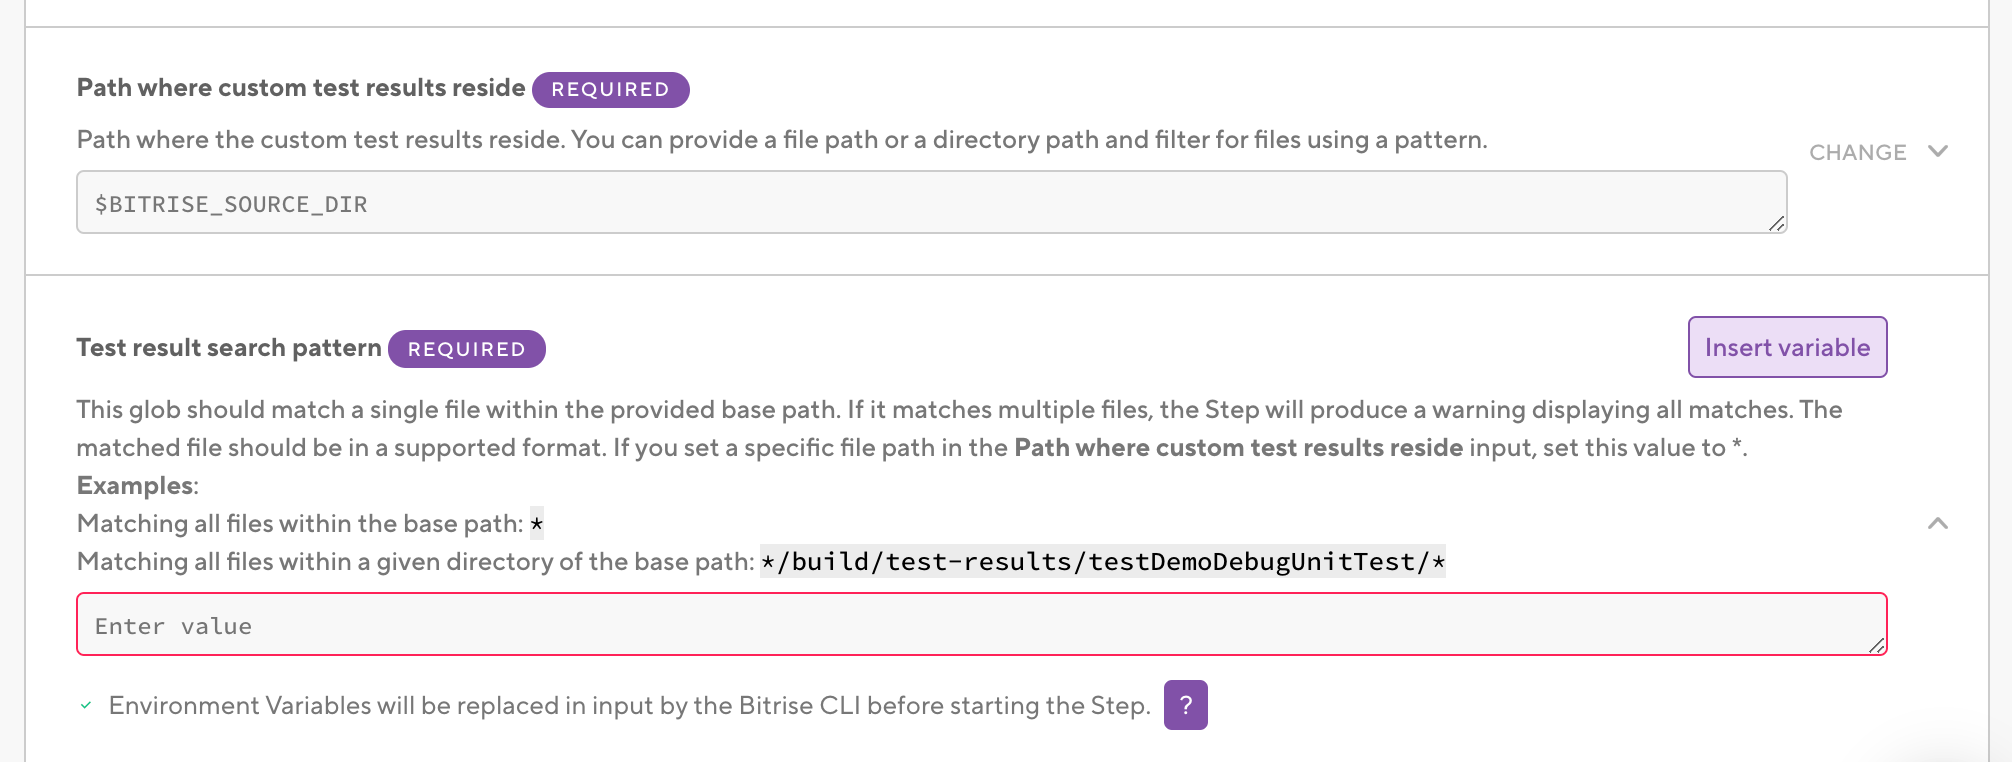
Add the Export test results to Test Reports Step to your Workflow.
-
In the Path where custom test results reside input, add the folder in which your
junit.xmlfile and other test results are located. -
In the Test result search pattern input, set
*.xml. -
In the The name of the test input, set the name of the test run.
The test results will be under this name.
-
Make sure you have the Deploy to Bitrise.io Step in your Workflow.
Deploying a React Native appClick to copy link
You can deploy your React Native app to:
- bitrise.io: This allows you download the generated binary, and to share it with others via the public install page.
- Online stores: we have integrations for multiple different online stores. In these guides, we'll show you how to publish to Google Play and to Apple's App Store.
You can deploy updates to your users' devices with Bitrise CodePush. CodePush is part of Release Management and it is supported for React Native and Expo apps.
For more information about CodePush, check out the official guides: CodePush.
Deploying a cross-platform app to bitrise.ioClick to copy link
The Deploy to bitrise.io Step uploads all the artifacts related to your build into the Artifacts tab on your Build’s page.
You can share the generated binary file (APK for Android or an IPA file for iOS) with your team members using the public install page. The public install page is a URL you can share with others who can install the generated app binary on their device. You can also notify user groups or individual users that your APK or IPA file has been built.
The Deploy to Bitrise.io Step does not use Expo commands and doesn’t publish to expo.io. This Step publishes artifacts to Bitrise and is not specific to a particular platform.
If you need to publish to expo.io, set the Run expo publish after eject? input of the Expo Eject Step to yes. Be aware that in that case you have to provide your username and password for your Expo account to publish to expo.io.
-
Log in to Bitrise and select Bitrise CI on the left, then select your project.
-
Click the Workflows button on the main page.
-
Make sure you have the Deploy to bitrise.io Step in your Workflow.
-
In the Notify: User Roles, add the role so that only those get notified who have been granted with this role. Or fill out the Notify: Emails field with email addresses of the users you want to notify.
Make sure you set those email addresses as Secrets! These details can be also modified under Notifications if you click the eye icon next to your generated binary in the Artifacts tab.
-
If you want the Step to generate a public install page for you, set the Enable public page for the App? input to
true.
Deploying the app to App Store ConnectClick to copy link
Keep in mind that every time you want to push an app to App Store Connect, it must have a unique build and version number: increment either or both before deploying.
-
Make sure you have a working connection to your Apple Developer account.
-
Generate an IPA file on your own machine at least once.
-
Upload all necessary code signing files to Bitrise.
To deploy an app to App Store Connect, you need a Distribution type certificate and an App Store type provisioning profile.
-
Make sure the Xcode Archive & Export for iOS Step is in your Workflow.
-
Set the Automatic code signing input to the Apple service connection you want to use for code signing. The available options are:
offif you don’t use automatic code signing, or if you exclusively use Step inputs for Apple service authentication.api-keyif you use API key authorization.apple-idif you use Apple ID authorization.
-
Set the Distribution method input of the Step to
app-store.The Step will store the path of the exported .ipa file in the $BITRISE_IPA_PATH Environment Variable.
-
Add the Deploy to App Store Connect Step to your Workflow.
-
Fill the required inputs.
- Either the app’s Apple ID or its Bundle ID is a required input. One of the two must be provided.
- If you set the Submit for Review to
yes, the Step will wait for your submission to be processed on App Store Connect and then submit the given version of the app for review. - The default value of the Skip App Version Update input is
No. Change it only if you incremented the app version number in another way. - If you use an App Store Connect account that is linked to multiple teams, provide either a Team ID or a Team name!
-
Start a build.
If all goes well, your app will be submitted to App Store and you can distribute it via Testflight or via the App Store!
Deploying your Android project to Google PlayClick to copy link
You can use the Deploy to Google Play Step in your Workflow to upload your digitally signed AAB/APK to the Google Play Store.
-
Make sure your Workflow includes the Android Build Step and that it runs before the Android Sign Step.
-
Configure code signing for your app.
-
You only need to do this for your very first Google Play deployment of the app.
-
Make sure you have the Deploy to Google Play Step after the Android Sign Step in your Workflow.
-
Fill out the required input fields as follows:
- Service Account JSON key file path: This field can accept a remote URL so you have to provide the Env Var which contains your uploaded service account JSON key. For example:
$BITRISEIO_SERVICE_ACCOUNT_JSON_KEY_URL. - Package name: The package name of your Android app.
- Track: The track where you want to deploy your APK (for example, alpha/beta/rollout/production or any custom track you set).
- Service Account JSON key file path: This field can accept a remote URL so you have to provide the Env Var which contains your uploaded service account JSON key. For example: