- Parent publication
- Bitrise as a Platform
- ワークスペース
- コラボレーションと権限
- ワークスペースグループ
ワークスペースグループ
ワークスペースのチームのメンバーになるということは、ワークスペースグループの1つのメンバーになることを意味します。ワークスペースが所有するアプリにグループを割り当てることができます。
Bitrise ワークスペースのメンバーは、ワークスペース グループに編成できます。グループを使用すると、アプリ間でワークスペース メンバーを柔軟に割り当てることができるため、複数のアプリを所有するワークスペースの管理プロセスが簡素化されます。
ワークスペースのメンバーは、複数の異なるグループに属することができます。グループには、任意のアプリのチームのユーザー ロールを割り当てることができます。グループの各メンバーは、グループのロールと、そのロールに伴うアクセス権を持ちます。
アプリチームとワークスペースグループの違い
アプリチームはアプリごとに処理されますが、ワークスペースグループはグローバルに処理されます。
ワークスペースグループには、それ自体に固有の役割はありません。 アプリチームにグループを割り当てることができますそして彼らを選ぶ役割つまり、同じグループが異なるアプリで異なる役割を持つことができるということです。
Workspace groups can have three main types of product access:
-
Admin access: Gives access to all aspects of the selected projects with the project admin role. This doesn't necessarily mean access to all projects owned by the workspace!
-
Bitrise CI access: The group can only access the Bitrise CI configuration of a project, with the specific Bitrise CI roles and permissions.
-
Release Management access: The group can only access the Release Management apps of the project, with the specific Release Management permissions.
グローバルアクセスグループ
ワークスペースメンバーには、すべての製品のすべてのプロジェクトへのアクセス権を付与できます。これを行うと、そのメンバーはグローバルアクセスグループに追加されます。
グローバルアクセスグループはワークスペースグループであり、通常のワークスペースグループとはいくつかの違いがあります。
-
ワークスペースから削除することはできません。
-
その役割は変更できません。
他のグループと同様に、メンバーをグローバルアクセスグループに手動で追加できます。また、グローバルアクセスグループの名前はいつでも変更できます。
ワークスペースのグループの作成
所有者のみ
ワークスペースのグループを作成できるのは、ワークスペースの所有者だけです。
When you create a new group, you must decide which products it should have access to.
-
Bitriseにログインし、左側のナビゲーションバーにカーソルを合わせます。
-
で適切なワークスペースが選択されていることを確認してください ワークスペース メニュー。
-
[選択] [設定]。
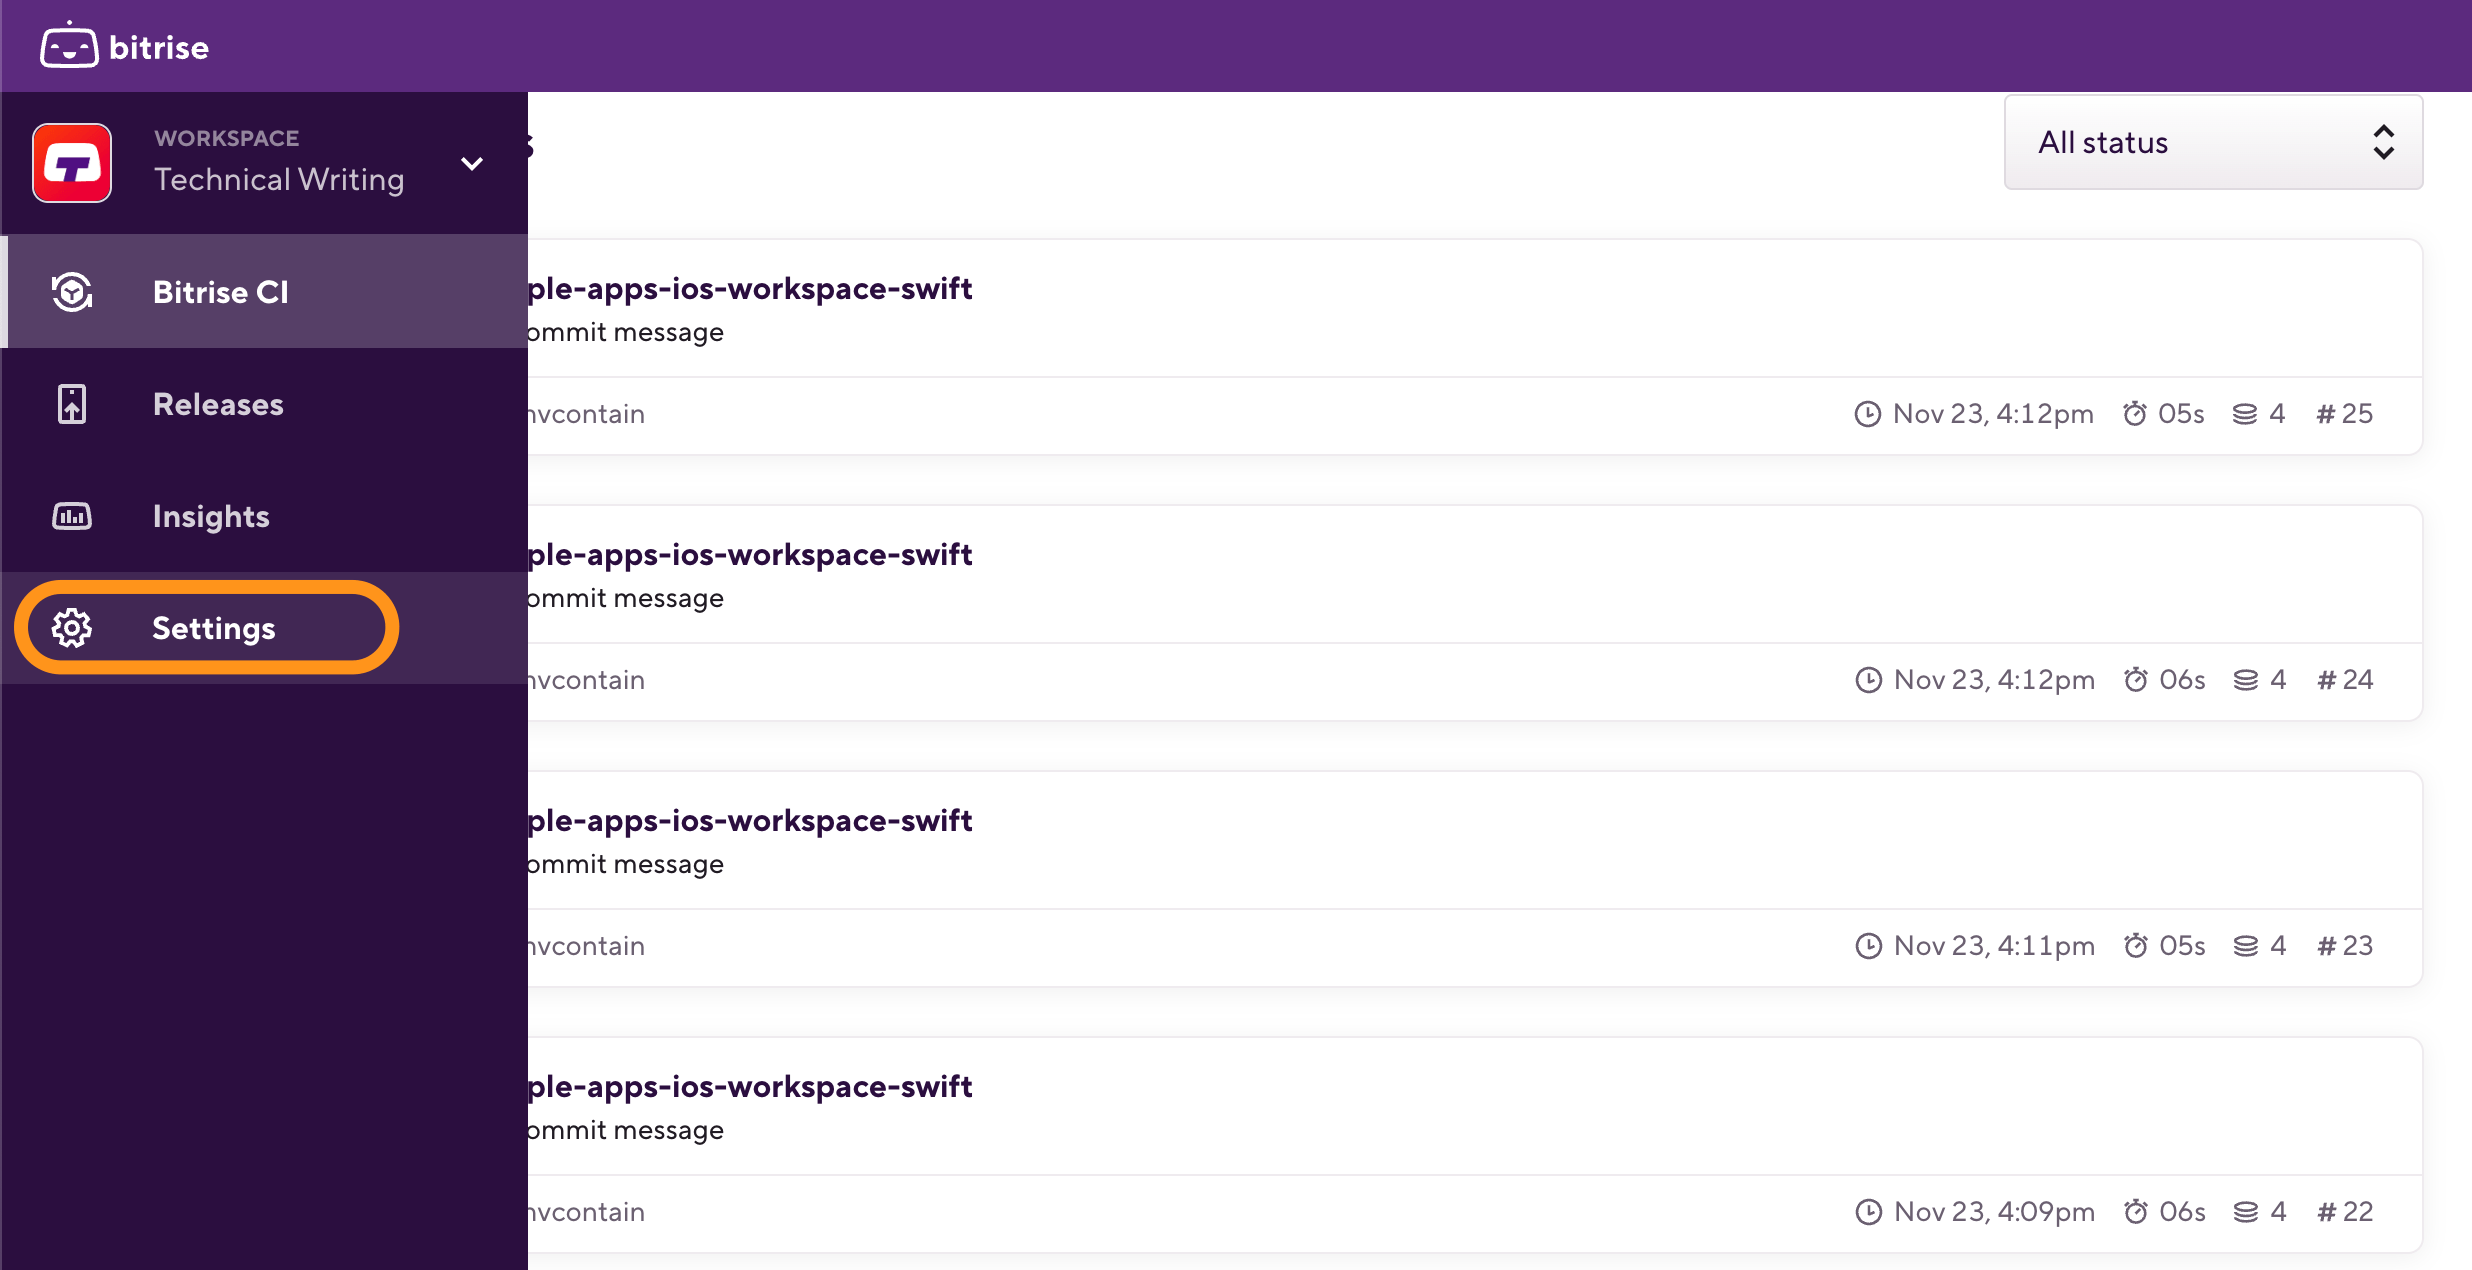
-
左側で選択します コラボレーション メニューオプションから。
-
左側で、 グループ メニューオプションから。
-
を見つける 新しいグループを作成する 上部のセクション。
-
にグループ名を入力します グループ名を入力してください フィールドをクリックし、 作成。
-
Configure access to products:
-
Admin access: Grants access to all products, managing all aspects of selected projects with the project admin role.
-
Bitrise CI: The group has access to Bitrise CI only, and it can be assigned Bitrise CI roles.
-
Release Management: The group has access to Release Management only, and it can be assigned Release Management roles.
-
-
If you toggle on a specific product instead of admin access, you will be prompted to select the projects for the group and its user roles on the selected projects.
For Bitrise CI, you can select projects and assign a role to each project. You can also select the All projects option: in this case, the user will be added to a global access group with the selected role.
For Release Management in particular, you can select:
-
Specific projects. Note that the group will be able to access all currently existing apps pf the project but not all future apps.
-
Specific Release Management apps: select the already existing apps you want the group to have access to.
-
-
When finished with setting up roles, click Done.
-
Click Create group.
ワークスペースグループへのメンバーの追加
実際には、ワークスペースにメンバーを追加するということは、ワークスペースに属するグループにメンバーを追加することを意味します。ワークスペースに必要なグループができたら、それらにメンバーを追加するのは非常に簡単です。
-
Bitriseにログインし、左側のナビゲーションバーにカーソルを合わせます。
-
で適切なワークスペースが選択されていることを確認してください ワークスペース メニュー。
-
[選択] [設定]。

-
左側で選択します コラボレーション メニューオプションから。
-
を選択 グループ タブ。
-
必要なグループを見つけて、グループの右側にある 3 つの点をクリックして、グループ ドロップダウン メニューを表示します。
-
クリックしてください +メンバーを追加 ボタン。

-
ダイアログボックスのラジオボタンを使用して、電子メールアドレスを入力するか、既存のメンバーをグループに追加します。
-
選択する ワークスペースに新しいメンバーを招待します メールアドレスを入力します。クリック 招待を送る 下部に招待状を送信します。
-
選択する 既存のメンバーを追加する ドロップダウン メニューから既存のワークスペース メンバーの 1 つを選択します。クリック メンバーを追加 下部にあるをクリックして、チームメンバーをグループに追加します。
-
アプリチームへのワークスペースグループの追加
ワークスペースから特定のアプリにユーザーを割り当てる最も便利な方法は、ユーザーのグループをアプリのチームに割り当てることです。ワークスペースグループの割り当て ユーザーの役割 これは、グループ内のすべてのユーザーがアプリのチームで同じ役割を持つことを意味します。
と呼ばれるワークスペースを考えてみましょう TestSpace と呼ばれるアプリを所有しています TestApp。 TestOrg 次のグループがあります。
-
グループアルファ -それらはに割り当てられています TestApp と 管理者 役割。このグループのメンバーは、他のグループをアプリに割り当てたり、外部の貢献者を追加したり、アプリの設定を変更したり、役割やワークフローを管理したりできます。
-
グループベータ -それらはに割り当てられています TestApp とともに デベロッパー 役割。このグループのメンバーは、ビルドの実行、ビルドログの表示、ビルドの表示を行うことができます。
-
グループガンマ -それらはに割り当てられています TestApp とともに テスター/ QA 役割。ビルドのみを表示できます。
ワークスペースグループをBitriseアプリのチームに割り当てるには、次の2つの方法があります。
-
から割り当てることができます チーム ワークスペースのプロファイル設定ページのタブ。
-
あなたはそれをに割り当てることができます アプリの設定 アプリのページ。
ワークスペースのプロファイル設定ページからのグループの割り当て
-
Bitriseにログインし、左側のナビゲーションバーにカーソルを合わせます。
-
で適切なワークスペースが選択されていることを確認してください ワークスペース メニュー。
-
[選択] [設定]。

-
左側で、 チーム メニューオプションから、あなたが上にいることを確認してください グループ タブ。
-
割り当てるグループを選択し、によって示されるドロップダウンメニューをクリックします。
 シンボル。
シンボル。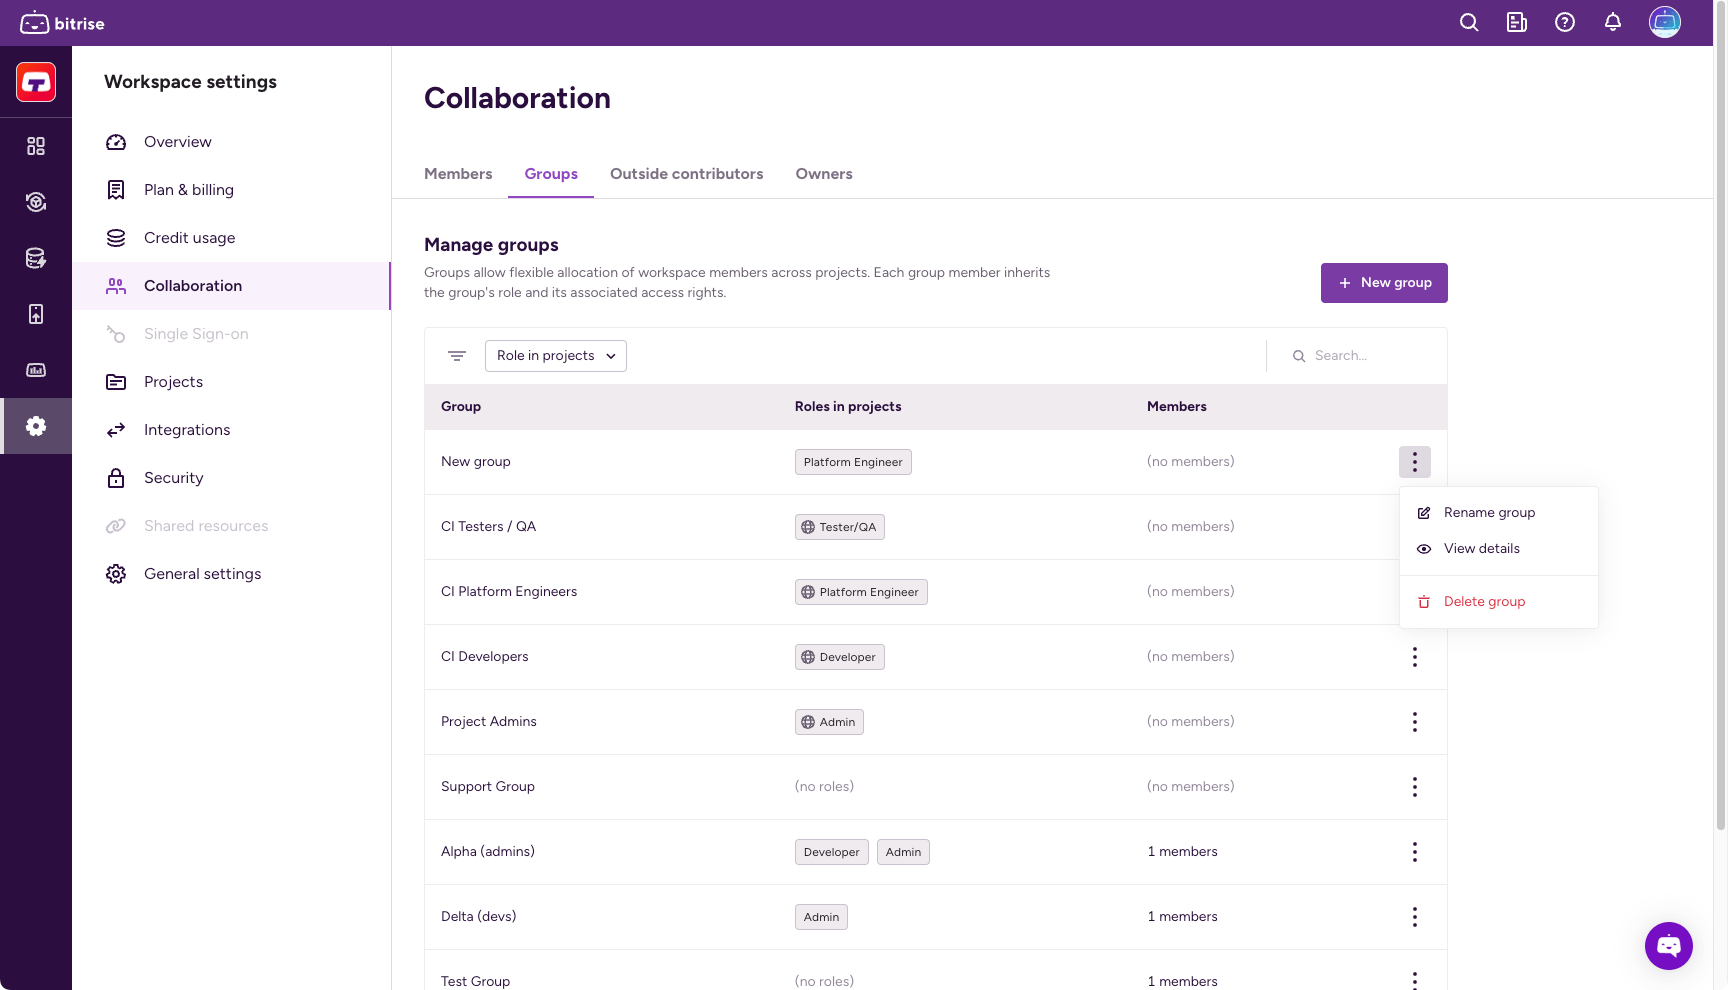
-
クリック アプリへのアクセスを管理する。
-
必要なアプリを見つけてグループに適切な役割を選択するか、ラジオボタンを使用して現在のすべてのアプリのグループの役割を選択できます。
-
Configure product access by enabling one or more toggles and then selecting a role for your project in the dialog. You have the option to grant universal access or to set roles on a product basis:
-
Admin access allows the contributor to manage all aspects of the project, including both the Bitrise CI configuration and the Release Management apps. Note that this gives full access to an outside contributor!
-
Select a product to assign the group specific roles that only apply to that product. If the project doesn't have a CI configuration or a Release Management app, the respective option won't be available.
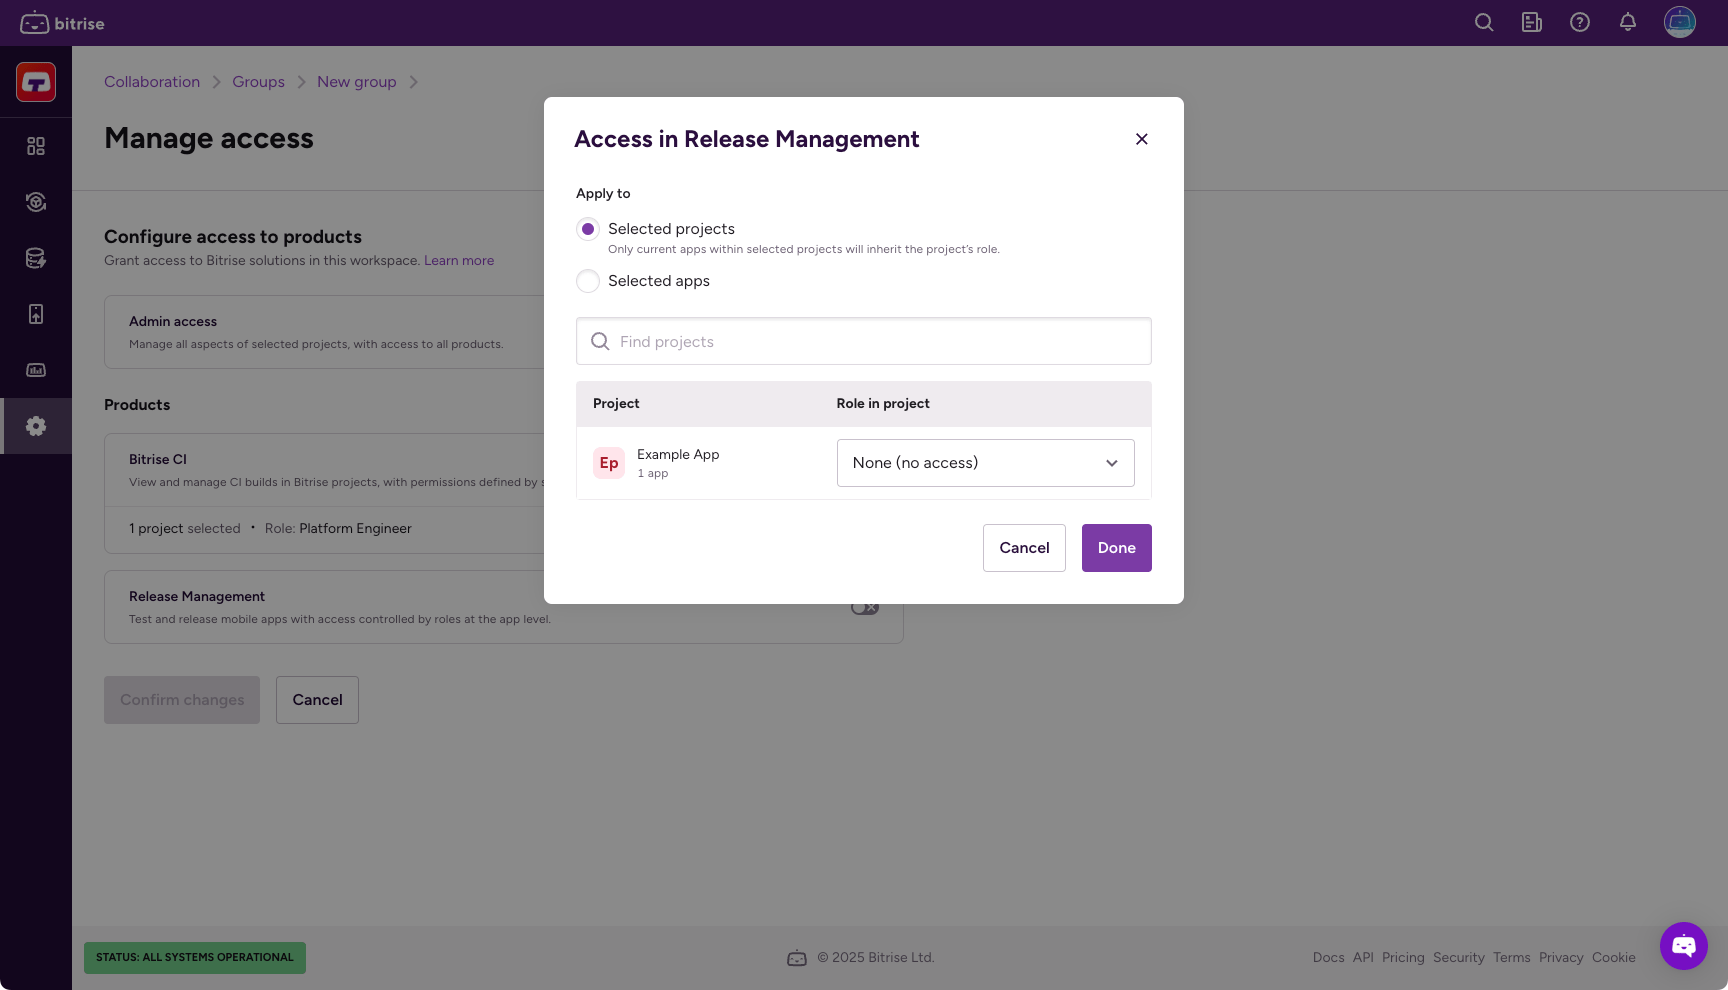
役割のチートシート
の役割に関するチートシートを確認できます。 プロジェクトチームのユーザーロール、または任意のアプリでそれを見つける チーム タブ。
-
-
クリック 変更内容を保存 変更を確定します。
アプリ設定ページからのグループの割り当て
-
Bitriseでアプリを開くには、 管理者 アプリチームでの役割。
-
に移動します 設定 タブ。
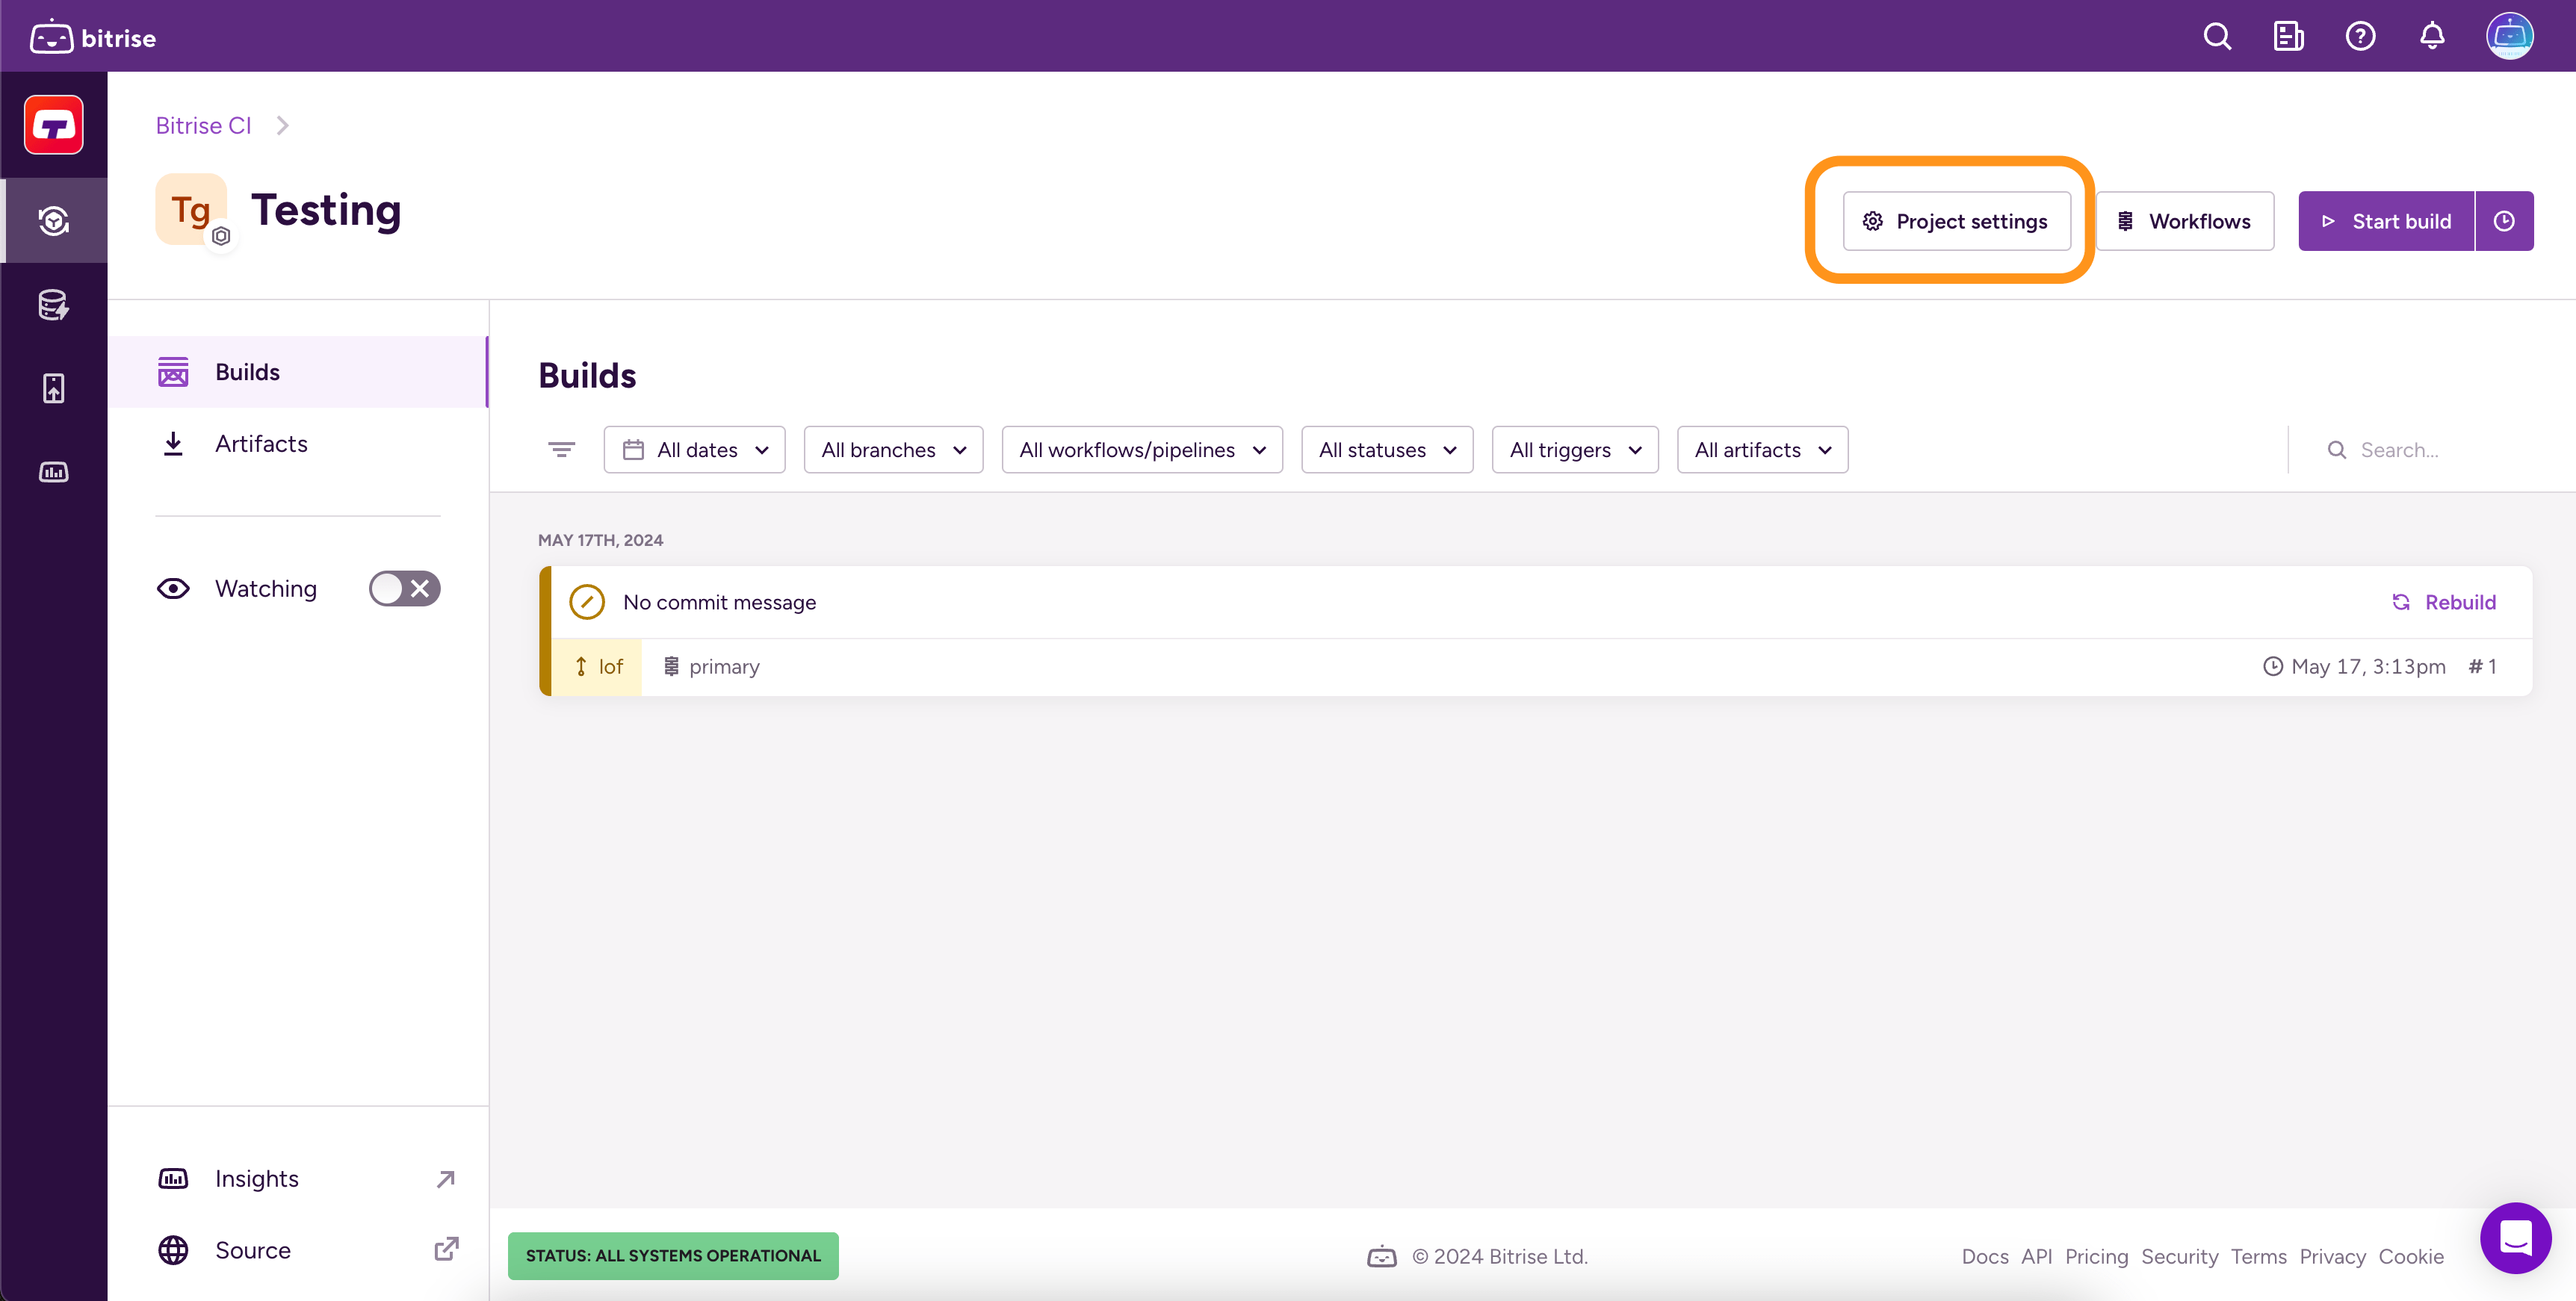
-
左側で、 チーム メニューオプションから。
-
あなたが上にいることを確認してください グループ タブ。
-
クリック グループへのアクセスを許可する。
-
追加するグループを見つけ、ドロップダウンメニューを使用してグループの役割を選択します。
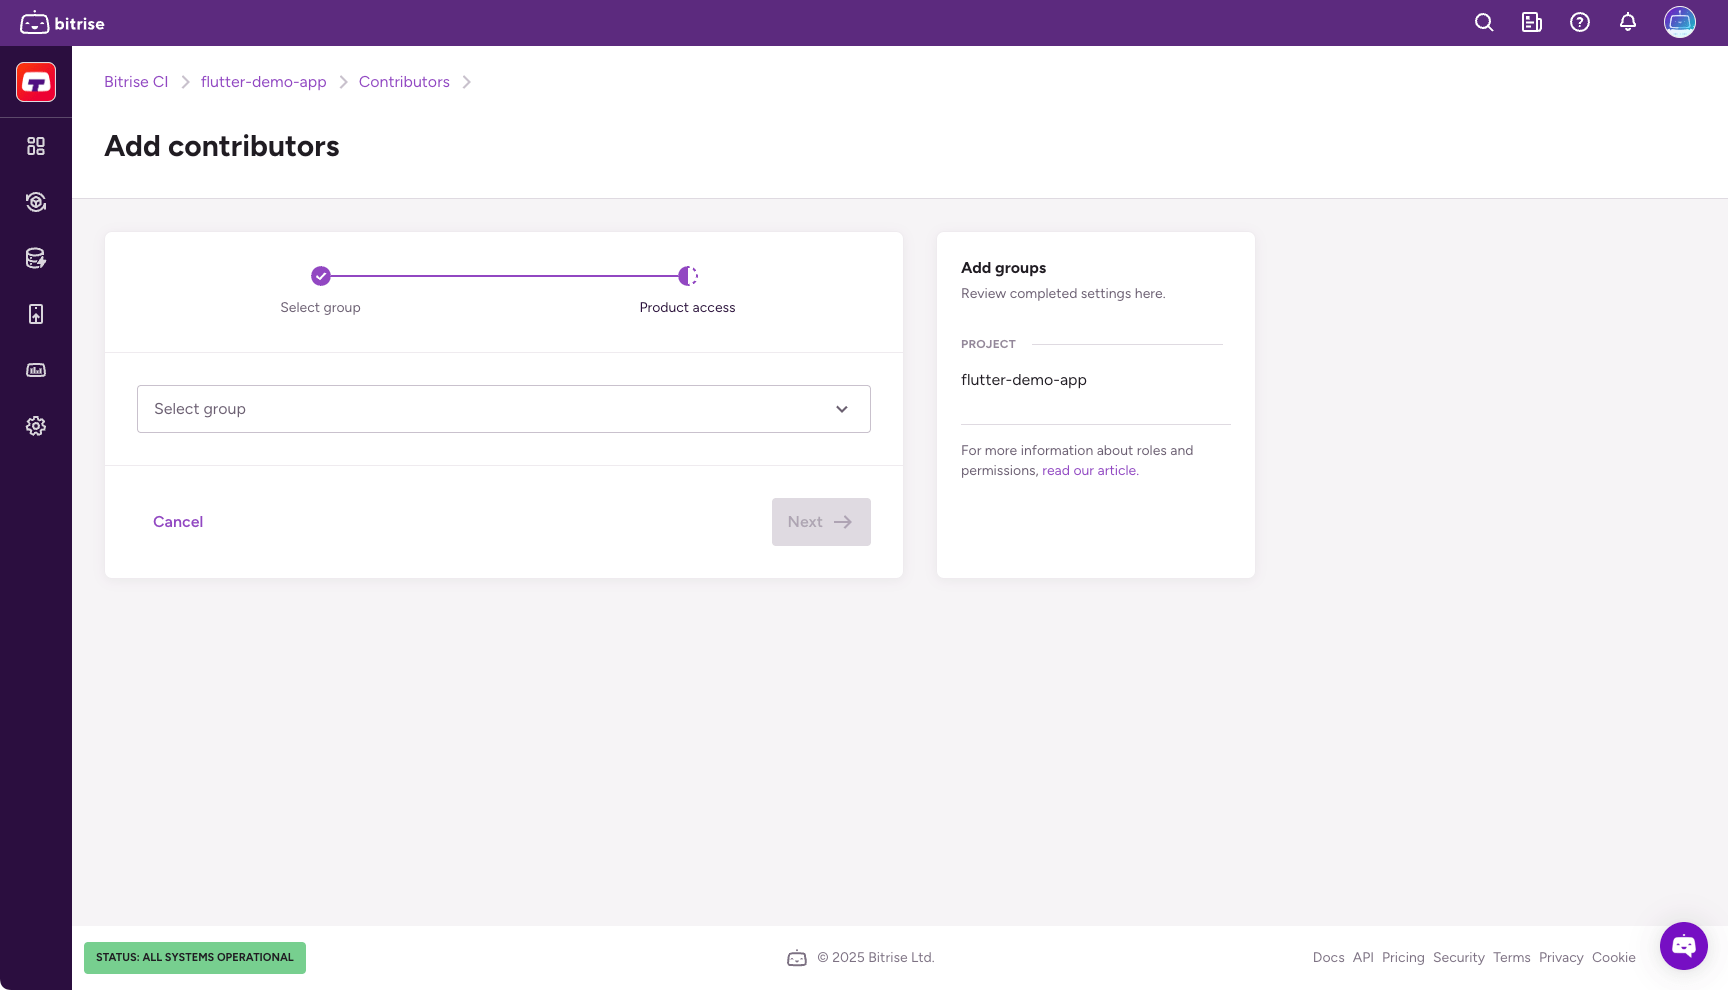
-
Configure product access by enabling one or more toggles and then selecting a role in the dialog. You have the option to grant universal access or to set roles on a product basis:
-
Admin access allows the group members to manage all aspects of the project, including both the Bitrise CI configuration and the Release Management apps.
-
Select a product to assign the group specific roles that only apply to that product. If the project doesn't have a CI configuration or a Release Management app, the respective option won't be available.
-
-
クリック 保存。