セルフホストのGitLabインスタンスを接続する
ワークスペースの場合、Bitriseは自己ホスト型GitLabインスタンスへの接続をサポートしています。完了したら、プライベートにホストされているリポジトリからBitriseにアプリを追加できます。
ワークスペースの場合、BitriseはセルフホストのGitLabインスタンスへの接続をサポートしています。接続は簡単で、接続が完了すると、プライベートにホストされているリポジトリからBitriseにアプリを追加できます。公開されているリポジトリで慣れ親しんだすべての機能が利用可能になります!
セルフホストのGitLabリポジトリにあるアプリのセットアップは非常に簡単です。BitriseはGitLabインスタンス全体のアプリケーションとして承認され、次に アプリケーションID そしてその ひみつ BitriseOAuthアプリケーションに属する値を上のワークスペースに追加する必要があります bitrise.io。
GitLab接続の構成
BitriseでプライベートにホストされているGitLabリポジトリにアクセスするには、GitLabアカウントで新しいOAuthアプリケーションを作成し、サーバーにアクセスするための適切な資格情報を割り当てる必要があります。
警告
When you create a new Bitrise project, you must pick the dedicated GitLab Self-hosted option in the provider picker. If you paste your repository URL into the Other field instead, Bitrise will save the project as a generic Custom-provider repository, and the following features will be silently unavailable:
-
The Service Credential User UI in App Settings.
-
The "Store bitrise.yml in repository" option.
-
Build status reporting back to GitLab merge requests.
This cannot be fixed by editing the repository URL afterwards. If you have already created the project this way, contact support to have the provider type corrected.
公的に解決可能なIPアドレス
セルフホストインスタンスには、パブリックに解決可能なIPアドレスが必要です。そうしないと、Bitriseはそれに接続できません。
The connection requires two URLs: a Bitrise OAuth callback URL and a GitLab instance URL:
|
URL |
Where it goes |
Example |
|---|---|---|
|
Bitrise's OAuth callback URL |
In GitLab, in the OAuth application's Callback URL field |
|
|
Your GitLab instance URL |
In Bitrise, in the Workspace Integrations Self-hosted URL field |
|
-
Allowlist the Bitrise backend workers for your GitLab instance: Bitrise バックエンドワーカーの IP アドレス範囲.
Be aware that the Bitrise backend workers that power, among other things,
app.bitrise.ioand the Bitrise build machines have a different IP address range. Allowlisting the build machines is not sufficient for this feature.If allowlisting the backend workers is not an option for you, reach out to Bitrise so we can discuss other options.
-
を使用してGitLabインスタンスにログインします 根 特権。 Bitriseに接続する場合 root権限なし、ワークスペースの他のチームメンバーは GitLabインスタンスのリポジトリにアクセスできません。
-
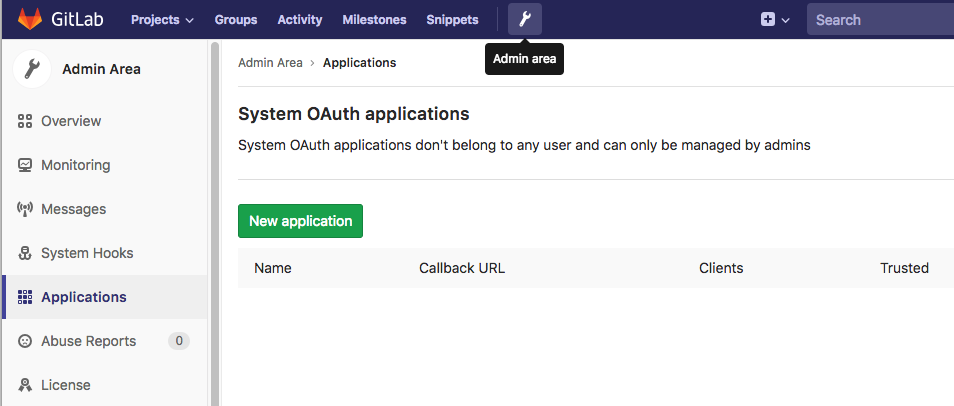
上部のメニューバーにある小さなレンチアイコンをクリックして、管理領域に移動します。
-
左側のメニューバーで、 、次にクリックします 。
-
の中に 名前 フィールドに、アプリケーションを明確に識別する名前を入力します。簡単にするために、お勧めします
Bitrise。 -
の中に URIをリダイレクトする フィールドに入力します
https://app.bitrise.io/users/auth/gitlab/callback。This is Bitrise's URL. GitLab will redirect users here after they authenticate.
-
の中に スコープ メニュー、チェック api。
-
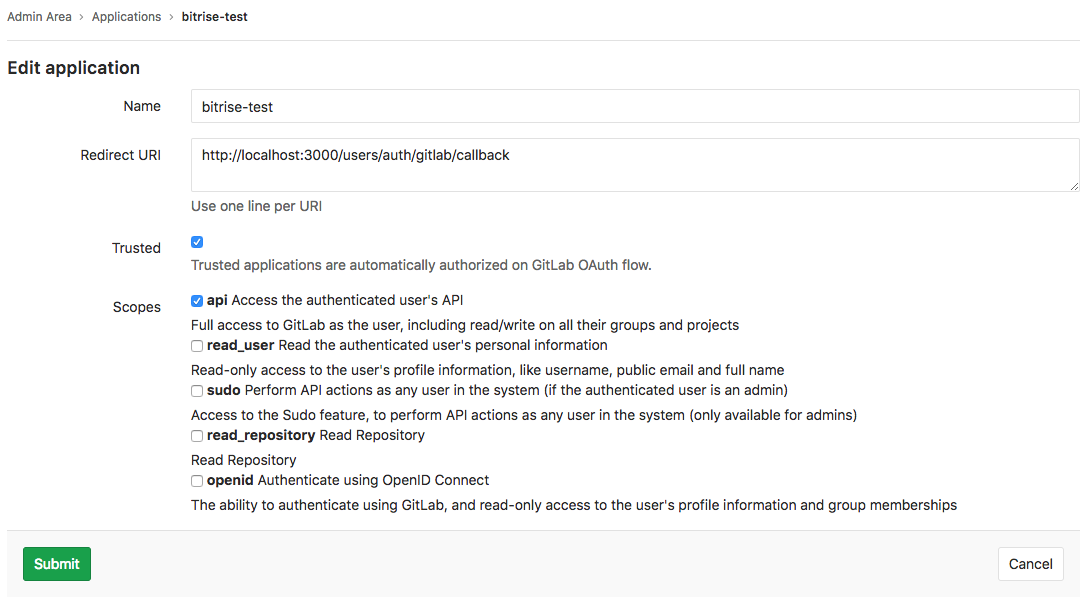
をセットする 信頼 オプション いいえ。
新しく作成されたアプリが機密情報として構成されている場合、Bitriseはそのアプリにアクセスできません。
-
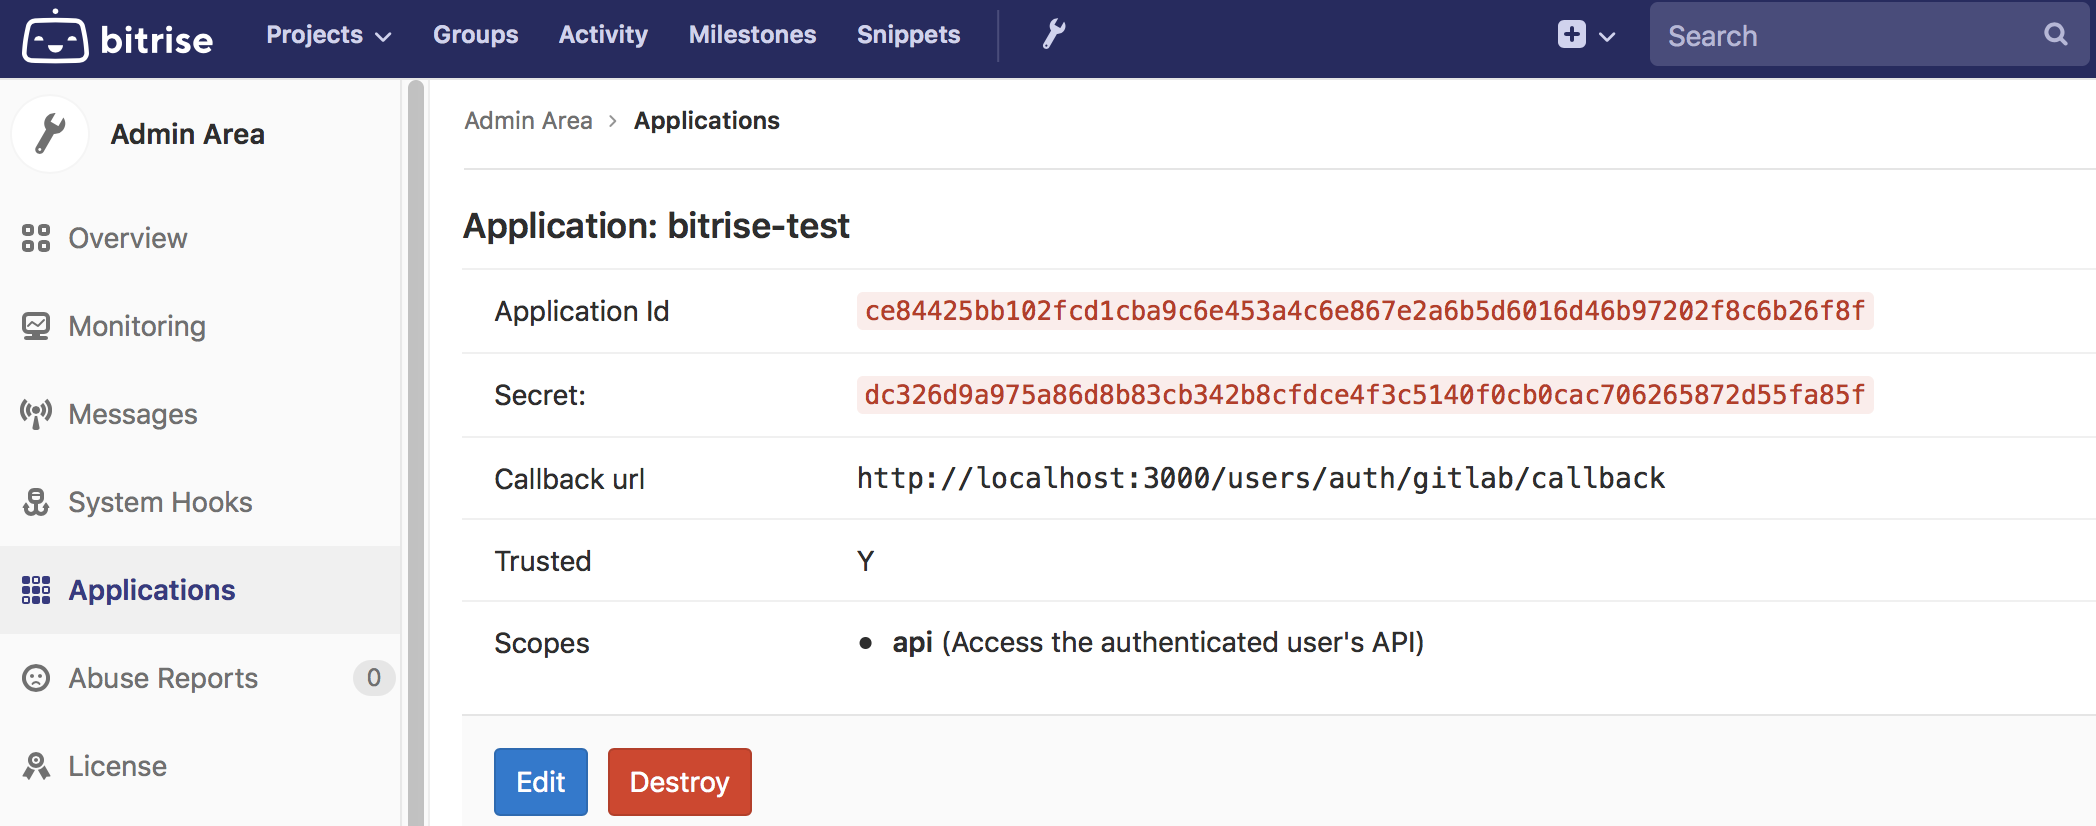
クリック 。次のページで、 アプリケーションID と ひみつ。でGitLabインスタンスに接続するには両方が必要です bitrise.io。
-
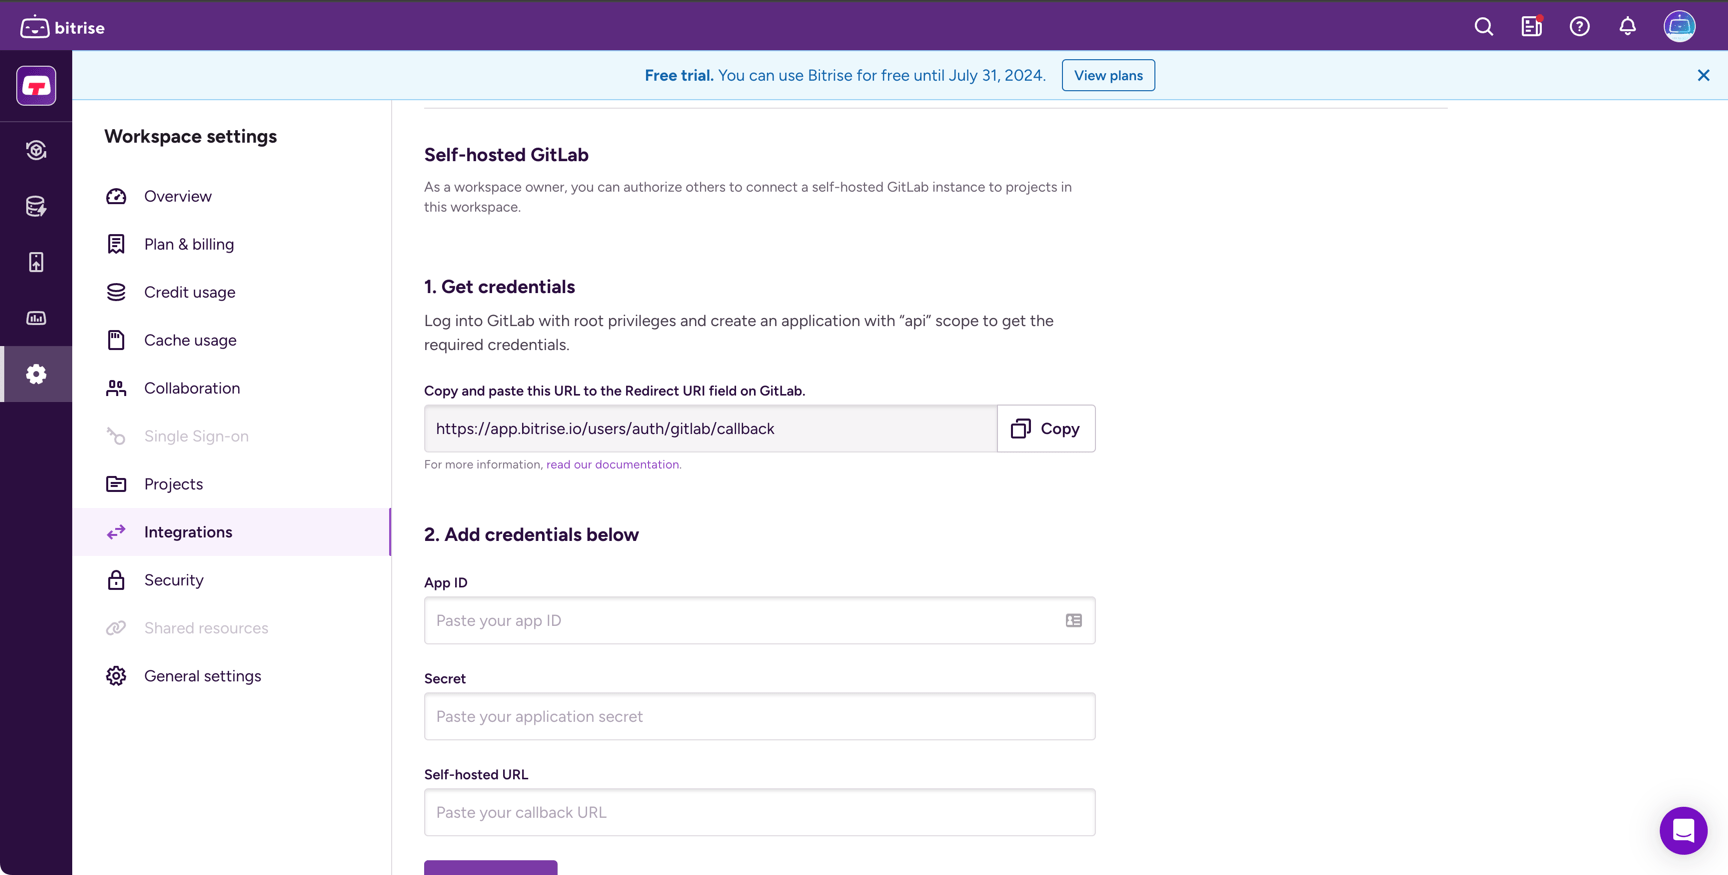
Bitriseにログインし、右上のアカウントセレクタードロップダウンメニューを開きます。
-
On the left, select .
-
を選択 左側のメニューバーのオプション。
-
セルフホストのGitLabクレデンシャルを追加します。
-
アプリID
-
ひみつ
-
セルフホストURL
The Self-hosted URL is your GitLab instance's URL (for example,
https://gitlab.example.com). It is not the same as the Bitrise callback URL that you pasted in the GitLab instance configuration!
-
完了です!これで、Bitriseを使用してプライベートにホストされているリポジトリにアクセスできるようになりました。
サービス認証情報ユーザーロール
ビットライズのユーザー サービスクレデンシャルユーザ (SCU) GitLab インスタンスで Webhook を登録したり、マージリクエストにコミットステータスを投稿したり、リポジトリの内容を読み取ったりできます。セルフホストの GitLab では、SCU には次のものが必要です メンテナー リポジトリでの最低限の役割:
|
GitLab オペレーション |
必要な役割 |
|---|---|
|
読む |
レポーター |
|
ウェブフックを登録 |
メンテナ |
|
ポストコミット/マージリクエストステータス |
メンテナ |
レポーターまたはデベロッパーだけでは不十分です。ステータスレポートは通知されず失敗します。SCU 設定フローの詳細については、「サービス認証情報ユーザー」を参照してください
セルフホストのGitLabリポジトリから新しいアプリを追加する
-
[en] Start the process of adding a new project.
-
Gitプロバイダーを選択するように求められたら、 GitLab。を選択 セルフホスト オプション。
-
クリック 。
接続したら、通常どおり続行します。 最初の CI プロジェクトの追加