Gradle execution reason diagnostic builds
Cache hit ratio is a measurement of how many content requests a cache is able to fill successfully, compared to how many requests it receives. Getting a high amount of cache misses slows down your build as it doesn't take full advantage of caching.
When running Gradle tasks, a change in task inputs usually lead to a cache miss. Gradle's execution reasons can help understand why the change in inputs happened, and to debug the problem.
You can keep on reading to understand the details of how Gradle tasks and their caching works.
To learn how to set up diagnostic builds on Bitrise, skip ahead to Diagnostic builds.
Gradle tasks and cachingClick to copy link
In the Gradle build system, the basic unit of action is a task. A task could be compiling classes, running unit tests, or creating a JAR. Each task has its own inputs, such as files or environmental variables, and outputs.
Tasks usually generate their output in a specific build directory which is configurable for each module. The contents of this directory can be often reused between builds on the same machine. As such, Gradle saves time by executing only the tasks that can't be reused. For other tasks, the output from the build directory is reused and the task gets the UP-TO-DATE label. This process is what Gradle calls an incremental build.
Incremental builds are not the same as incremental task execution! You can read about incremental tasks in Gradle's official docs.
Gradle tasks in a CI environmentClick to copy link
When running Gradle in a CI environment, all tasks are either executed or retrieved from cache because the build directory is empty. After execution, Gradle saves metadata about the task inputs in the project cache directory. Gradle uses this metadata to be able to perfom incremental builds.
For example, in the case of a compile task, Gradle saves the checksum of the source files and only re-compiles files that have changed, based on the checksums. For more information on how Gradle checks task inputs, read Gradle’s docs on task inputs and outputs.
If metadata is not available, Gradle will execute all tasks.
Caching tasksClick to copy link
If the metadata indicates that a task has to be executed, and the Bitrise build cache is enabled, the task inputs and certain Gradle properties such as the version are hashed into the cache key. If either the remote or local cache has a match for the cache key, the task does not have to be fully executed: its execution result is loaded from the cache and gets the FROM-CACHE outcome label.
If there is no match for the cache key in the remote or local cache (a cache miss), the task is fully executed and its outputs are stored in the cache.
When a task doesn't have the UP-TO-DATE label, the reasons for this are recorded and displayed in the task's row in the invocation details on Bitrise. Some of the possible reasons are as follows:
- If the metadata is missing, No history available is displayed.
- If the outputs are missing, Output... has been removed is displayed.
- Tasks without the
UP-DO-DATElabel can still be cached if their inputs were cached at least once previously.
Diagnostic buildsClick to copy link
To understand what changes contribute to a task’s execution, you’ll need the Gradle metadata and the build outputs from a previous build. Restoring them on a CI environment simulates a local incremental build, showing the changes between builds that contribute to cache misses.
These builds are called diagnostic builds on Bitrise.
Diagnostic builds heavily use key-based caching and have increased build time. Their purpose is debugging and they shouldn't be a part of your daily workflows!
The archive limit for key-based cache is 15 Gb. If your app’s outputs exceed that, you can run two separate builds with the same principle, using your own artifact storage solution.
To set up and run a Gradle diagnostic build:
-
Create a CI configuration that:
- Saves the build outputs and Gradle metadata with the Bitrise Build Cache CLI.
- Restores the build outputs and metadata from cache.
-
Run an initial build to save the necessary directories in the key-based cache.
-
Run the diagnostic build to reveal Gradle execution reasons.
Creating the CI configuration for a diagnostic buildClick to copy link
To create a CI configuration for a Gradle diagnostic build, your Bitrise Workflow will need two new Steps to save and restore build outputs, using the Bitrise Build Cache CLI.
Diagnostic builds use key-based caching but for this purpose, do not use our dedicated key-based caching Steps. Set up Script Steps as they are described in this guide.
- Workflow Editor
- Configuration YAML
-
Create a new Workflow for the diagnostic build.
If you store your
bitrise.ymlfile in your repository, we recommend creating a new branch, too, and run the diagnostic build from that branch. -
Add the Build Cache for Gradle Step to the Workflow.
-
After the Step that runs your Gradle tasks (for example, Android Build), add a Script Step.
EnvironmentMake sure to run the script in the same environment as the Gradle command(s) you want to speed up. For example, if you use multiple Docker containers throughout the build, make sure that the Bitrise Build Cache CLI runs in the same Docker container as the Gradle command.
-
To the Script content input, add the following:
/tmp/bin/bitrise-build-cache save-gradle-output-dataThis saves the Gradle metadata directory and the build outputs to the key-based cache under a cache key unique for your Workspace, app, and Workflow.
-
Before the Step that runs your Gradle tasks, add another Script Step.
-
To the Script content input, add the following:
/tmp/bin/bitrise-build-cache restore-gradle-output-dataThis Step accesses the cache and restores your Gradle build data.
-
Create a new Workflow for the diagnostic build.
If you store your
bitrise.ymlfile in your repository, we recommend creating a new branch, too, and run the diagnostic build from that branch. -
Add the
activate-build-cache-for-gradleStep to your Workflow. -
After the Step that runs your Gradle tasks (for example,
android-build), add ascriptStep.EnvironmentMake sure to run the script in the same environment as the Gradle command(s) you want to speed up. For example, if you use multiple Docker containers throughout the build, make sure that the Bitrise Build Cache CLI runs in the same Docker container as the Gradle command.
-
To the
contentinput, add:- script:inputs:- content: |-/tmp/bin/bitrise-build-cache save-gradle-output-dataThis saves the Gradle metadata directory and the build outputs to the key-based cache under a cache key unique for your Workspace, app, and Workflow.
-
Before the Step that runs your Gradle tasks, add another
scriptStep. -
To the
contentinput, add/tmp/bin/bitrise-build-cache restore-gradle-output-data:- script:inputs:- content: |-/tmp/bin/bitrise-build-cache restore-gradle-output-dataThis Step accesses the cache and restores your Gradle build data.
Saving the directories in the key-based cacheClick to copy link
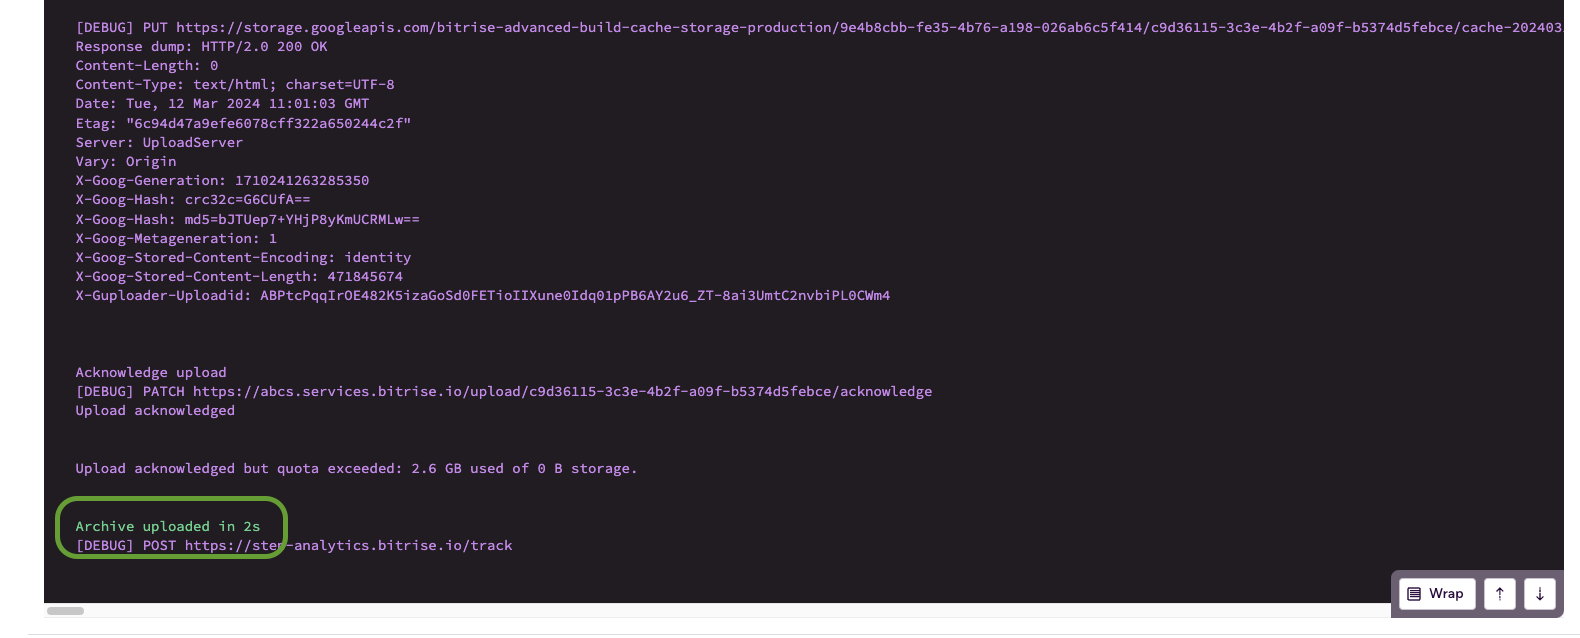
When setting up a Gradle diagnostic build for the first time, you need to run an initial build with the created configuration to save the necessary directories in the key-based cache. This initial build will not show any execution reason in the invocation details.
-
Once the CI configuration is complete, run a build.
-
Check the logs to make sure the uploads have been successfully completed.
Running and checking a diagnostic buildClick to copy link
After the CI configuration is complete and an initial build has successfully uploaded the necessary directories to the key-based cache, you can run a diagnostic build to reveal execution reasons for Gradle tasks. Make sure you use the same Workflow and branch as the initial build
With a diagnostic build, Gradle will behave as if it was an incremental local build.
-
Run the build.
-
Open the Build Cache page.
-
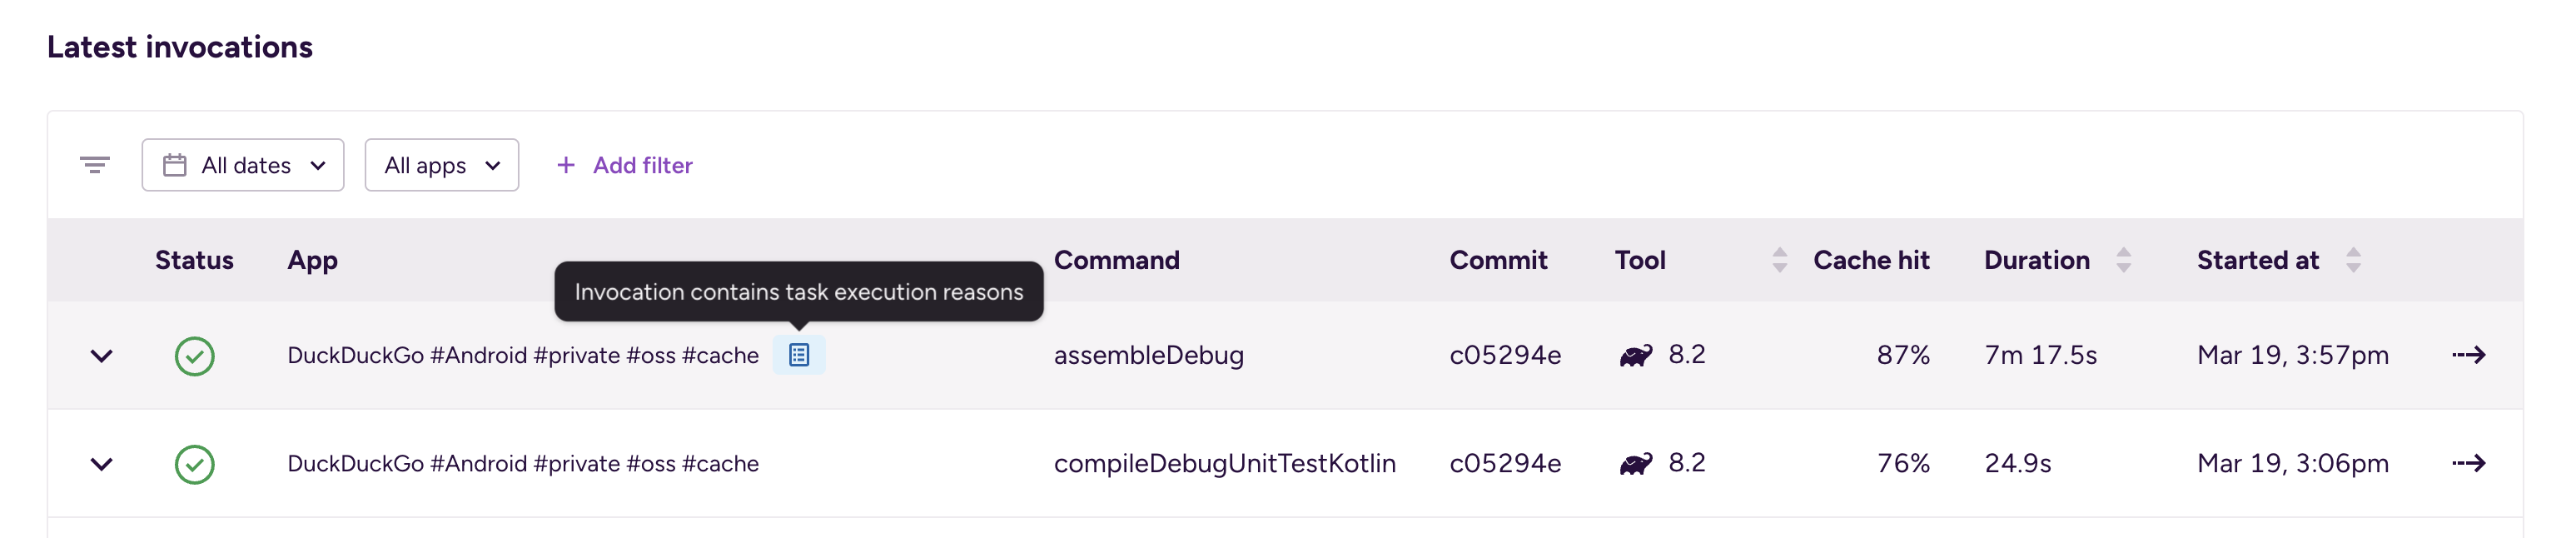
Among the Latest invocations, find the tasks you need. A blue icon will show you the tasks that contain task execution reasons:
You will see changes related to your CI configuration that frequently cause cache task input changes and cache misses.

To successfully interpret and debug these reasons, you can check out the relevant Gradle documentation or delve into our debugging tips.