Managing user access to a project
To collaborate on a project, users must be part of the project. You can add workspace groups to a project from the Workspace settings page or the Project settings page.
Each Bitrise project is owned by a workspace - but this doesn't mean that all members belonging to that workspace have access to a given project. In order to be able to collaborate on a project, users must be assigned to the project.
There are three ways to be invited to collaborate on a project:
-
Adding one of the groups from the workspace that owns the project.
-
Assigning a workspace member to the project. This also allows to set user roles at the same time.
Similarly, there are two ways to revoke access to a project:
Adding an outside contributor to a project
An outside contributor is a user who is assigned to a project but isn't a member of the workspace that owns the project. To add outside contributors, your workspace must have them enabled.
An outside contributor is a user who is assigned to a project but isn't a member of the workspace that owns the project. To add outside contributors, your workspace must have them enabled.
Admins and owners only
You need to be a project admin or a workspace owner to be able to add outside contributors to a project.
-
Open your project on Bitrise with a user that has the Admin role on the project.
-
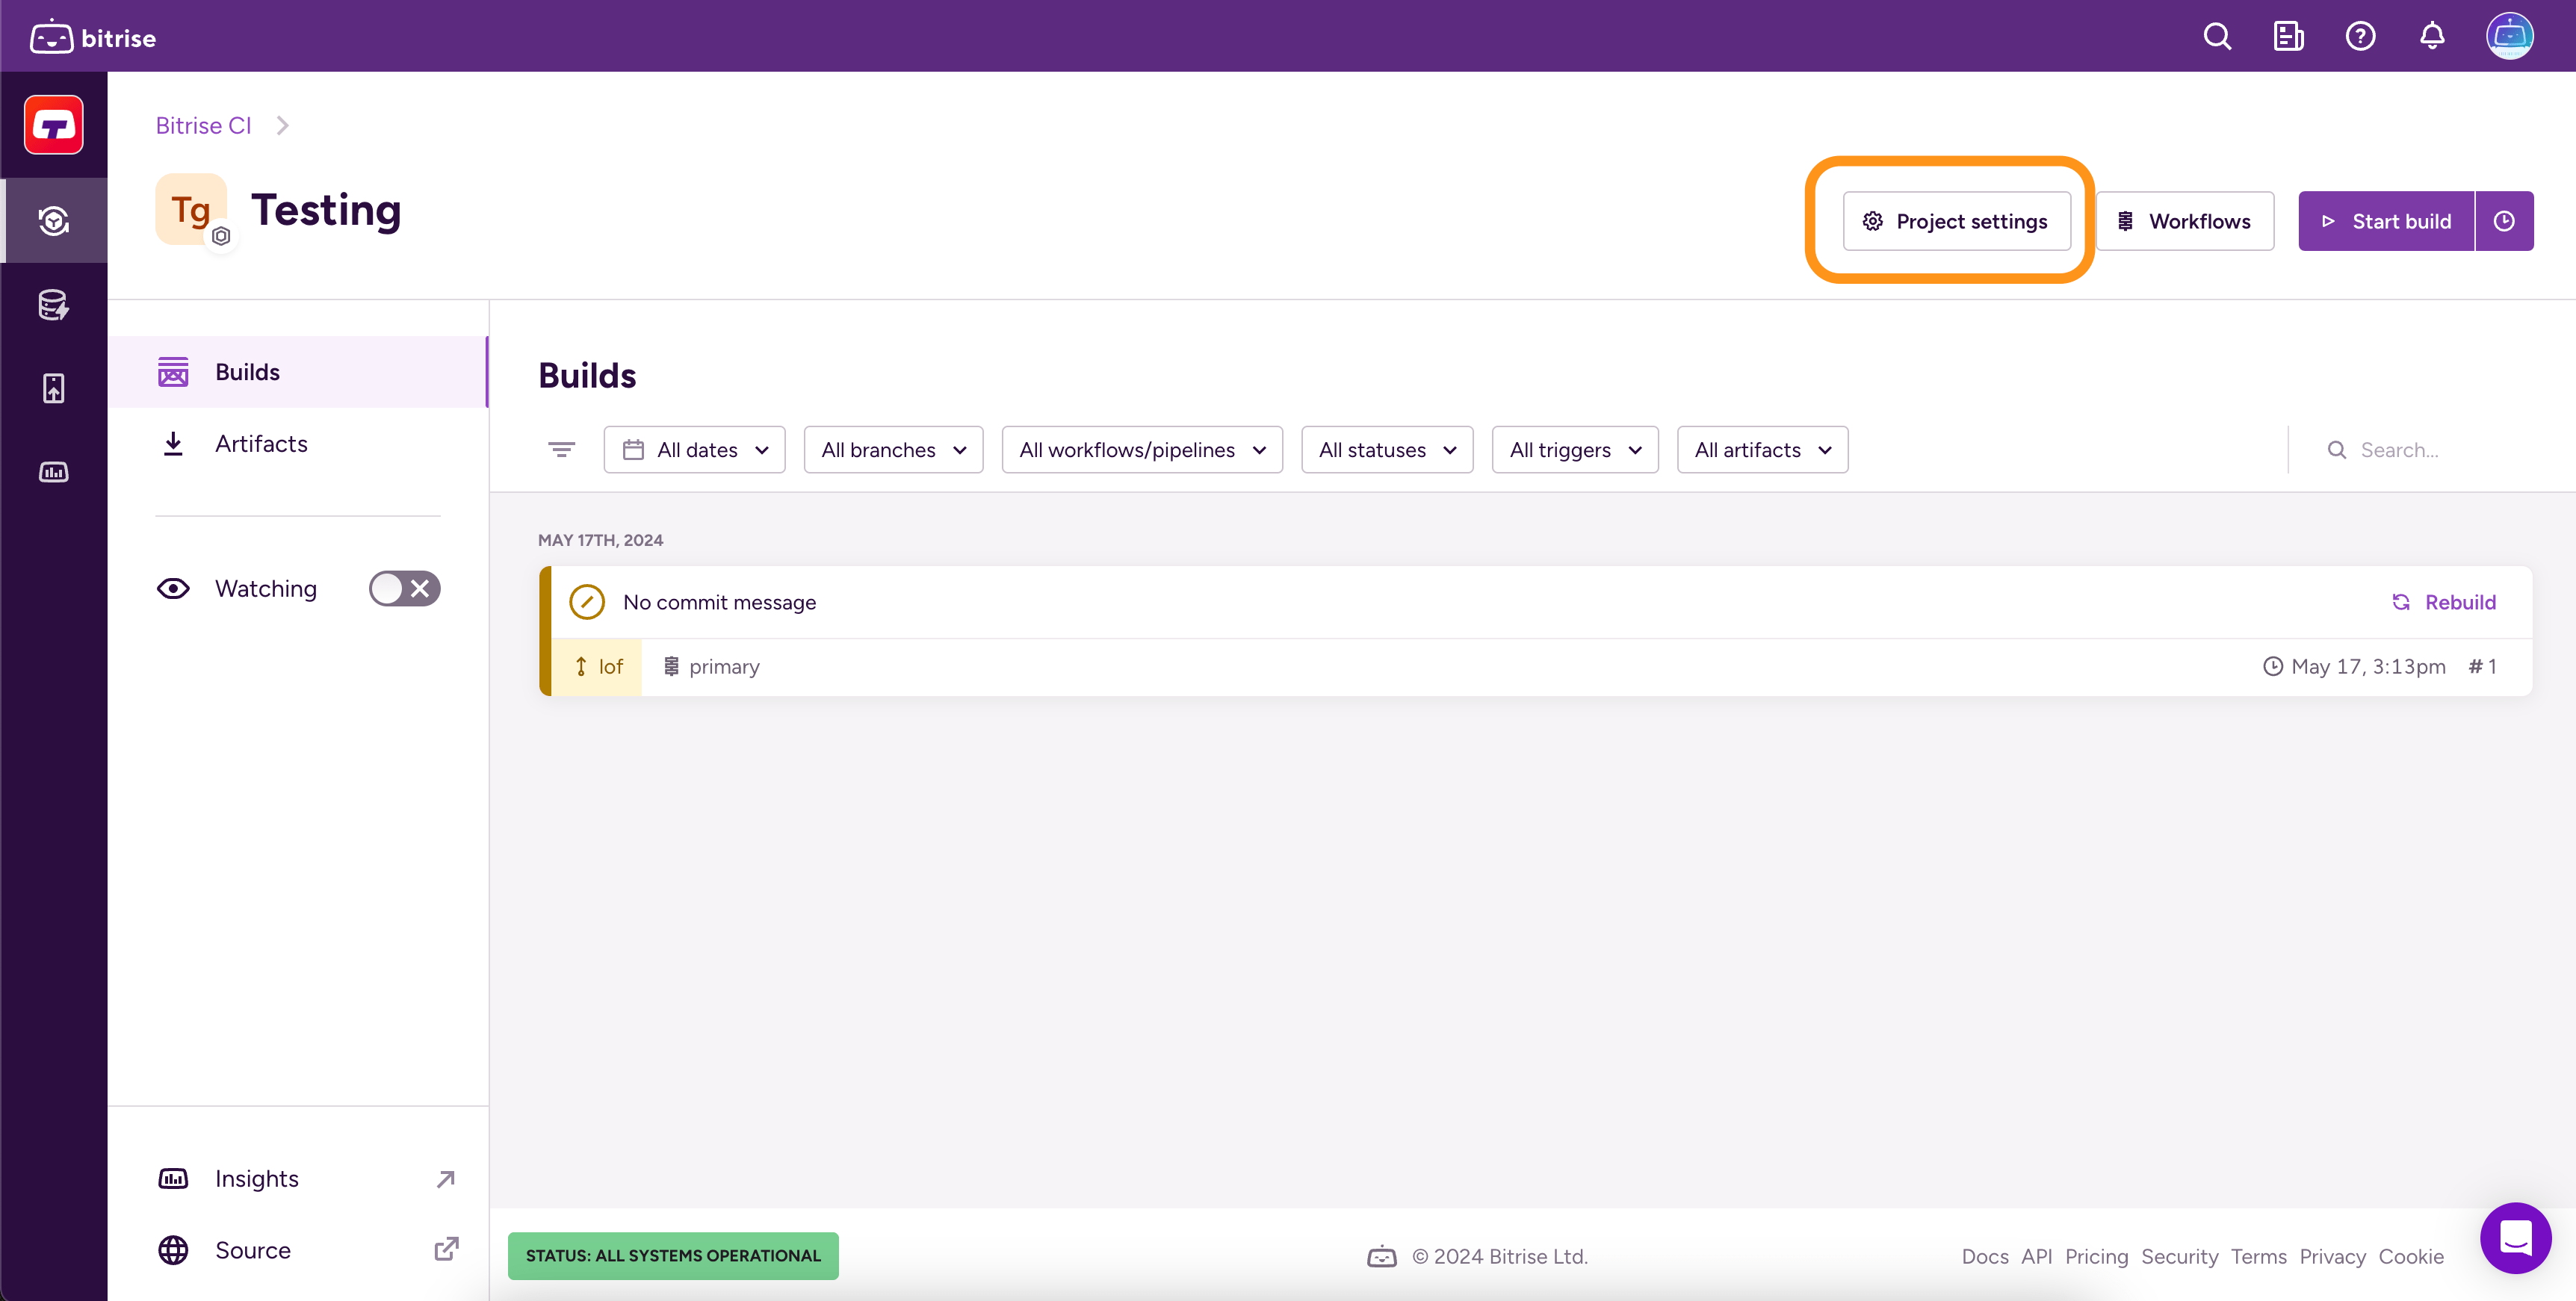
On the main page of the project, click on the Project settings button.
-
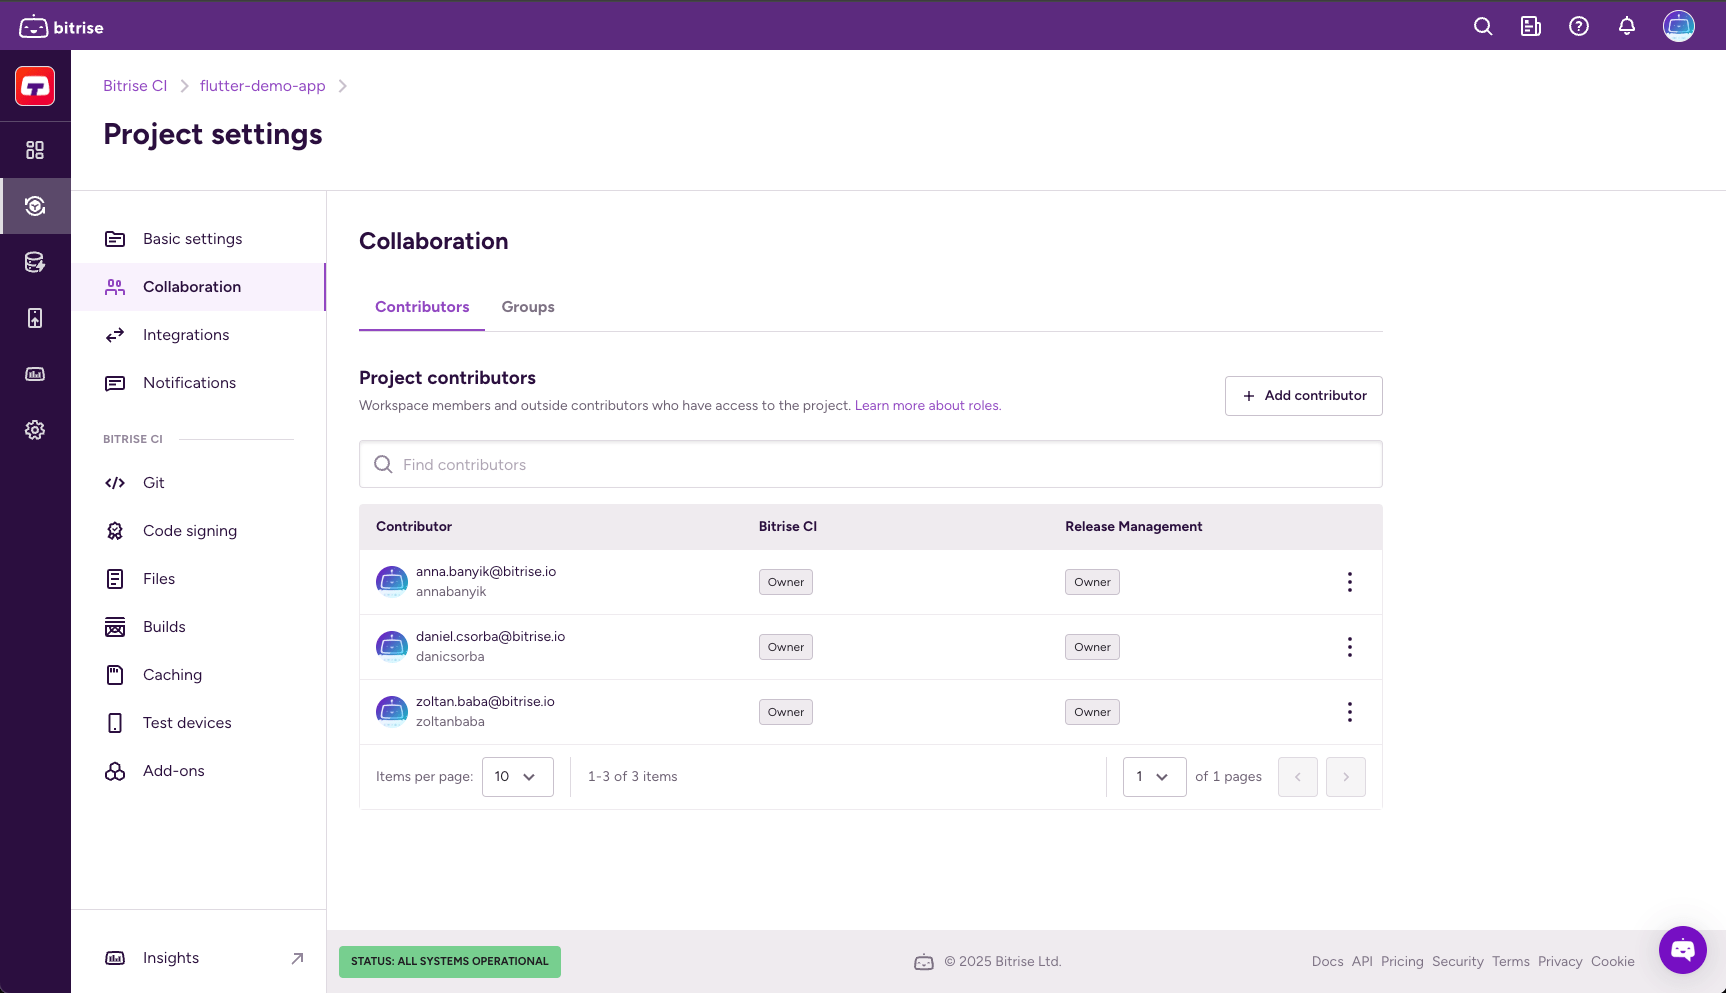
From the menu on the left, select Collaboration.
-
Go to the tab.
-
Click .
-
Select Add outside contributor
-
Type their email address and select their role.
If they are not registered on Bitrise, we will send out an invitation email for them.
-
Click .
-
Configure product access by enabling one or more toggles and then selecting a role in the dialog. You have the option to grant universal access or to set roles on a product basis:
-
Admin access allows the contributor to manage all aspects of the project, including both the Bitrise CI configuration and the Release Management apps. Note that this gives full access to an outside contributor!
-
Select a product to assign the contributor specific roles that only apply to that product. If the project doesn't have a CI configuration or a Release Management app, the respective option won't be available.
-
-
Click .
Adding Workspace groups to a project
Assigning a workspace group to a project means that all members of that workspace group will have the same role on the project. Roles are different based on product access: both Bitrise CI and Release Management have their own roles.
Let’s say the workspace called TestSpace owns a project called TestProject. TestOrg has the following groups:
-
Group Alpha: they are assigned to TestProject with an Admin role. Members of this group can assign other groups to the project or add outside contributors, change project settings, manage roles and Workflows.
-
Group Beta: they are assigned to TestProject with a Developer role. Members of this group can run builds, view build logs and view builds.
-
Group Gamma: they are assigned to TestProject with a Tester/QA role. They can only view builds.
There are two ways to assign workspace groups to a Bitrise project:
-
You can assign it from the menu of the Workspace settings page.
-
You can assign it on the Project settings page of the project.
Assigning a group from the Workspace settings page
-
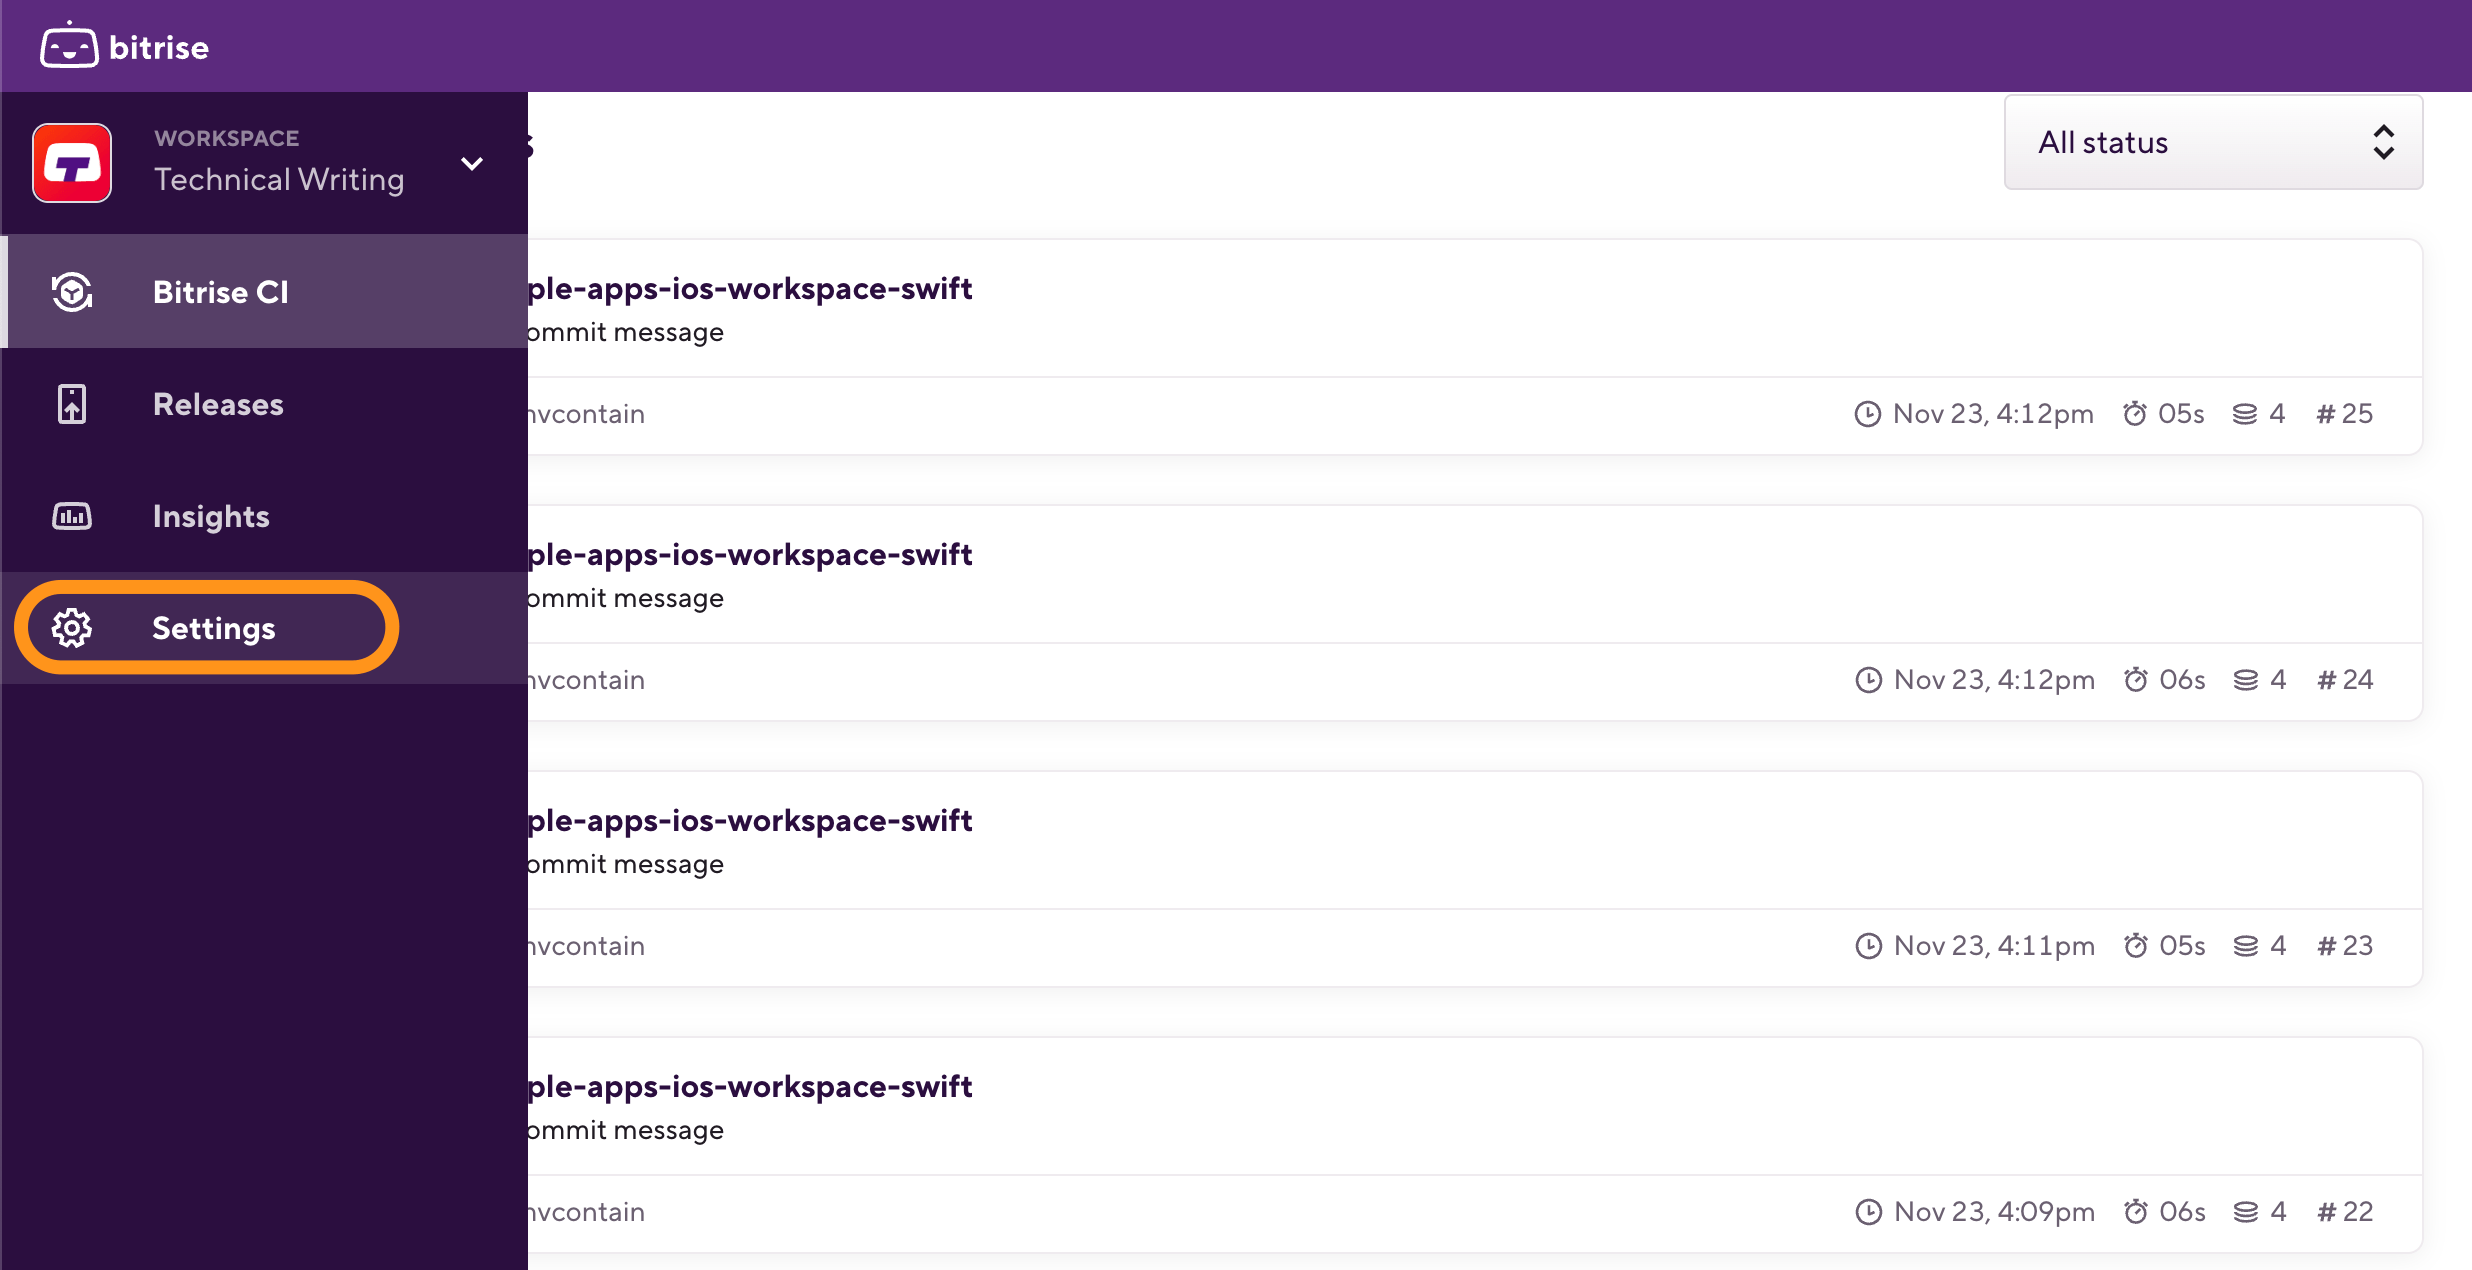
Log in to Bitrise and hover over the left navigation bar.
-
Make sure you have the right workspace selected in the Workspace menu.
-
Select Settings.
-
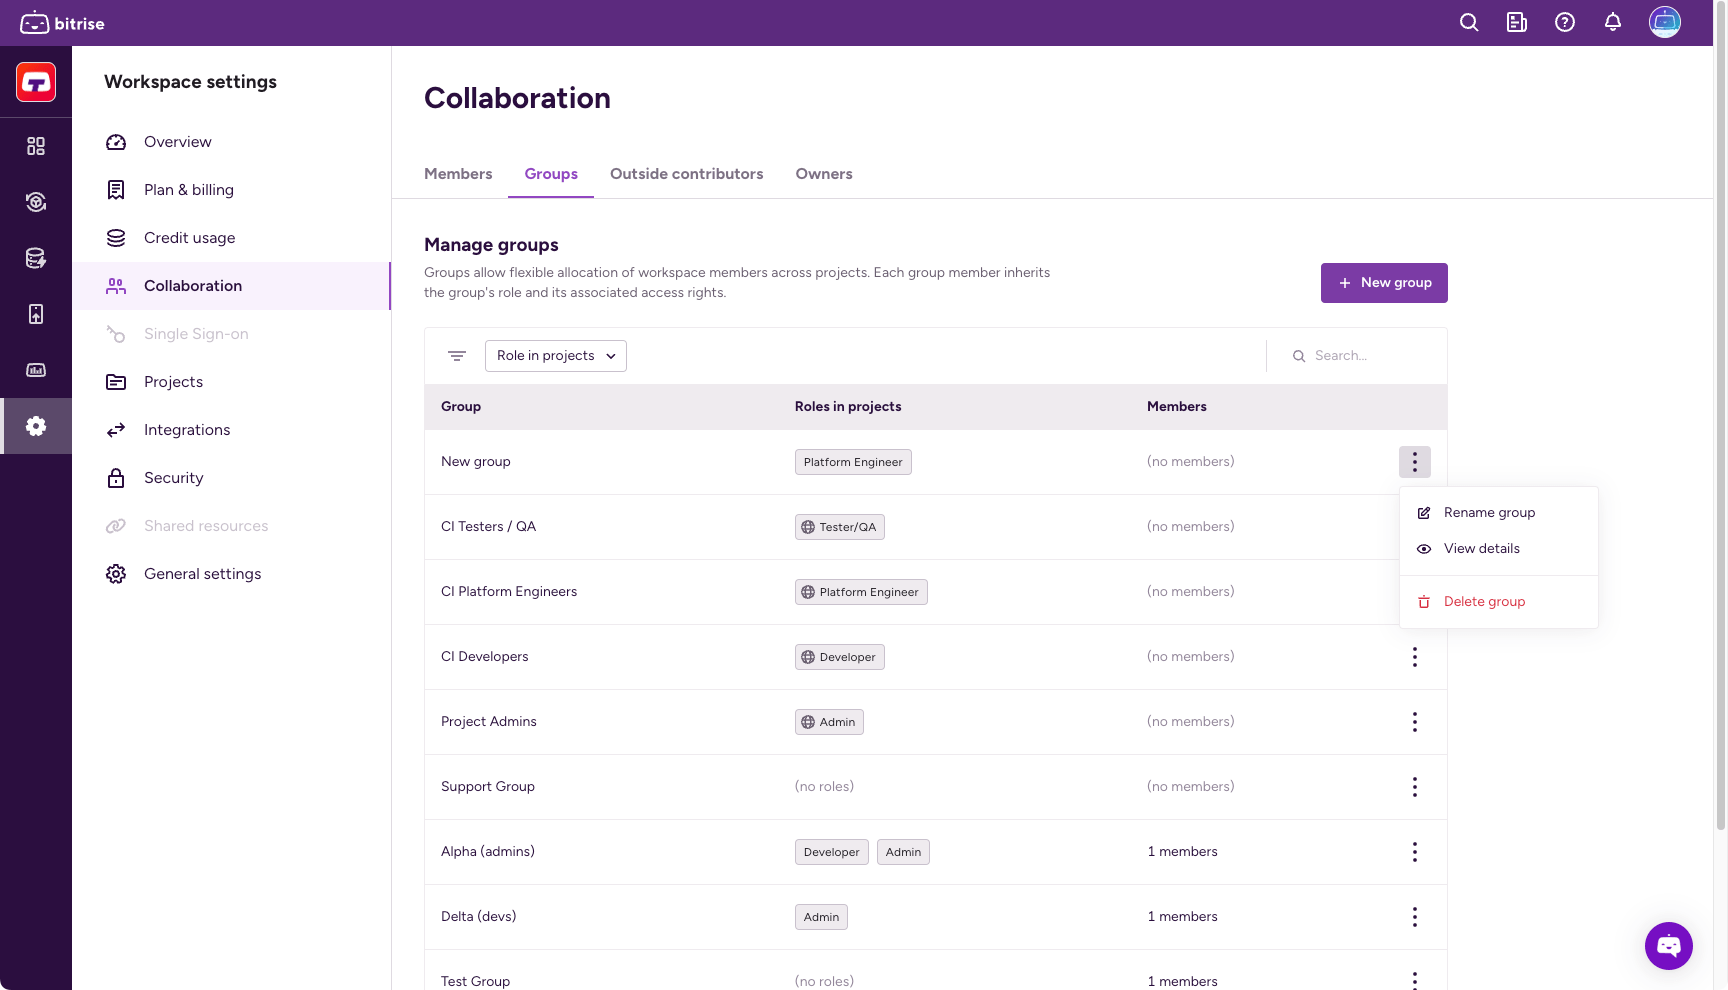
On the left, select Collaboration then go to the Groups tab.
-
Choose the group you wish to assign, and click the dropdown menu indicated by the
 symbol.
-
Select View details and go to the Projects tab.
-
Click .
-
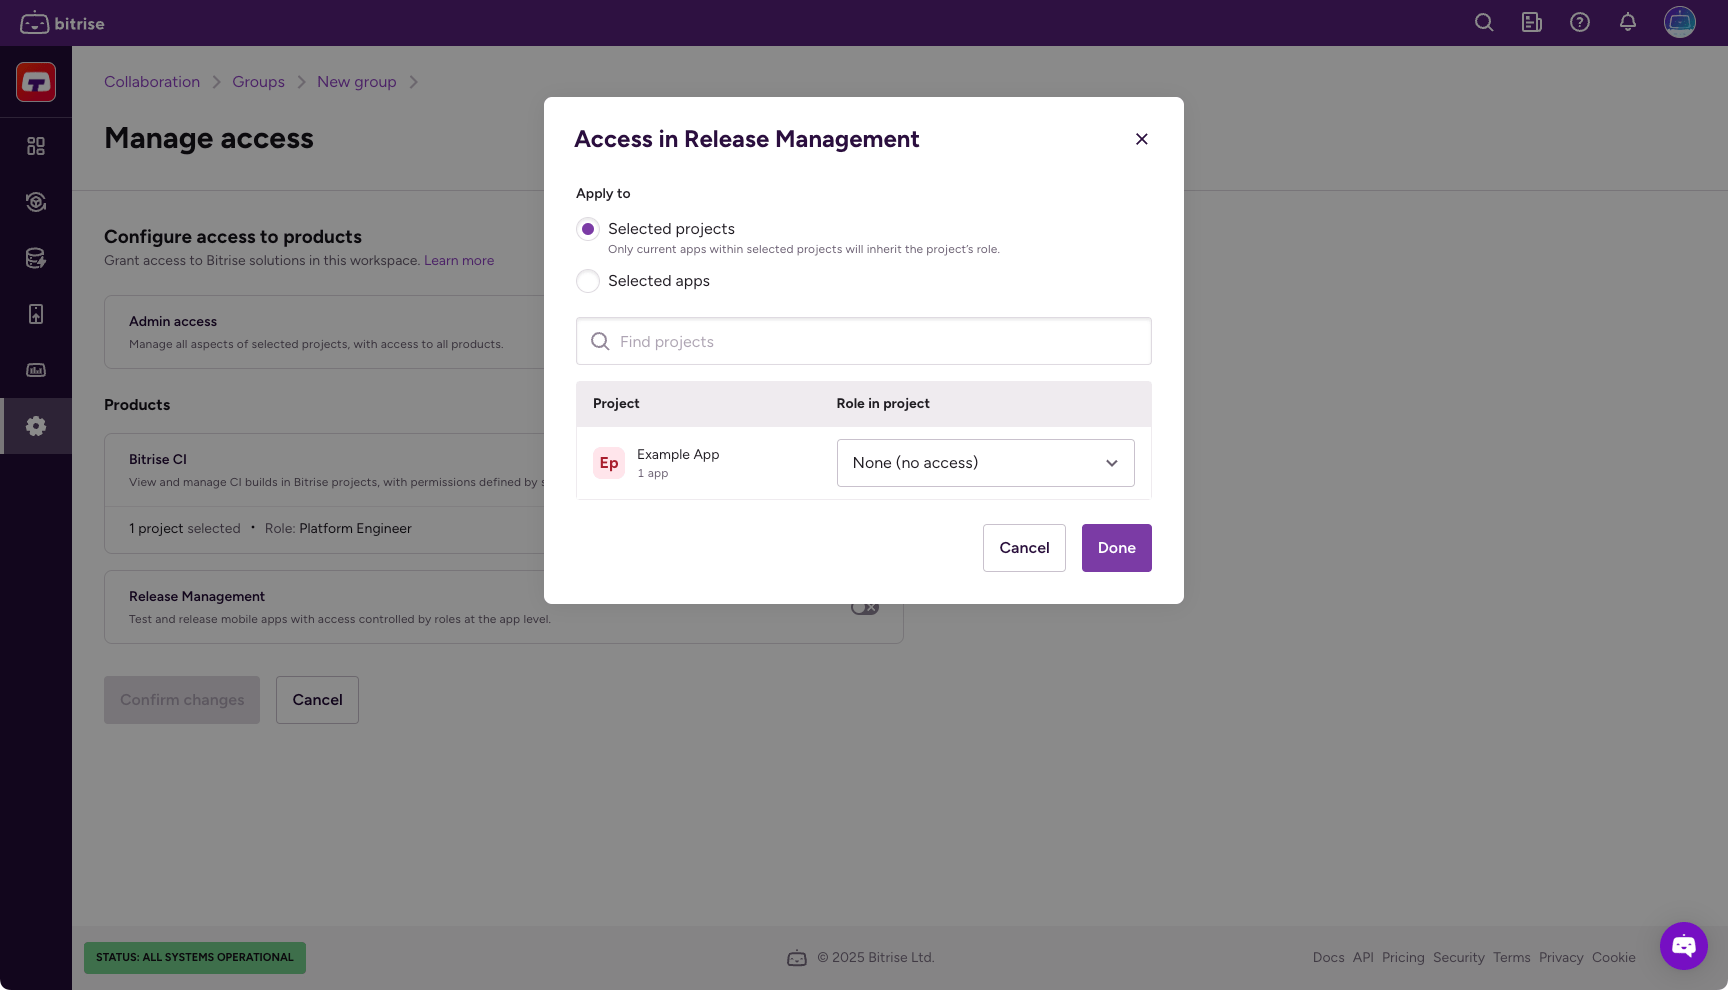
Configure product access by enabling one or more toggles and then selecting a role for your project in the dialog. You have the option to grant universal access or to set roles on a product basis:
-
Admin access allows the contributor to manage all aspects of the project, including both the Bitrise CI configuration and the Release Management apps. Note that this gives full access to an outside contributor!
-
Select a product to assign the group specific roles that only apply to that product. If the project doesn't have a CI configuration or a Release Management app, the respective option won't be available.
Role cheatsheets
You can check out the role cheatsheets here: .
-
-
Click to finalize changes.
Assigning a group from the Project settings page
-
Open your project on Bitrise with a user that has the Admin role on the project.
-
On the main page of the project, click on the Project settings button.

-
On the left, select Collaboration.
-
Go to the tab.
-
Click on .
-
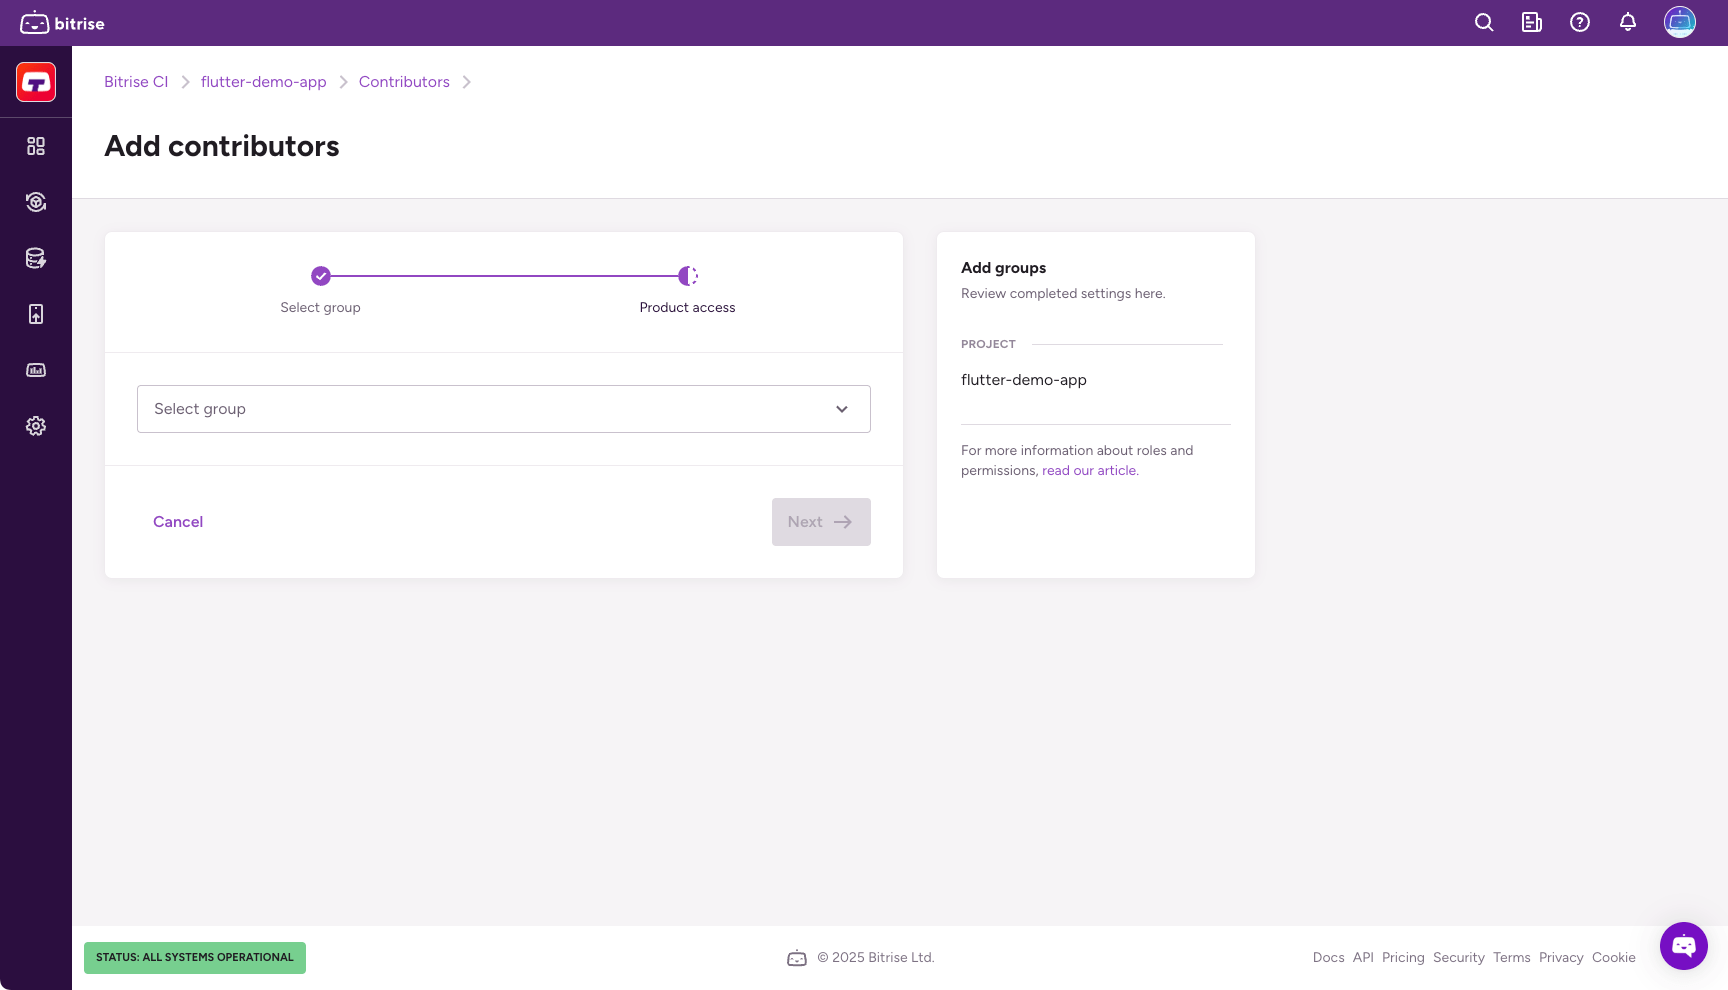
In the dropdown menu, select the group you need then click .
-
Configure product access by enabling one or more toggles and then selecting a role in the dialog. You have the option to grant universal access or to set roles on a product basis:
-
Admin access allows the group members to manage all aspects of the project, including both the Bitrise CI configuration and the Release Management apps.
-
Select a product to assign the group specific roles that only apply to that product. If the project doesn't have a CI configuration or a Release Management app, the respective option won't be available.
-
-
Click .
Revoking access to a project from a group
-
Open your project on Bitrise with a user that has the Admin role on the project.
-
On the main page of the project, click on the Project settings button.

-
From the menu on the left, select Collaboration.
-
Go to the Group tab.
-
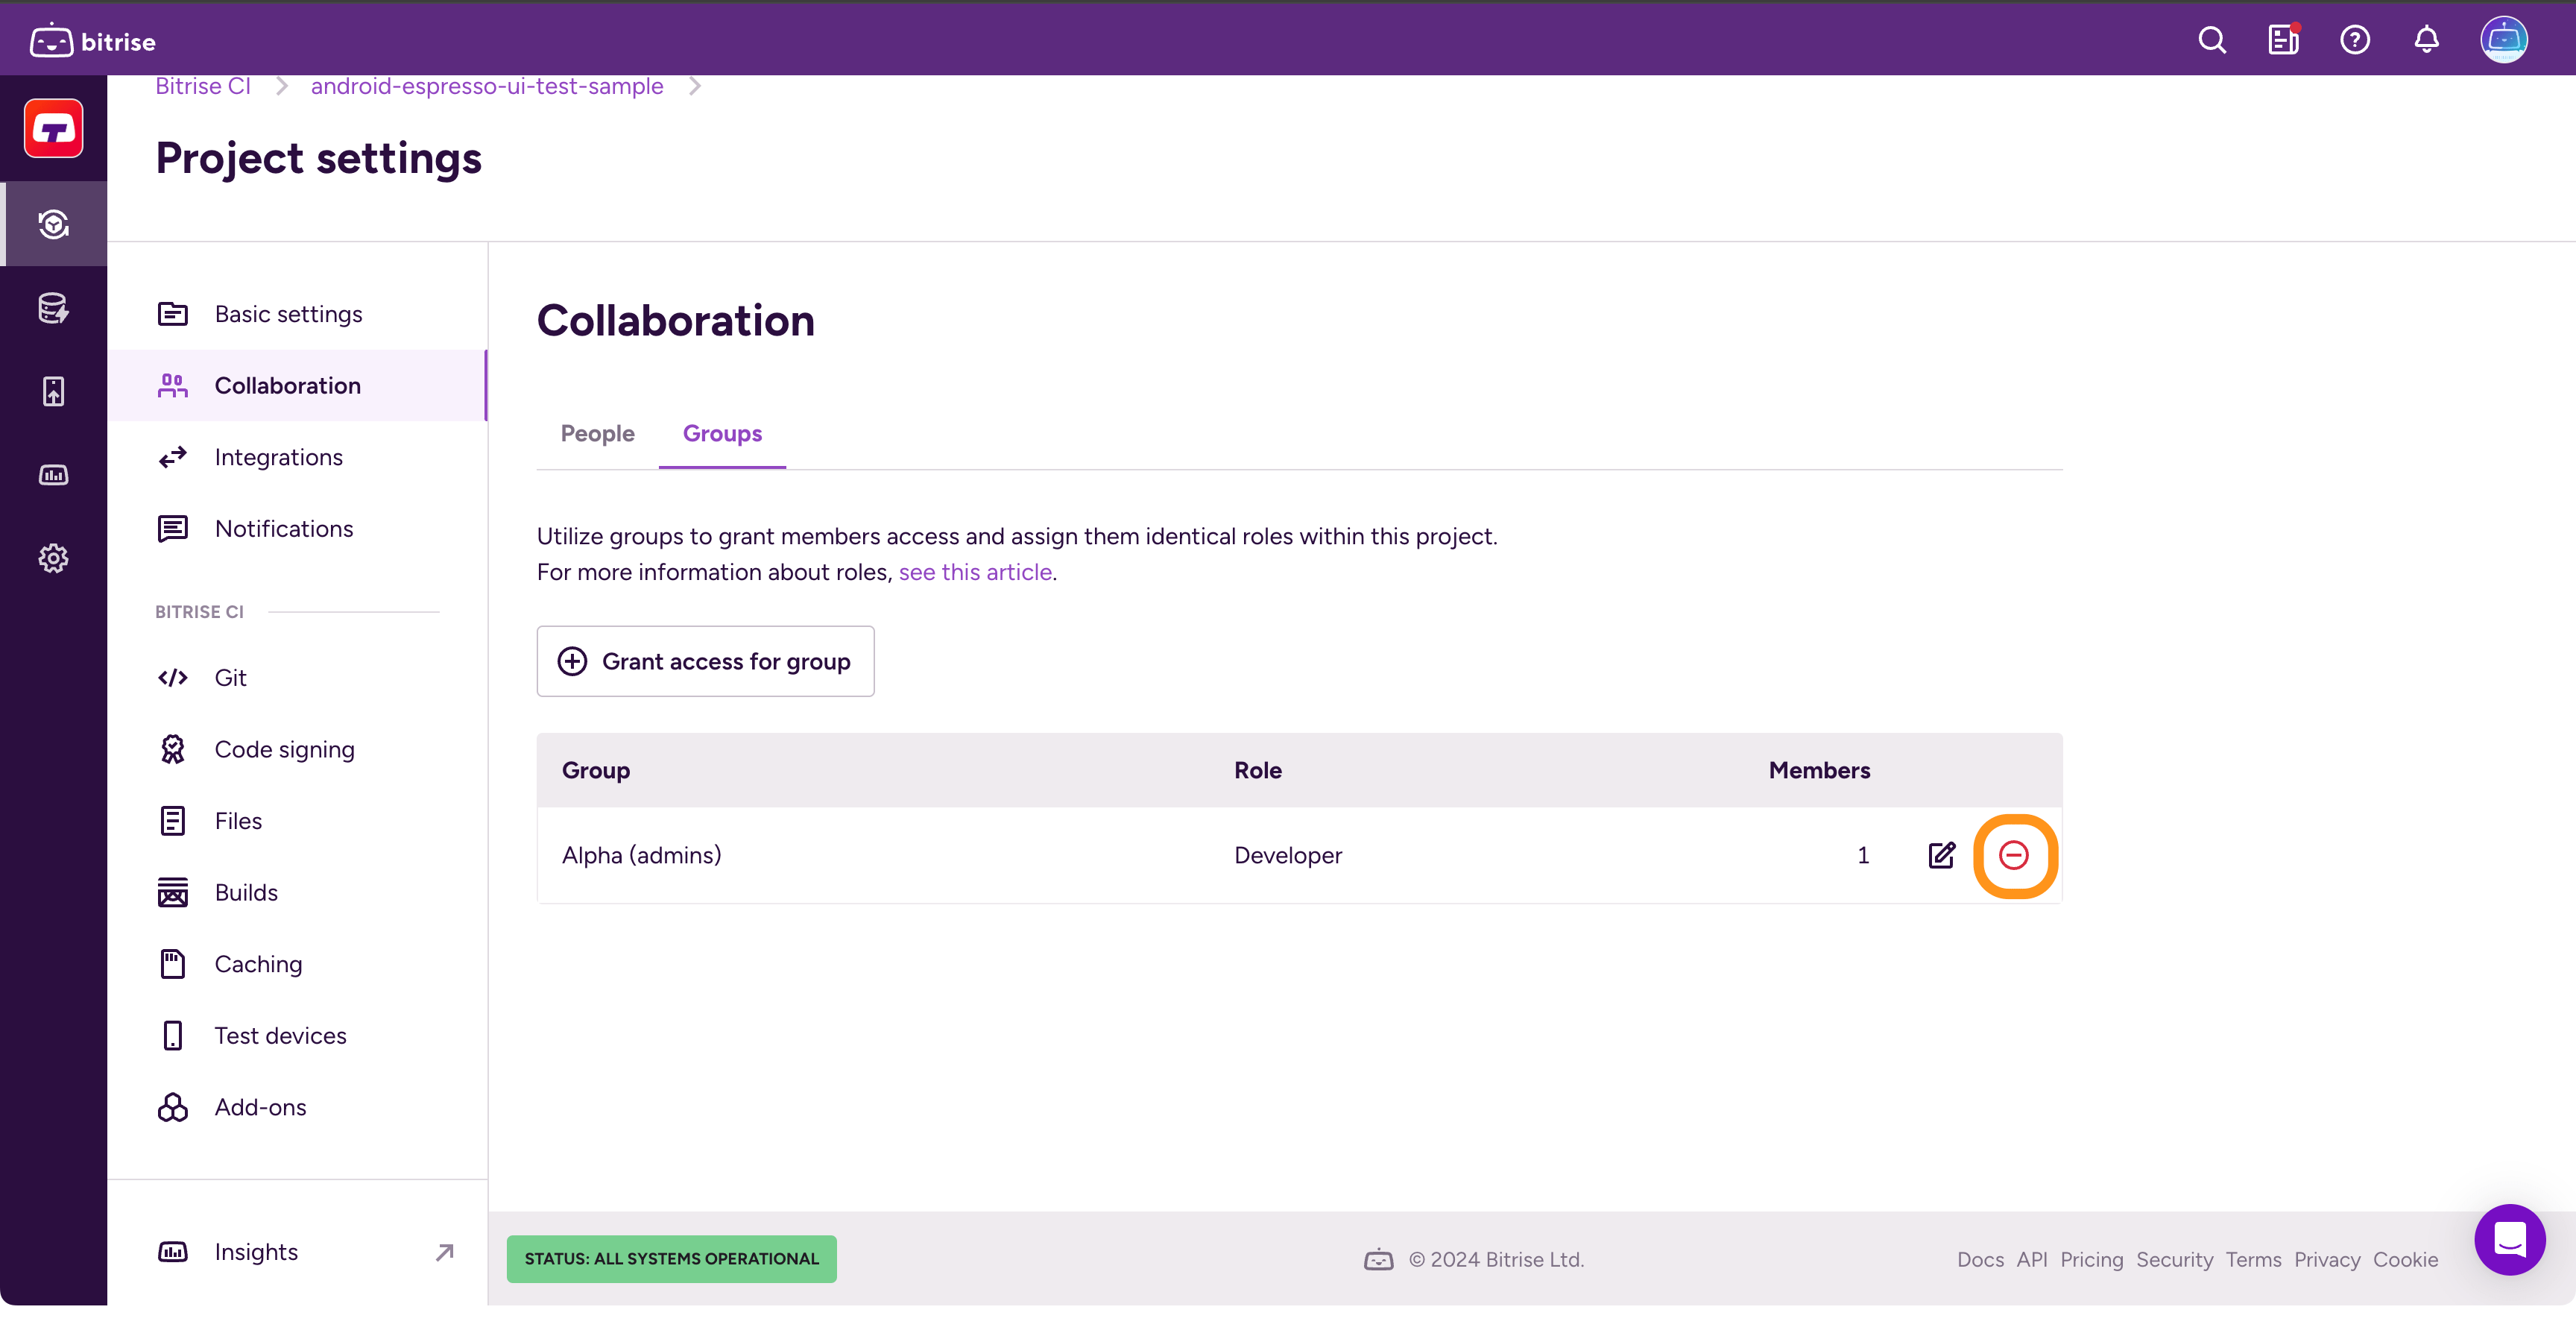
Search for the group you would like to remove and click "
 ".
".
-
Click in the dialog to revoke the group's access from the project.
Revoking access to a project from a single user
-
Open your project on Bitrise with a user that has the Admin role on the project.
-
On the main page of the project, click on the Project settings button.

-
From the menu on the left, select Collaboration.
-
Go to the Contributors tab.
-
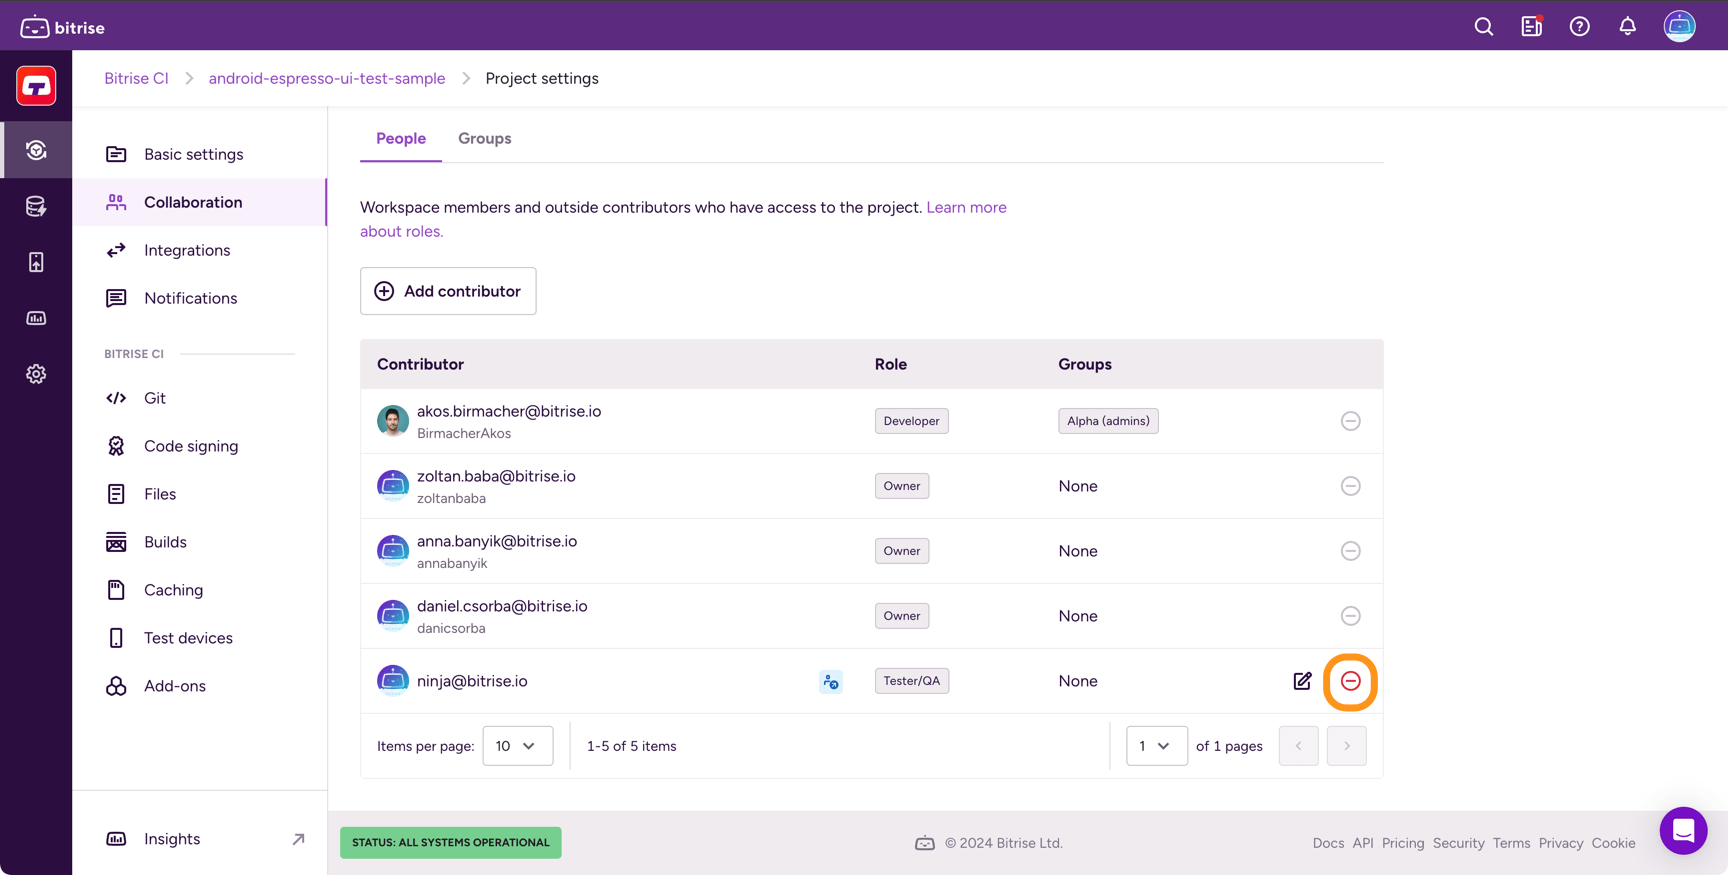
Find the user you would like to remove and click "
 ".
".
-
Click in the dialog.