Pipelines with stages
Pipelines with stages are the older way of configuring Pipelines. We recommend switching to the new way where you can define Workflow dependencies to create more flexible configurations, and you no longer have to waste time waiting for a stage to finish.
Pipelines with stages are the older way of configuring Pipelines. We recommend switching to the new way where you can define Workflow dependencies to create more flexible configurations, and you no longer have to waste time waiting for a stage to finish.
You can convert a Pipeline with stages into the new format: Converting a Pipeline with stages into a graph Pipeline.
However, if you need to, you can keep using Pipelines with stages. Such Pipelines have three main building blocks:
-
Steps: Blocks of script execution, each defining a single task in a CI/CD process.
-
Workflows: Collections of Steps. When a build of an app is running, the Steps will be executed in the order that is defined in the Workflow.
-
Stages: Collections of Workflows. A Stage can contain multiple Workflows which all run in parallel in the same Stage. If all Workflows are successful in a Stage, the Pipeline moves on to the next Stage. If any of the Workflows fail, the Pipeline ends without running the other Stages unless you configure a given Stage to always run.
Configuring a Pipeline with stages
Configuring a Pipeline that contains stages is only possible by directly editing the bitrise.yml file. You can create and modify Workflows in the graphical Workflow Editor but you need to define Pipelines and Stages in YAML format.
Defining Pipelines with stages
The bitrise.yml file contains the full configuration of your Pipelines. As with all bitrise.yml files, first you need to define the format version and the project type.
---
format_version: '8'
default_step_lib_source:
project_type: android
This is a bare minimum bitrise.yml configuration. To define your Pipelines, you will need to use the pipelines attribute.
pipelines:
  pipeline-successful:
    stages:
    - stage-successful-1: {}
    - stage-successful-2: {}
    - stage-successful-3: {}
In this example, we have a Pipeline called pipeline-successful, with three Stages that will run consecutively. This means that if stage-successful-1 finishes successfully, stage-successful-2 starts. If any of the Stages fail, the subsequent Stage
will not start: instead, the Pipeline will be aborted and marked as failed.
Each Stage has to be defined separately under the stages attribute. Defining a Stage means specifying the Workflows that are part of the Stage.
stages:
  stage-successful-1:
    workflows:
    - test-1: {}
  stage-successful-2:
    workflows:
    - build-1: {}
    - build-2: {}
  stage-successful-3:
    workflows:
    - deploy-1: {}
    - deploy-2: {}
In this example, the Stages run the test-1, build-1, build-2, deploy-1, and deploy-2 Workflows.
Configuring a Stage to always run
By default, if a Stage fails - because one of its Workflows failed -, any other subsequent Stages of the Pipeline will not run. However, you can configure your Pipeline to run certain Stages unless the Pipeline is aborted.
To do so, you just need to set the should_always_run attribute of the Stage to true:
stages:
  stage-always-run-successful-1:
    should_always_run: true
    workflows:
    - deploy-1: {}
    - deploy-2: {}
In the example above, the Stage called stage-always-run-successful-1 will always run, regardless of the status of previous Stages. The only way these Stages will not run is if the Pipeline build is aborted by the user.
Aborting the Workflows of a failed Stage
By default, if a Workflow in a particular Stage fails, the other Workflows in the same Stage aren’t automatically aborted: these Workflows will run but the next Stage won’t start. However, you can change this behavior to immediately and automatically abort all other Workflows in the same Stage.
To do so, you need to set the abort_on_fail attribute to true:
stages:
  stage-abort-on-fail-1:
    abort_on_fail: true
    workflows:
    - deploy-1: {}
    - deploy-2: {}
Sharing Env Vars between Pipeline Stages
You can reuse any environment variable from a Workflow and reuse it in subsequent Workflows using the Share Pipeline variables Step.
Optional Workflows using run_if conditions
You can easily combine the Share Pipeline variables Step with run_if expressions to create Pipelines with optional Workflows. For more information, check out Enabling or disabling a Step conditionally.
To do so:
-
Add the Share Pipeline variables Step to the Workflow.
-
Optionally, you can define additional run conditions in the Additional run conditions input. The Step will only run if the conditions you specify here are true.
-
Add the Env Var(s) you would like to use in subsequent Workflows in the Variables to share between Pipeline Workflows input.
Using environment variable keys
You can define Env Vars using a
{key}={value}syntax. For example,MY_ENV_KEY=value, orINSTALL_PAGE_URL=$BITRISE_PUBLIC_PAGE_URL.If you want to use the default environment variable keys, you can use a shorthand syntax. For example,
EXISTING_ENV_KEY.Sharing Env Vars using this Step does not override existing Env Vars defined in the app.
That's it! You can now use the Env Var in any subsequent Stage!
Currently supported use cases for the iOS platform
We have prepared some Pipeline recipes based on common iOS use cases. These contain some of the most frequent tasks our users need to run.
(iOS) Run tests in parallel on multiple simulators
Description
This example uses the sample-swift-project-with-parallel-ui-test iOS Open Source sample app, which has some example Unit and UI tests and uses Test Plans to group the tests.
The example Pipeline config showcases how to run all the test cases of the project on different iOS simulators.
run_tests_on_simulators Pipeline runs two Stages sequentially:
-
build_tests stagethat runs thebuild_testsWorkflow. This Workflow git clones the sample project and runs thexcode-build-for-testStep to build the target and associated tests. The built test bundle is transferred to the next Stage (run_tests_on_simulators) via thedeploy-to-bitrise-ioStep.The build test bundle is compressed
xcode-build-for-testStep compresses the built test bundle and moves the generated zip to the$BITRISE_DEPLOY_DIR. That directory’s content is deployed to the Workflow artifacts by default via thedeploy-to-bitrise-ioStep.Artifact file size limitation
There is no limitation on the number of files deployed to Artifacts per build. There is a limitation, however, on the file size which is 2GB per file.
-
run_tests_on_simulatorsStage runs three Workflows in parallel:run_tests_iPad,run_tests_iPhone, andrun_tests_iPod. Both of these Workflows use the newxcode-test-without-buildingStep, which executes the tests based on the previous stage built test bundle. The pre-built test bundle is pulled by the_pull_test_bundleutility Workflow.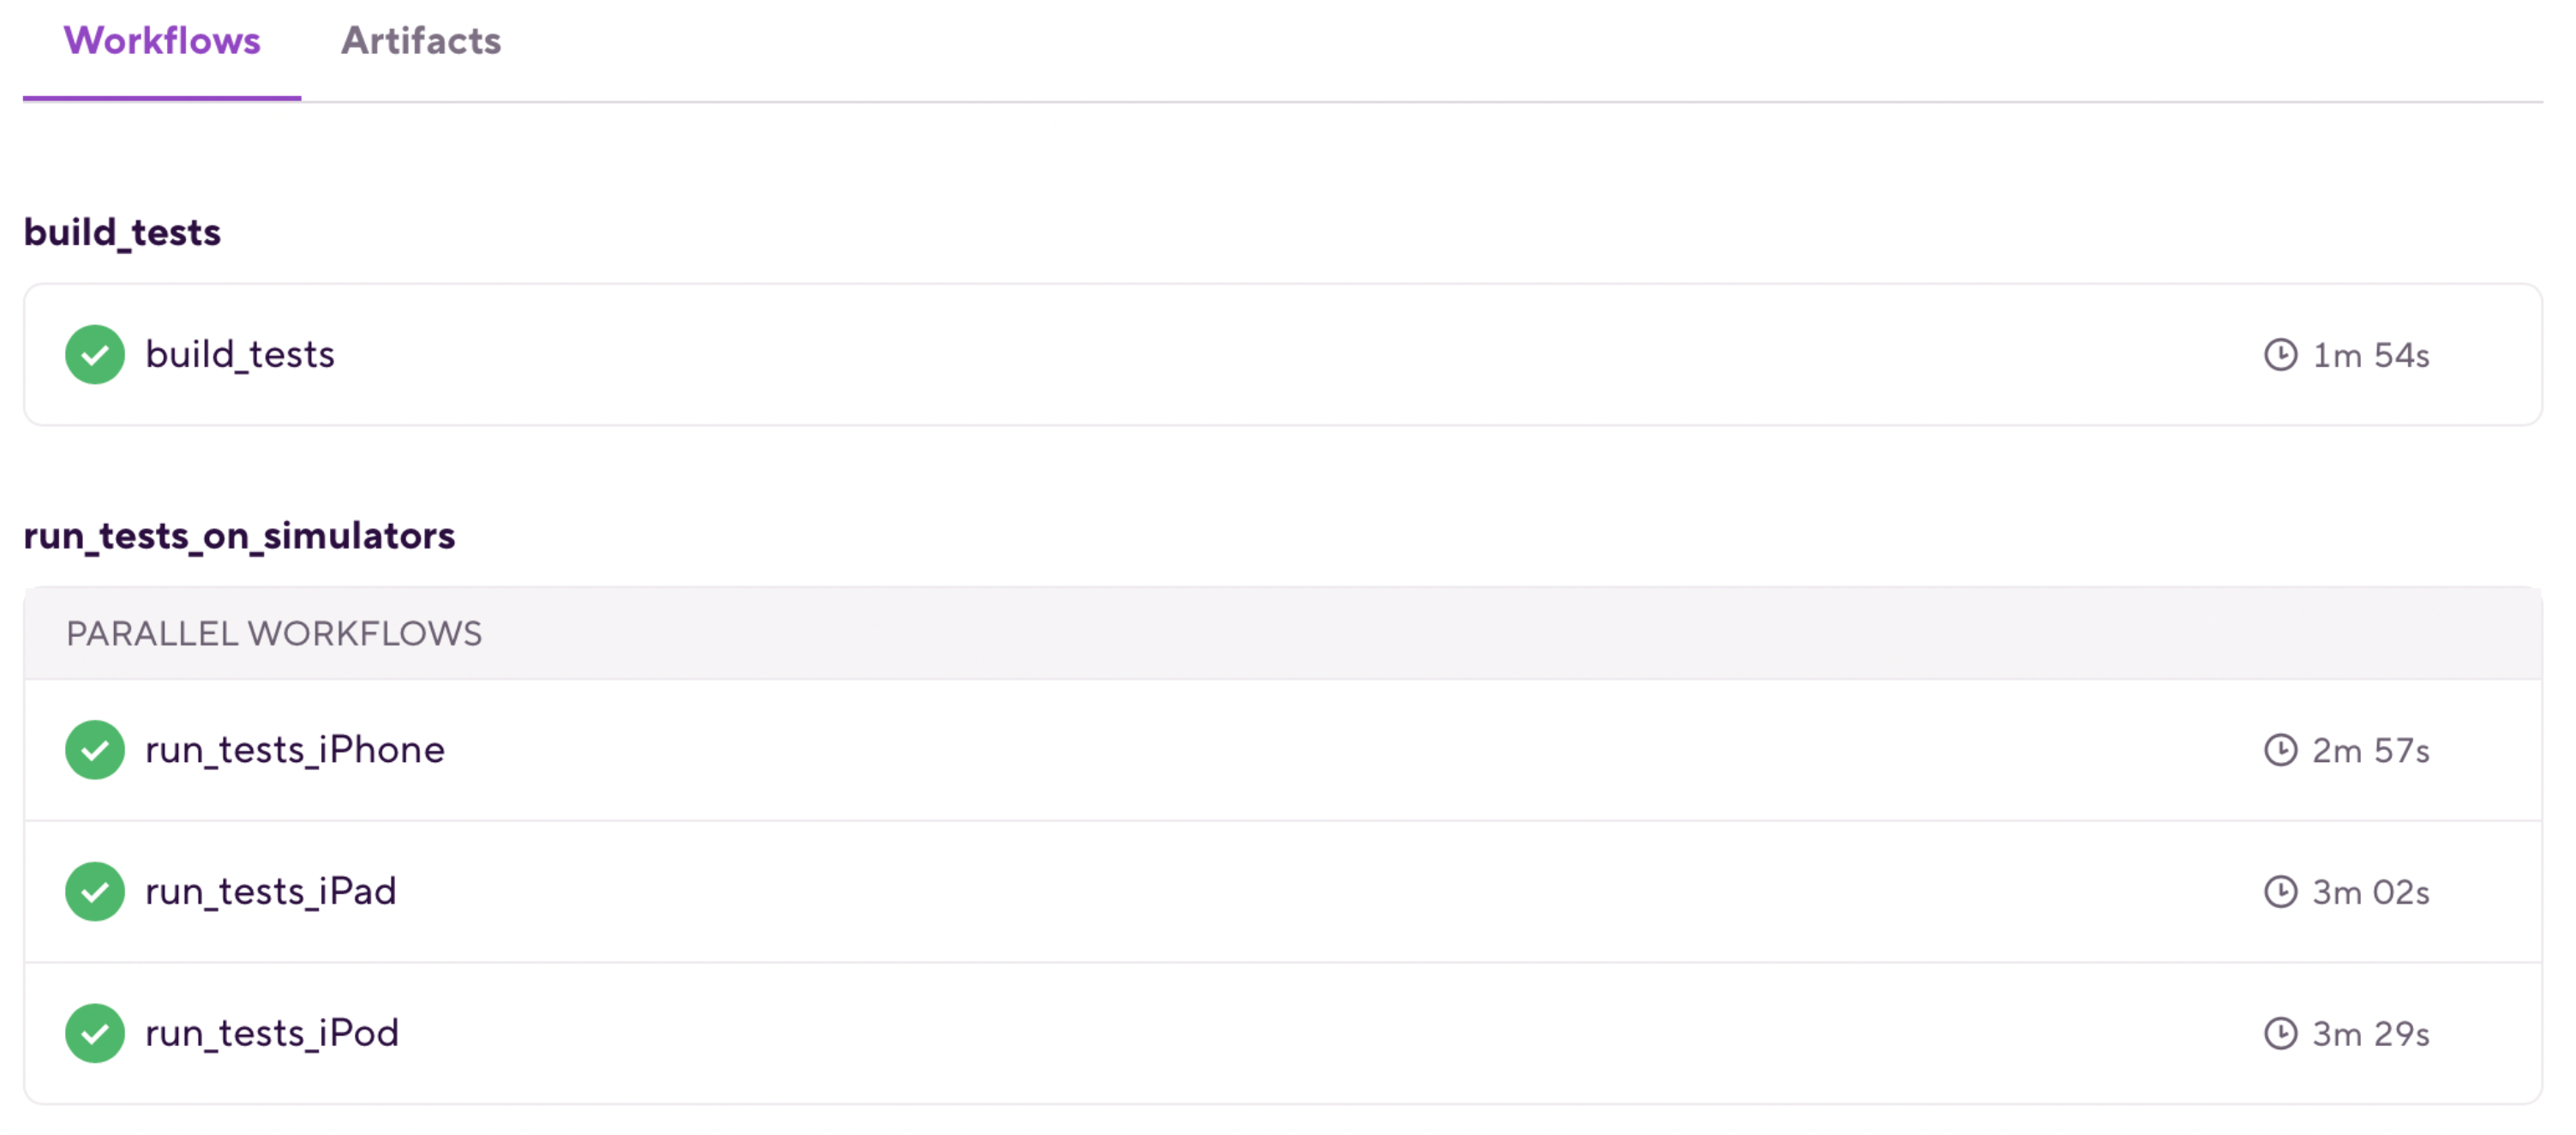
Instructions
To test the configuration in a new Bitrise example project, do the following:
-
Visit the Create New App page to create a new App.
-
When prompted to select a git repository, choose Other/Manual and paste the sample project repository URL (
https://github.com/bitrise-io/sample-swift-project-with-parallel-ui-test) in the Git repository (clone) URL field. -
Confirm that this is a public repository in the resulting pop-up.
-
Select the
masterbranch to scan. -
Wait for the project scanner to complete.
-
Select any of the offered Distribution methods (for example , it does not really matter as now we are focusing on testing).
-
Confirm the offered stack, skip choosing the app icon and the webhook registration and kick off the first build.
-
Open the new Bitrise project’s Workflow Editor.
-
Go to the bitrise.yml tab and replace the existing
bitrise.ymlwith the contents of the examplebitrise.ymlfile. -
Click the button, and select the option in the “Workflow, Pipeline” dropdown menu at the bottom of the popup.
bitrise.yml
(iOS) Run test groups in parallel
Description
This example uses the sample-swift-project-with-parallel-ui-test iOS Open Source sample app, which has some example Unit and UI tests and uses Test Plans to group the tests.
XCode test plans
Xcode Test Plans provide a way to run a collection of tests with different test configurations. raywenderlich.com has a great tutorial on how to get started with Xcode Test Plans.
The example Pipeline config showcases how to run different test groups in parallel.
run_tests_groups Pipeline runs two Stages sequentially:
-
build_testsStage that runs thebuild_testsWorkflow. This Workflow git clones the sample project and runs thexcode-build-for-testStep to build the target and associated tests. The built test bundle is transferred to the next Stage (run_tests_groups) via thedeploy-to-bitrise-ioStep. -
run_tests_groupsStage runs two Workflows in parallel:run_ui_testsandrun_unit_tests. Both of these Workflows use the new xcode-test-without-buildingStep, which executes the tests based on the previous Stage built test bundle. The pre-built test bundle is pulled by the_pull_test_bundleutility Workflow.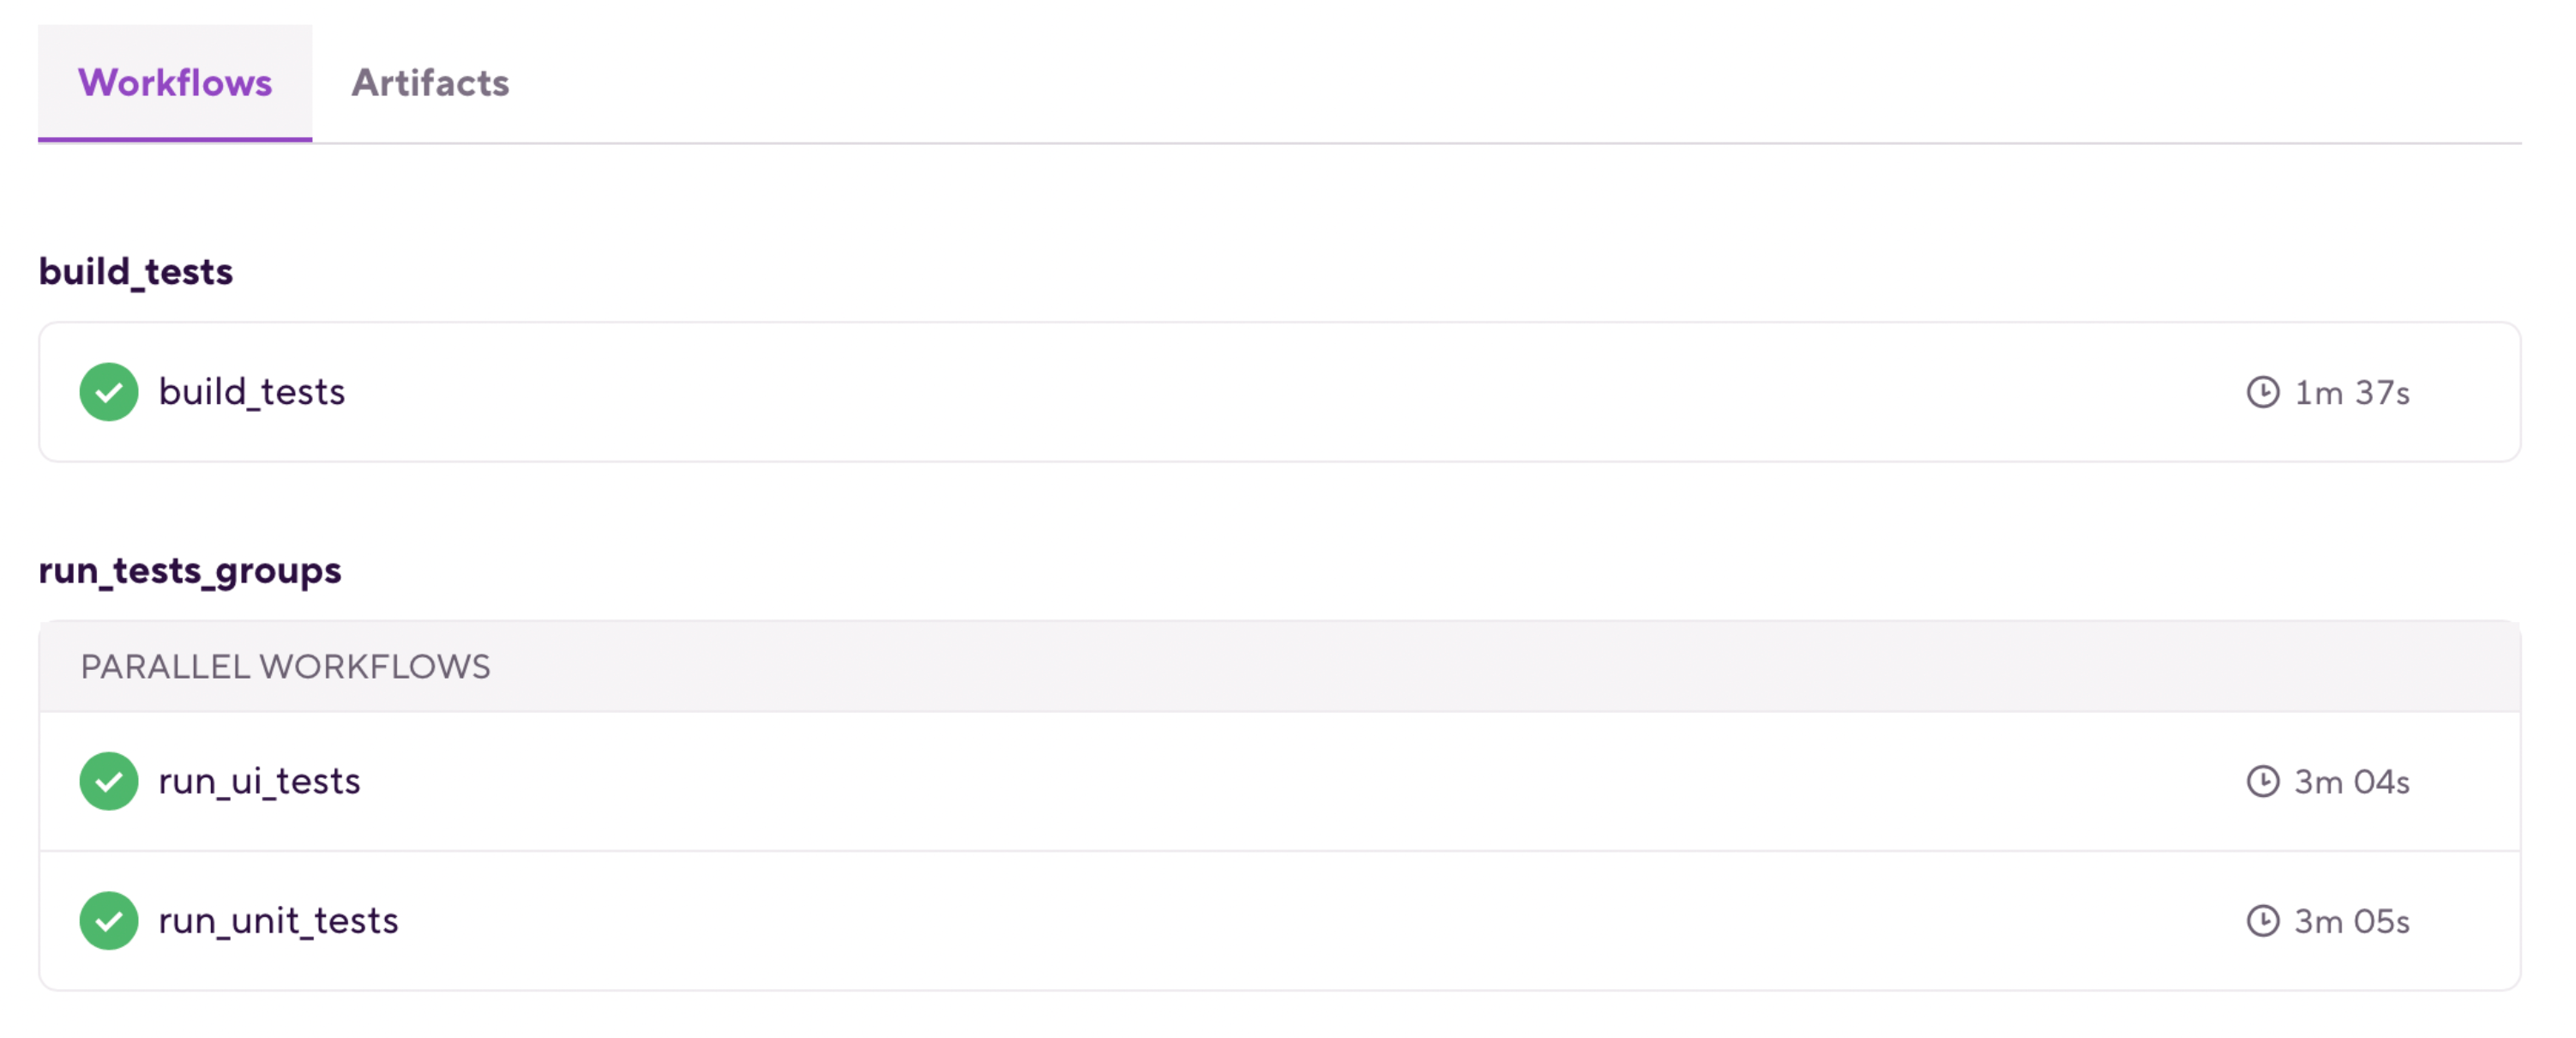
Instructions
-
Visit the Create New App page to create a new App.
-
When prompted to select a git repository, choose Other/Manual and paste the sample project repository URL (
https://github.com/bitrise-io/sample-swift-project-with-parallel-ui-test) in the Git repository (clone) URL field. -
Confirm that this is a public repository in the resulting pop-up.
-
Select the
masterbranch to scan. -
Wait for the project scanner to complete.
-
Select any of the offered Distribution methods (for example , it does not really matter as now we are focusing on testing).
-
Confirm the offered stack, skip choosing the app icon and the webhook registration and kick off the first build.
-
Open the new Bitrise project’s Workflow Editor.
-
Go to the bitrise.yml tab and replace the existing
bitrise.ymlwith the contents of the examplebitrise.ymlfile. -
Click the button, and select the
run_tests_groupsoption in the “Workflow, Pipeline” dropdown menu at the bottom of the popup.
bitrise.yml
GitHub link: https://github.com/bitrise-io/workflow-recipes/blob/main/recipes/ios-run-test-groups-in-parallel.md#bitriseyml
Currently supported use cases for the Android platform
We have prepared some Pipeline recipes based on common Android use cases. These contain some of the most frequent tasks our users need to run. The examples include entire Workflows that can be copied and pasted for the most part.
(Android) Run UI tests in parallel on multiple devices or shards
Description
Running the UI (instrumentation) tests of a single module in parallel Workflows utilizing pipelines. You can run the tests in parallel by shards or by devices.
The Pipeline contains two Stages that are run serially:
-
build_for_ui_testing: This Stage executes a Workflow — also namedbuild_for_ui_testing— that runs theandroid-build-for-ui-testingStep to build APKs for use in testing, and runs thedeploy-to-bitrise-ioStep to save those APKs for use in the later Stages. Performing this Stage separately from the actual testing allows for each test Stage to use these pre-built APKs rather than having to rebuild them for each test Stage. -
run_ui_tests_on_devices: This Stage executes three UI test Workflows in parallel —ui_test_on_phone,ui_test_on_tablet,ui_test_on_foldable— which use theandroid-instrumented-testStep to run the UI tests on the APKs built in the previous Workflow on each specific device type.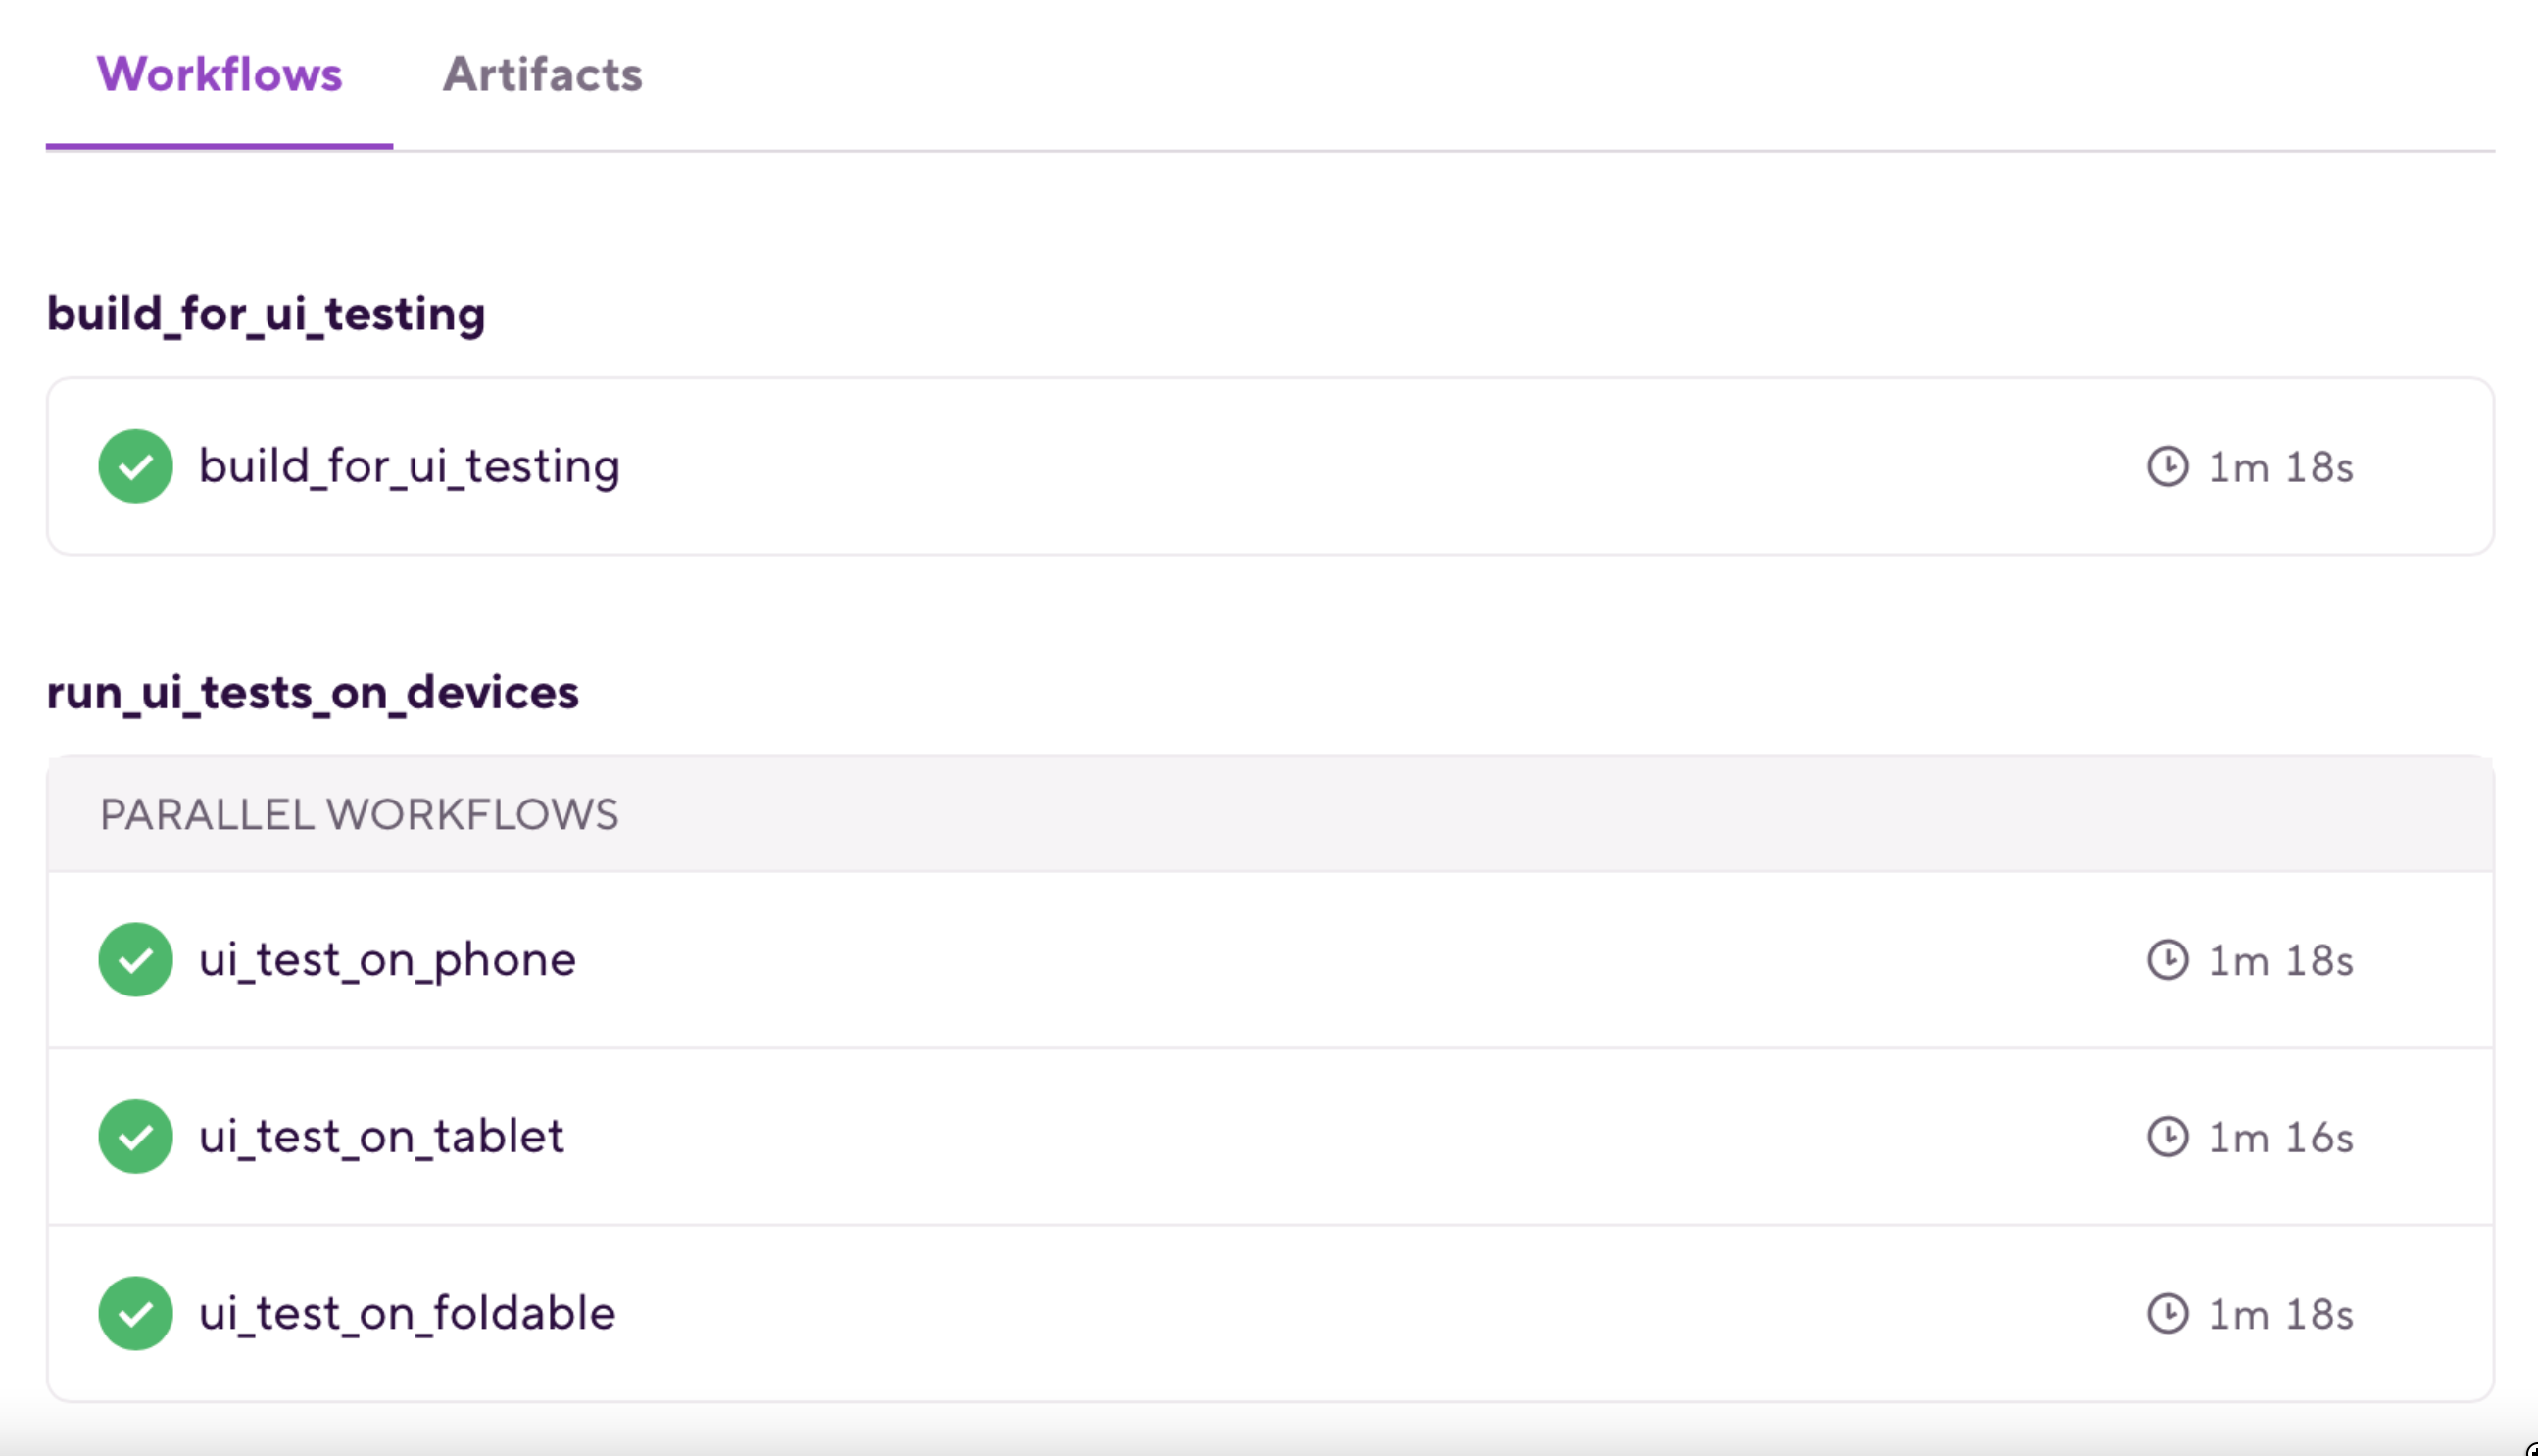
Instructions
To test this configuration in a new Bitrise example project, do the following:
-
Visit the Create New App page to create a new App.
-
When prompted to select a git repository, choose Other/Manual and paste the sample project repository URL (
https://github.com/bitrise-io/Bitrise-Android-Modules-Sample.git) in the Git repository (clone) URL field. -
Confirm that this is a public repository in the resulting pop-up.
-
Select the
mainbranch to scan. -
Wait for the project scanner to complete.
-
Enter
appas the specified module. -
Enter
debugas the specified variant. -
Continue through the prompts as normal — no changes are needed.
-
Open the new Bitrise project’s Workflow Editor.
-
Go to the bitrise.yml tab, and replace the existing yaml contents with the contents of the example
bitrise.yml. -
Click the button, and select the
ui_test_on_multiple_devicesoption in the dropdown menu at the bottom of the popup.
bitrise.yml
(Android) Running unit and UI tests in parallel
Description
Run unit tests and UI tests in parallel utilizing Pipelines.
This Pipeline contains one Stage — stage_unit_and_ui_test — that executes two Workflows in parallel:
-
unit_tests: This Workflow simply runs the unit tests of the given module and variant using theandroid-unit-testStep. -
ui_tests: This Workflow builds the given module and variant using theandroid-build-for-ui-testingStep, spins up an emulator using theavd-managerStep, waits for the emulator to boot using thewait-for-android-emulatorStep, and runs the UI tests using theandroid-instrumented-testStep.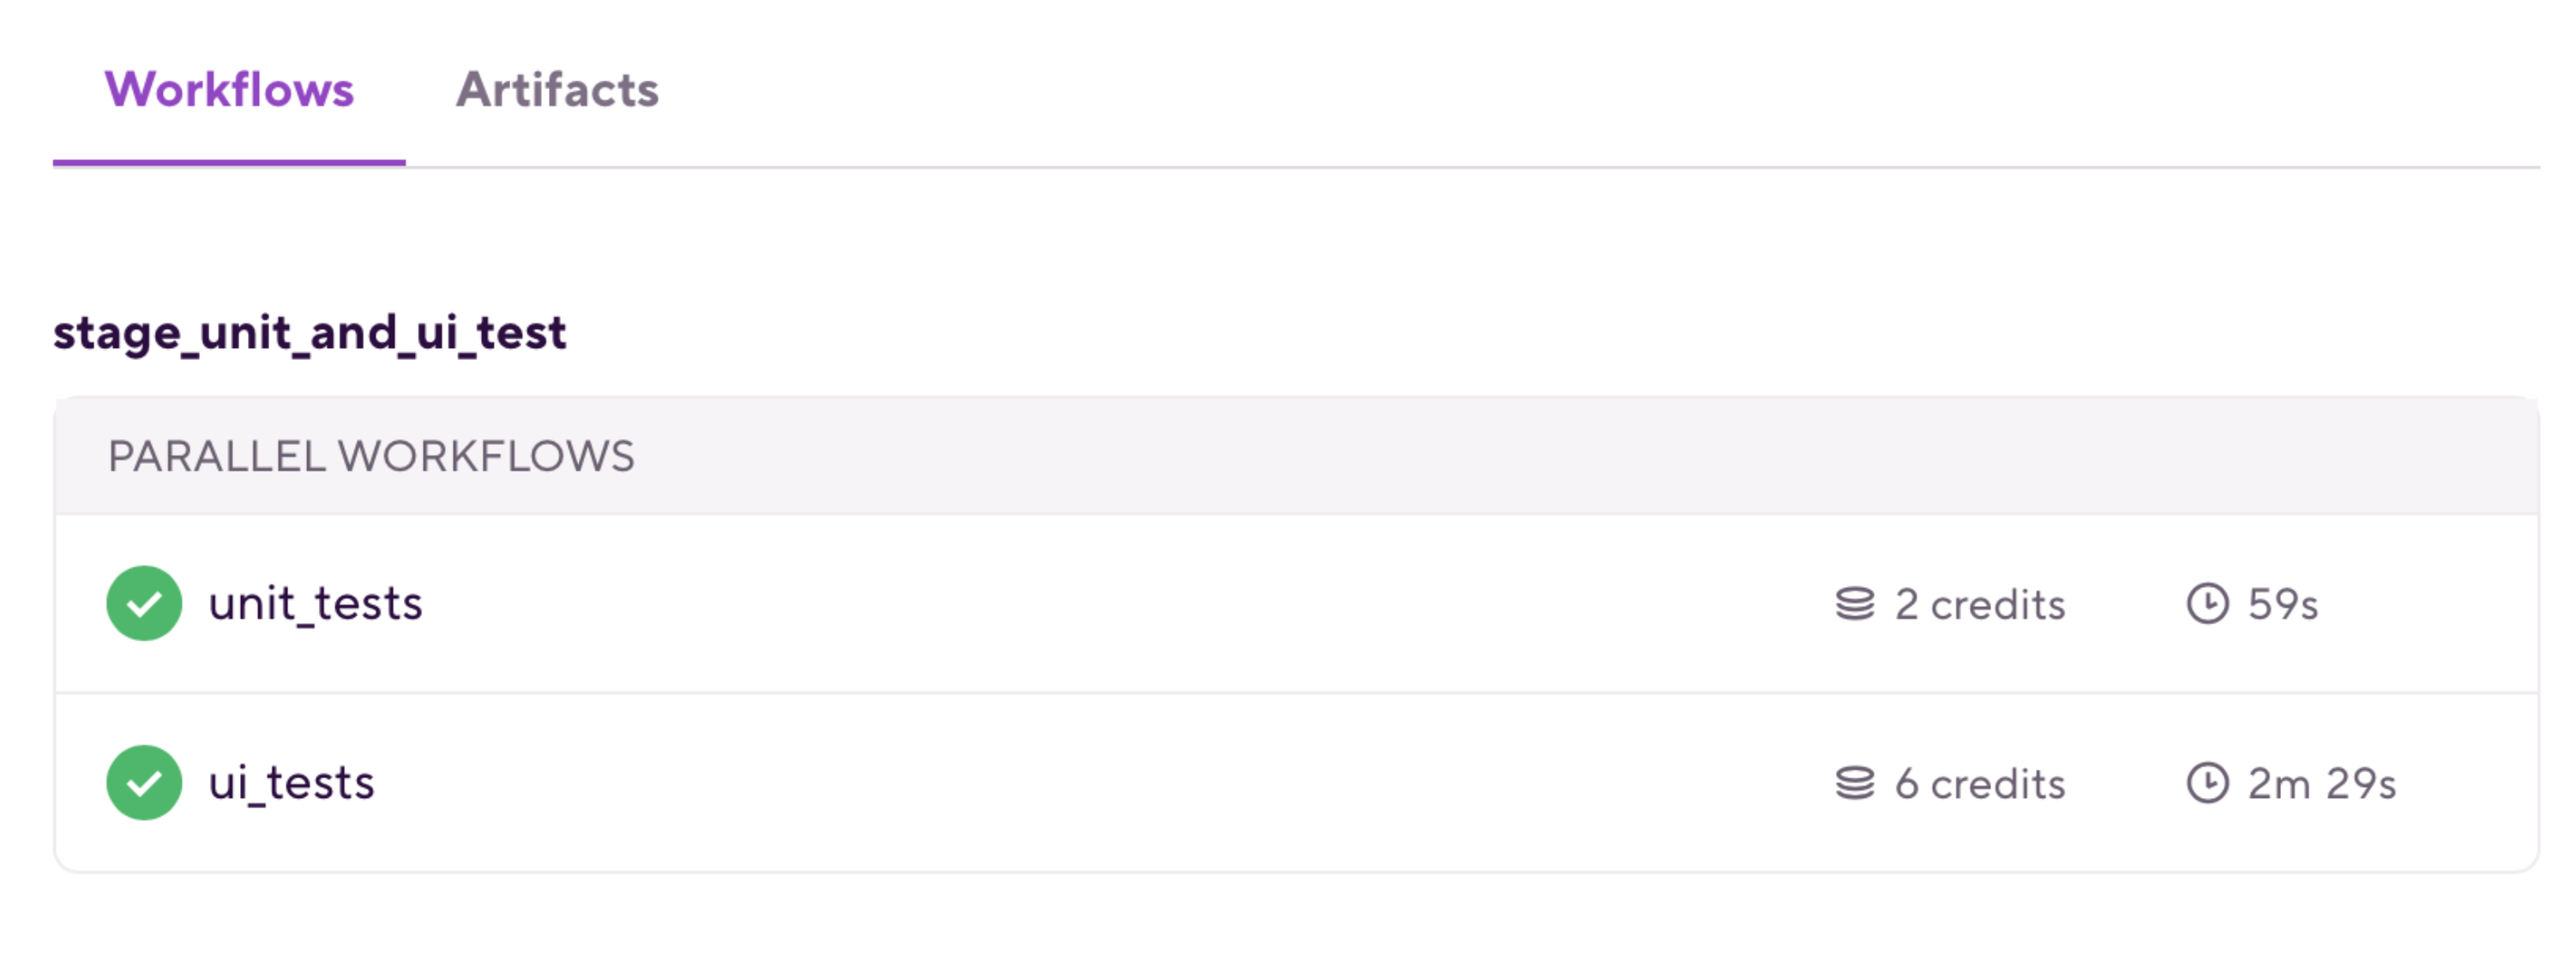
Instructions
-
Visit the Create New App page to create a new App.
-
When prompted to select a git repository, choose Other/Manual and paste the sample project repository URL (
https://github.com/bitrise-io/Bitrise-Android-Modules-Sample.git) in the Git repository (clone) URL field. -
Confirm that this is a public repository in the resulting pop-up.
-
Select the
mainbranch to scan. -
Wait for the project scanner to complete.
-
Enter
appas the specified module. -
Enter
debugas the specified variant. -
Continue through the prompts as normal — no changes are needed.
-
Open the new Bitrise project’s Workflow Editor.
-
Go to the bitrise.yml tab, and replace the existing yaml contents with the contents of the example
bitrise.yml. -
Click the button, and select the
pipeline_unit_and_ui_testoption in the dropdown menu at the bottom of the popup.
bitrise.yml
GitHub link: https://github.com/bitrise-io/workflow-recipes/blob/main/recipes/android-parallel-unit-and-ui-tests.md#bitriseyml
(Android) Unit test sharding by module
Description
Run the unit tests of a modularized app in parallel Workflows utilizing Pipelines.
This Pipeline contains one Stage — stage_unit_test — that executes two Workflows in parallel:
-
unit_test_app: This Workflow runs the unit tests of the app module using theandroid-unit-testStep. -
unit_test_library: This Workflow runs the unit tests of thelib-examplemodule using theandroid-unit-testStep.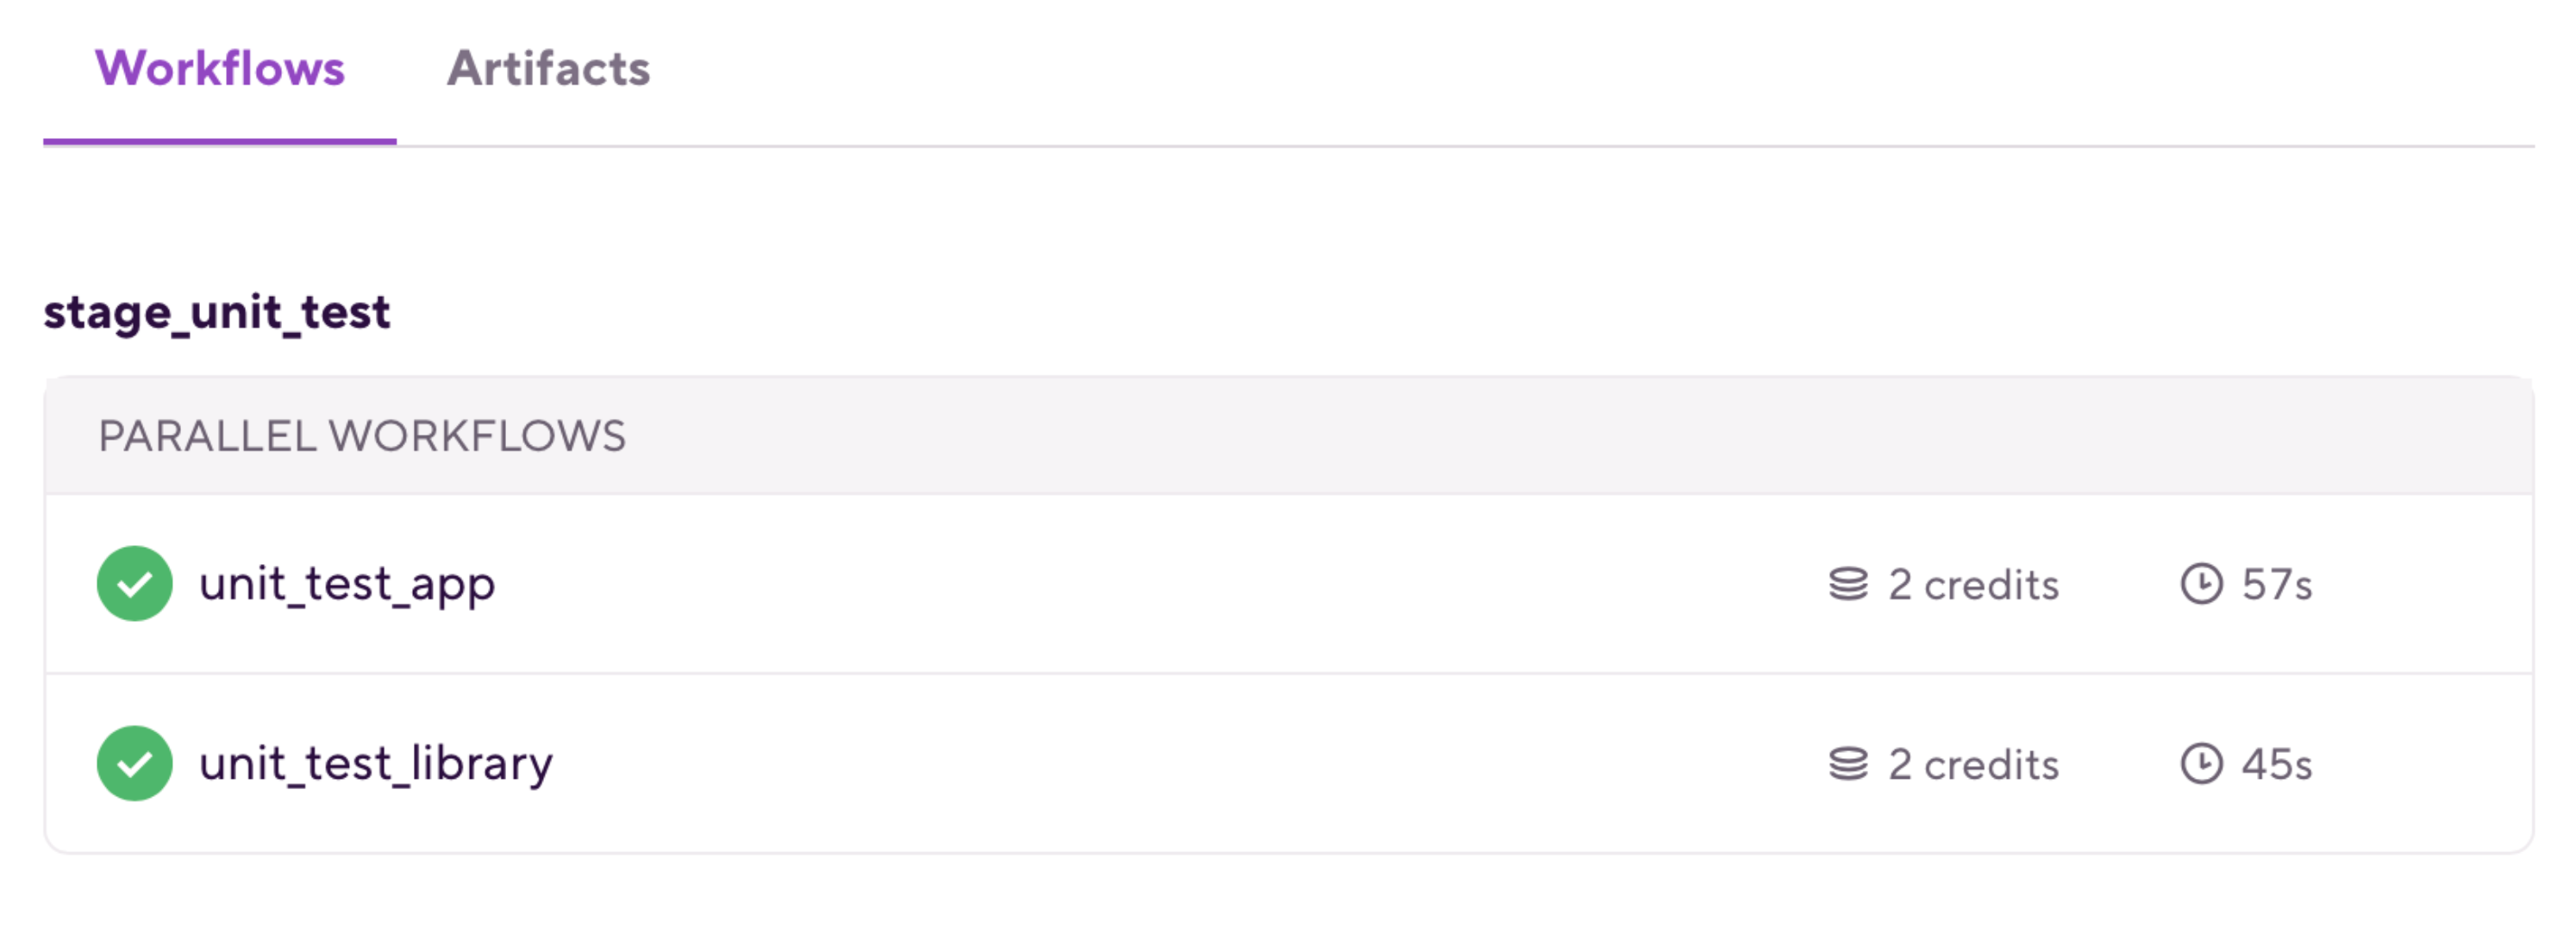
Instructions
-
Visit the Create New App page to create a new App.
-
When prompted to select a git repository, choose Other/Manual and paste the sample project repository URL (
https://github.com/bitrise-io/Bitrise-Android-Modules-Sample.git) in the Git repository (clone) URL field. -
Confirm that this is a public repository in the resulting pop-up.
-
Select the
mainbranch to scan. -
Wait for the project scanner to complete.
-
Enter
appas the specified module. -
Enter
debugas the specified variant. -
Continue through the prompts as normal — no changes are needed.
-
Open the new Bitrise project’s Workflow Editor.
-
Go to the bitrise.yml tab, and replace the existing yaml contents with the contents of the example
bitrise.yml. -
Click the button, and select the
pipeline_unit_testoption in the dropdown menu at the bottom of the popup.