AI build fixer
If you have a failed build, the AI build fixer corrects it right on the build’s details page without you having to switch to other tools and processes. The AI build fixer executes the suggested code changes and pushes a PR to your GitHub repository. You can check the changes through a link to the repo. Based on your configured build triggers, Bitrise kicks off a new CI build to validate the AI changes. This means less fragmented work and quicker debugging.
Note that every run attempt of the AI build fixer costs two AI credits.
Configuring the AI build fixerClick to copy link
To run the AI build fixer, you need to:
- Turn on AI build summary. The AI build fixer builds on the outputs and suggestions of the build summary.
- Enable the AI build fixer on the Project settings page.
- Add your own trusted domains to the build fixer configuration.
To do these:
-
From your workspace's Dashboard, click Settings on the left.
-
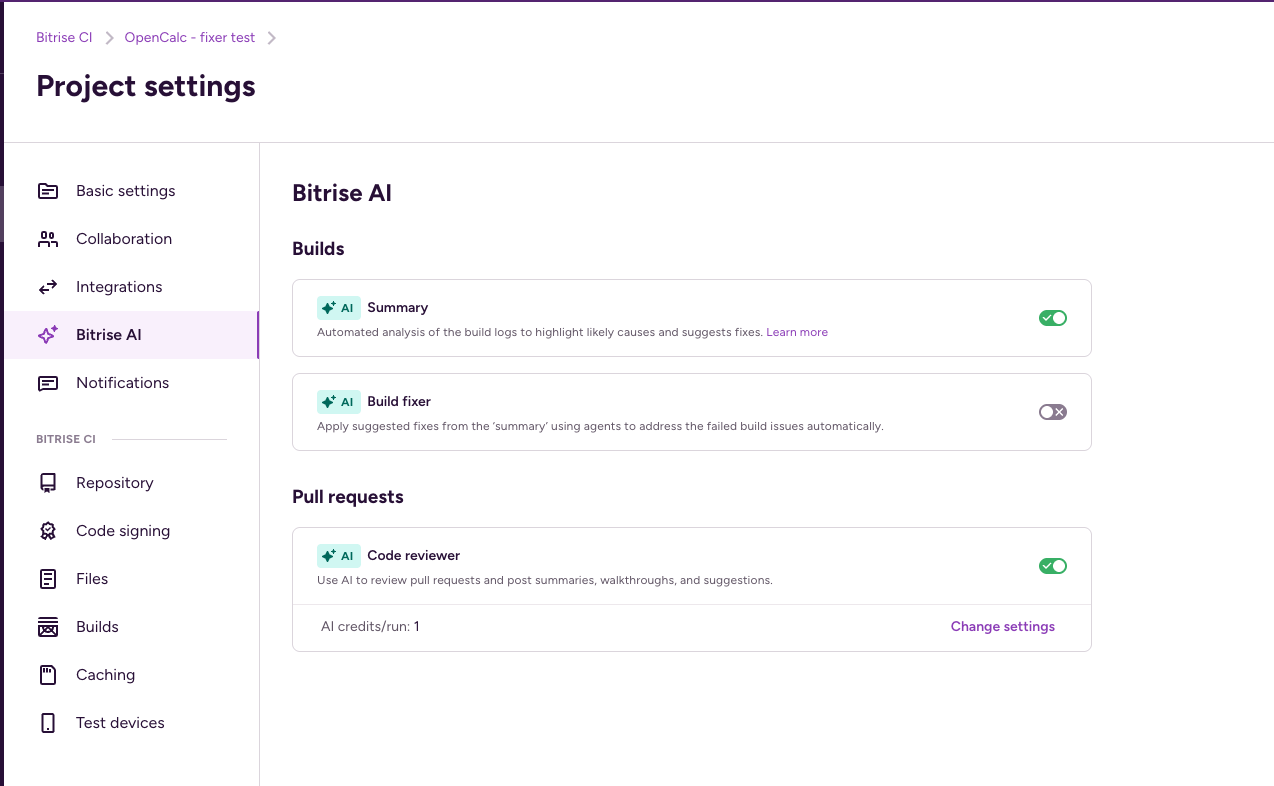
On the Project settings page of your project, select Bitrise AI.
-
Switch the toggle to enable AI build summary.
Without enabling it, you won't be able to use the AI build fixer since it relies on the findings of the AI Build summary.
-
Switch the toggle next to the AI Build fixer.
-
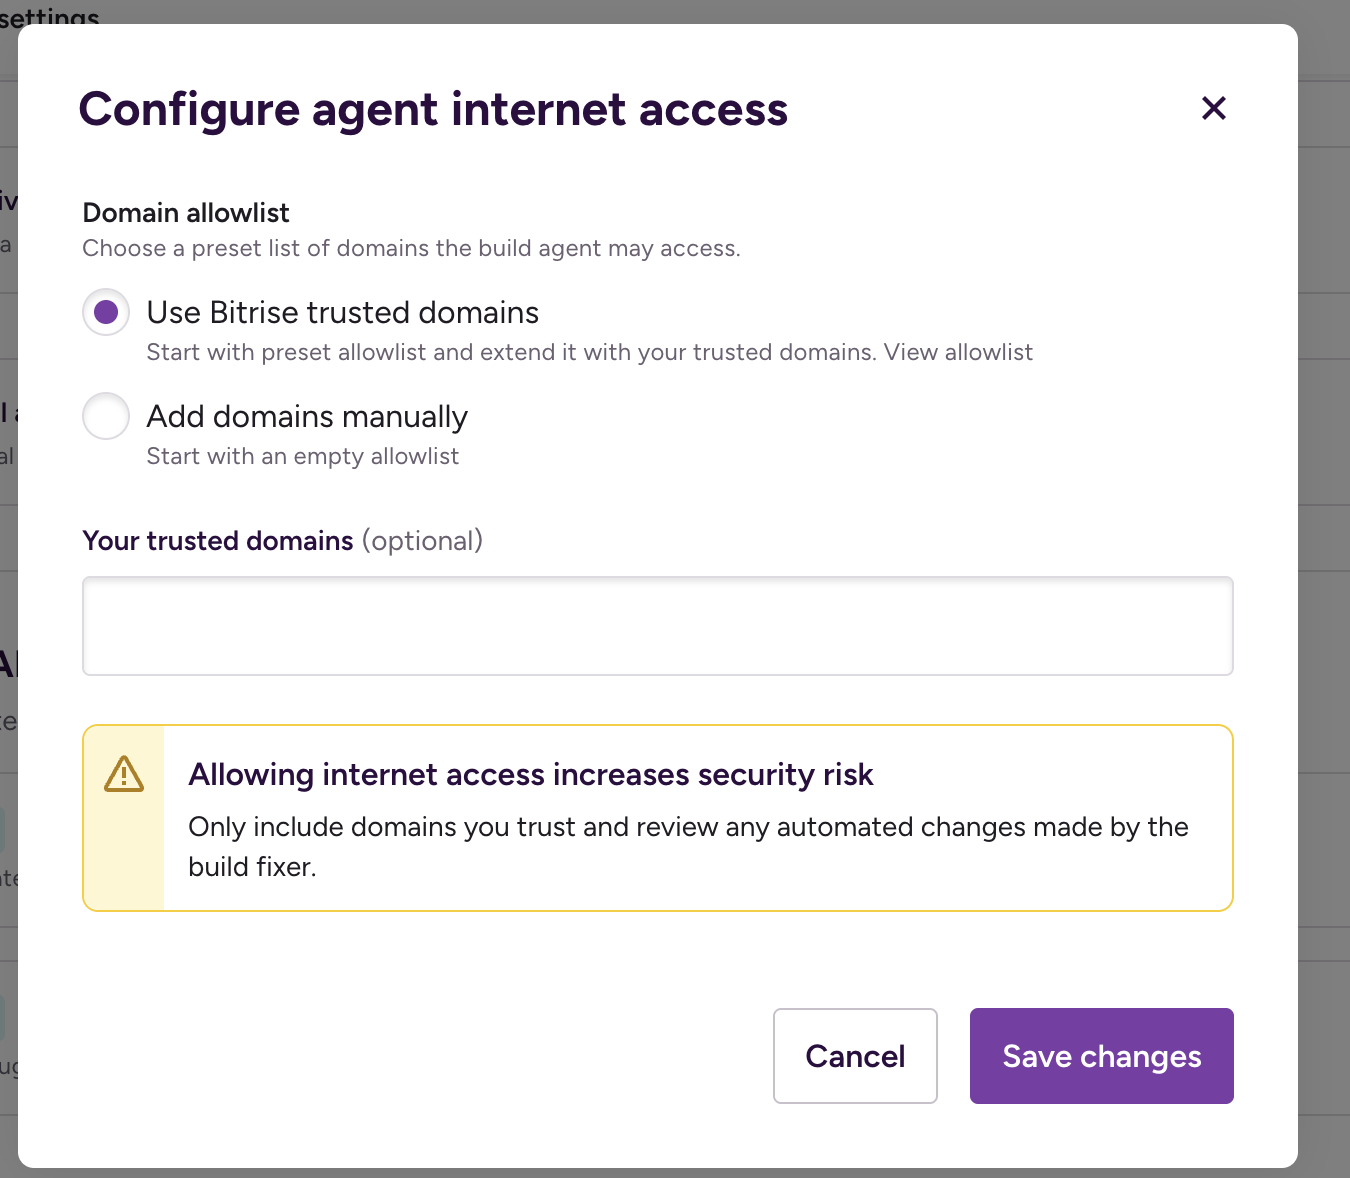
To set the domains Bitrise AI build fixer can use, select your preferred option in the Configure agent internet access dialogue which appears after you enabled the toggle. Here are the two options to choose from:
-
Use Bitrise trusted domains: You can start with a preset list of domains and can add more if you wish. Here is the list of preset domains:
alpinelinux.organaconda.comapache.orgapt.llvm.orgarchlinux.orgazure.combitbucket.orgbower.iocentos.orgcocoapods.orgcontinuum.iocpan.orgcrates.iodebian.orgdocker.comdocker.iodot.netdotnet.microsoft.comeclipse.orgfedoraproject.orggcr.ioghcr.iogithub.comgithubusercontent.comgitlab.comgolang.orggoogle.comgoproxy.iogradle.orghashicorp.comhaskell.orghex.pmjava.comjava.netjcenter.bintray.comjson-schema.orgjson.schemastore.orgk8s.iolaunchpad.netmaven.orgmcr.microsoft.commetacpan.orgmicrosoft.comnodejs.orgnpmjs.comnpmjs.orgnuget.orgoracle.compackagecloud.iopackages.microsoft.compackagist.orgpkg.go.devppa.launchpad.netpub.devpypa.iopypi.orgpypi.python.orgpythonhosted.orgquay.ioruby-lang.orgrubyforge.orgrubygems.orgrubyonrails.orgrustup.rsrvm.iosourceforge.netspring.ioswift.orgubuntu.comvisualstudio.comyarnpkg.com -
Add domains manually: You can add the domains (for example, a hosted git provider or a dependency store) you want our build fixer to access. Note that you must add your git provider here, otherwise our Build agent won’t be able to access it.
-
Once you enabled the Bitrise AI, the Bitrise Build fixer and set the domains, you can use the AI build fixer as well.
The Bitrise AI build fixer does not store any secrets or credentials while fixing your code or pushing the PR to your repo. For each fix attempt, it uses a one time only virtual machine which gets destroyed at the end of the run.
Running the AI build fixerClick to copy link
Now you are all set to run the AI build fixer on your project:
-
Go to your projects Builds page and select a failed build.
-
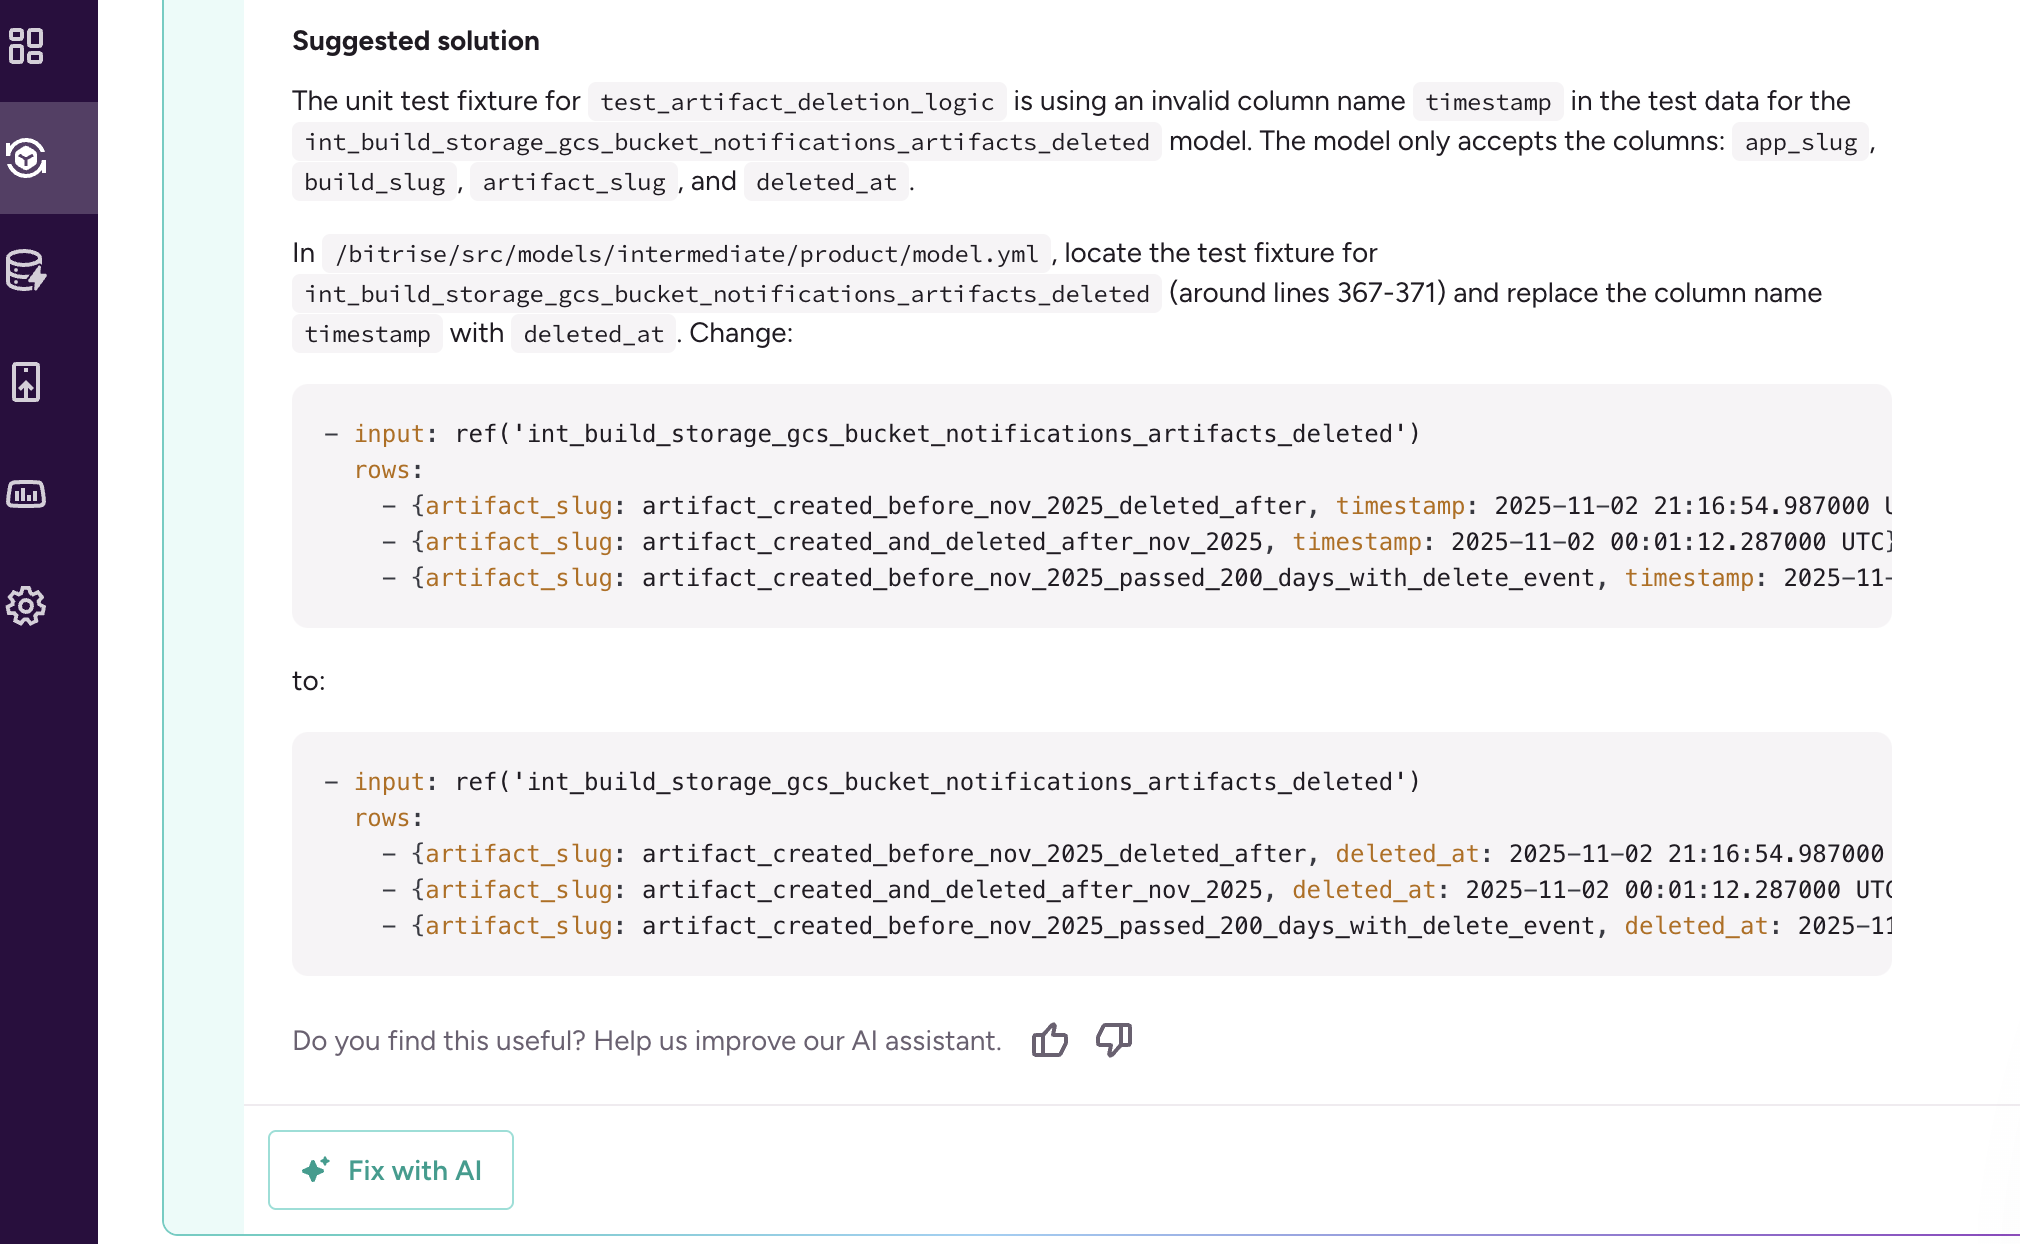
On the Build log tab go to Bitrise AI and click Show details.
-
UnderFailure reasons click Fix with AI.
-
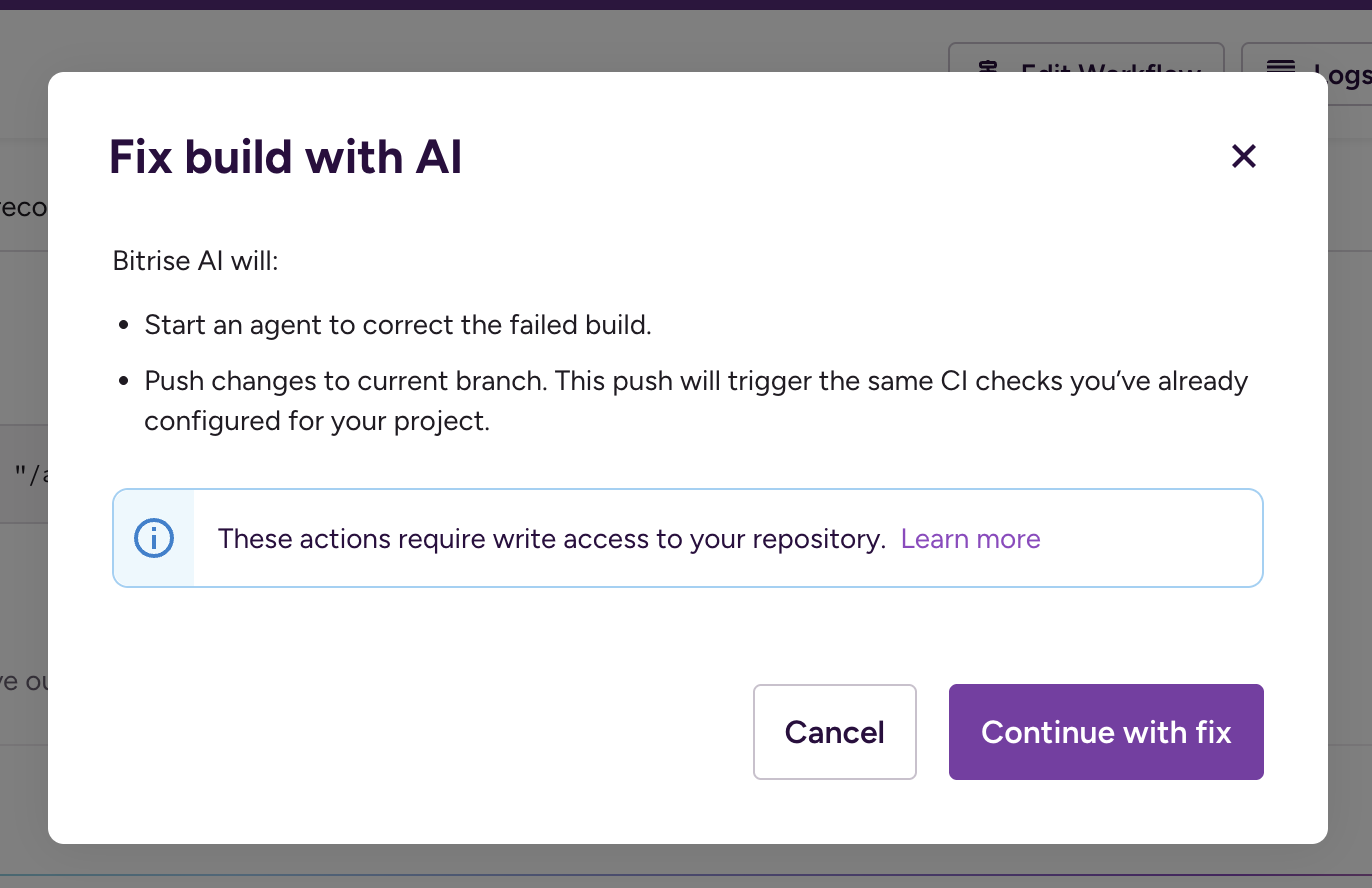
Click Continue with fixif you want Bitrise AI to start a build fixer agent and push changes to your current branch.
-
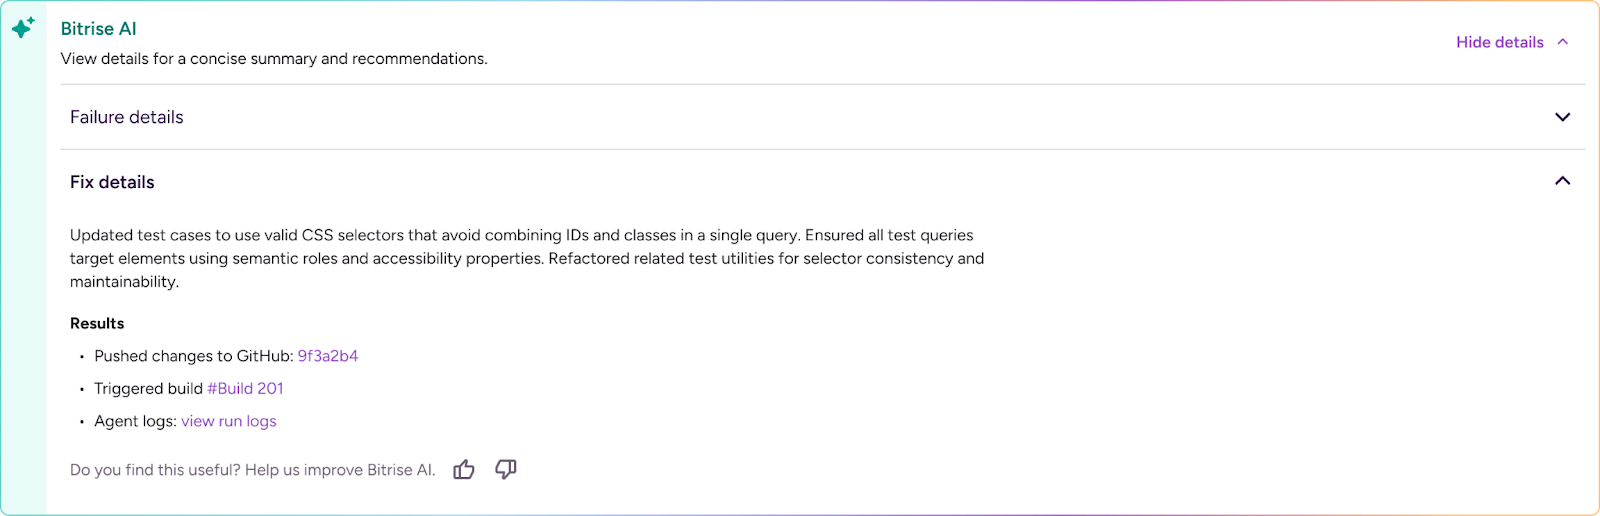
Once the AI build fixer has run, it produces links to theTriggered build, Pushed changes to GitHuband to the Agent logs for you to check changes and approve. You are ready to merge the PR into your project's repository.